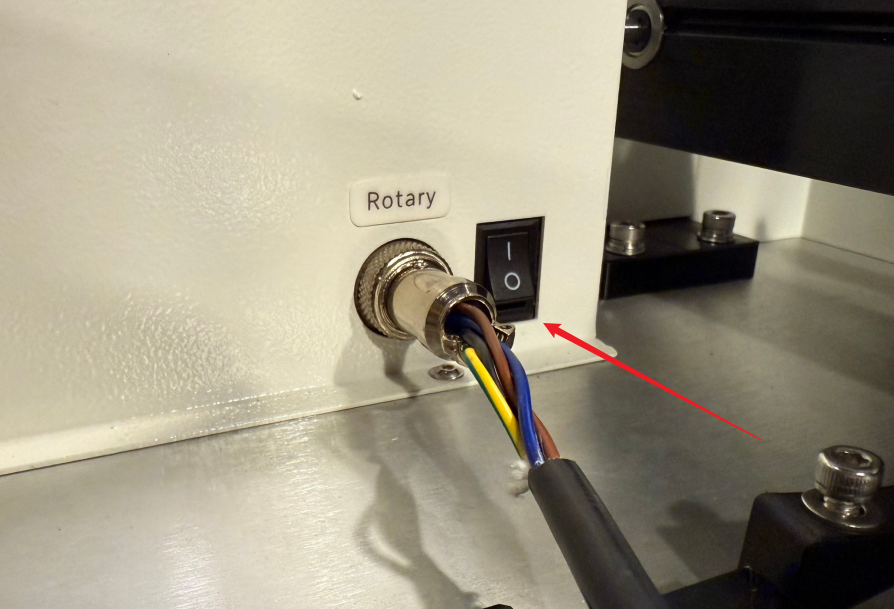
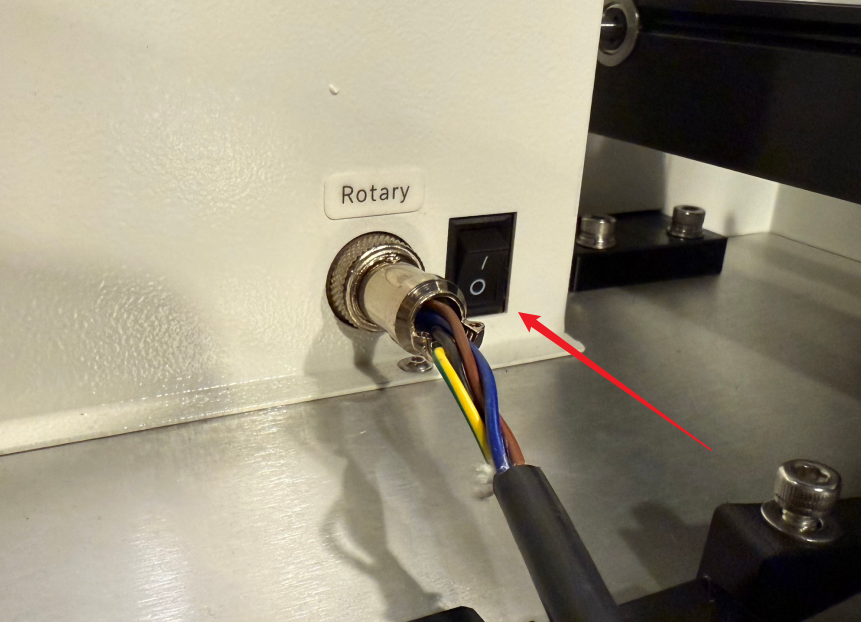
After connecting the Auto Feeder to the machine's rotary axis port, turn ON the rotary axis switch located next to the port.
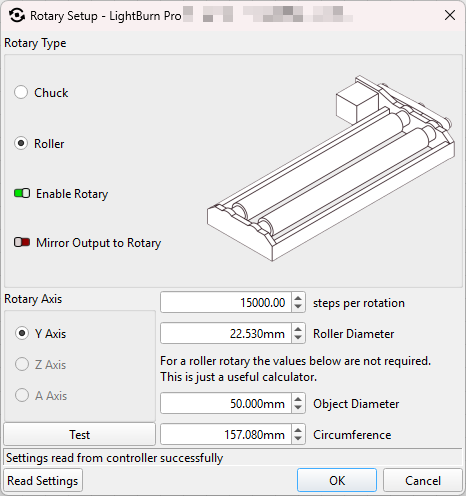
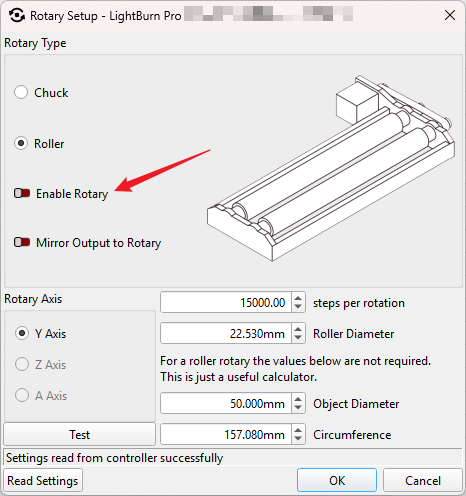
In LightBurn, open the Rotary Setup window and configure the following settings:
Rotary Type:Select Roller, and check the box to Enable Rotary.
Rotary Axis:The default selection is the Y-Axis (some machines may use the A-Axis).
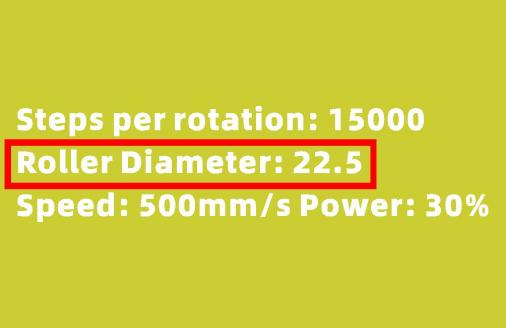
Parameters:Input the numerical values found on the aluminum card that came with the unit into the parameter fields on the right side of the pop-up window.
Once configured, the Auto Feeder is ready to use.
If you encounter a length limitation when processing material with the Auto Feeder (e.g., restricted to 500 mm):
In LightBurn, open the Rotary Setup window and uncheck the Enable Rotary box.
Turn OFF the rotary axis switch on the machine and disconnect the Auto Feeder's cable.
Finally, click the Reset icon on the machine's control panel to restore the machine to its normal processing state.
Caution:
If the shutdown sequence is incorrect or if you turn off the rotary axis switch directly (skipping the LightBurn disable step), it may cause homing errors or abnormal Y-axis movement.