¶ Dual-Light Source Installation Tutorial
This guide explains how to install and configure dual light sources on the One Laser Hydra series. It covers required preparations, RDWorks factory settings, verification steps, and how to use the dual-laser configuration in LightBurn.
Note: When configuring dual light sources in the software, make sure that the two lasers are of different types.
If the two lasers are of the same type, the motherboard may mistakenly identify them as dual-tube mode, causing both lasers to start emitting light at the same time, thus causing potential safety hazards.
¶ Preparation
¶ Material preparation
- One Laser Hydra series machine ×1
- Computer ×1
- Lightburn or RDWorks
¶ Adjustment steps
¶ Setting up dual light sources
This step can only be completed using the customized version of RDWorks. LightBurn does not have this function and cannot complete the initial setup.
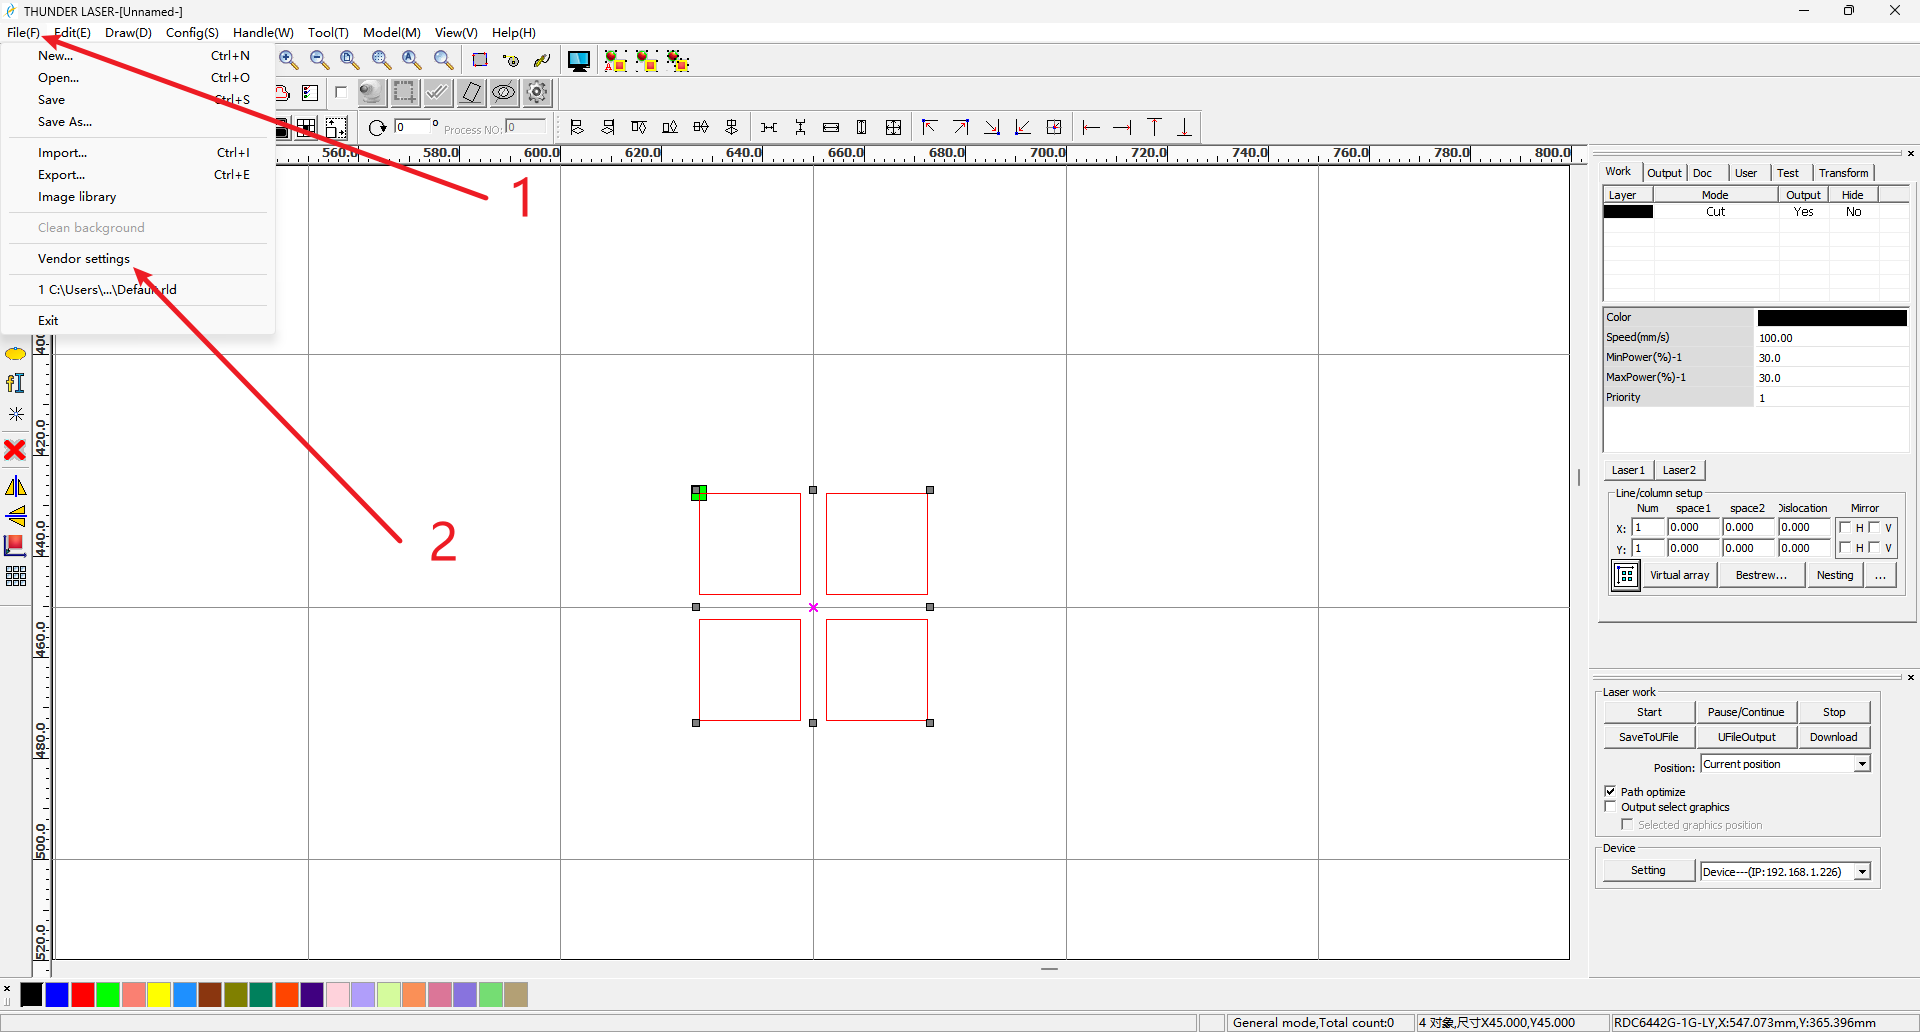
¶ After connecting the machine using RDWorks, click "File" in RDWorks and enter "Factory Settings".
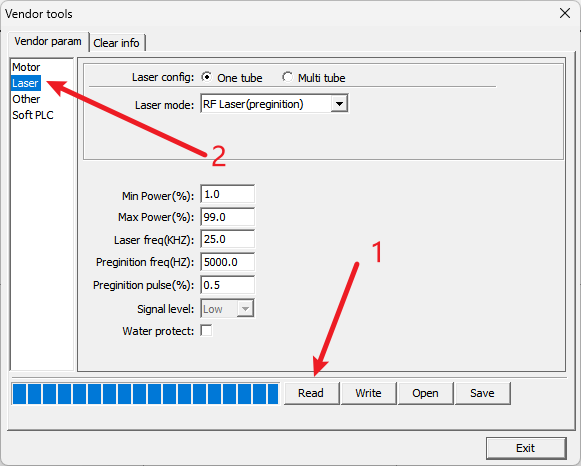
¶ After clicking "Read" button, click "Laser" tab.
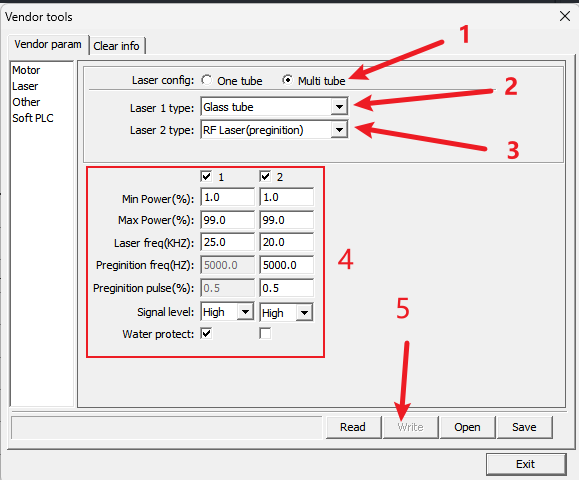
¶ Setup laser config:
For Laser config, select "Multi tube"
Select "Laser 1 type" to "Glass tube"
Select "Laser 2 type" to "RF Laser (preginition)"
Make sure other config is same to screenshot below (mark as step 4)
Click "Write" and wait until progress complete (mark as step 5)
¶ Click "Read Parameters" to confirm that the changes just made have taken effect.
Make sure that laser type 1 is glass tube and laser type 2 is RF tube CO2 (pre-combustion)!
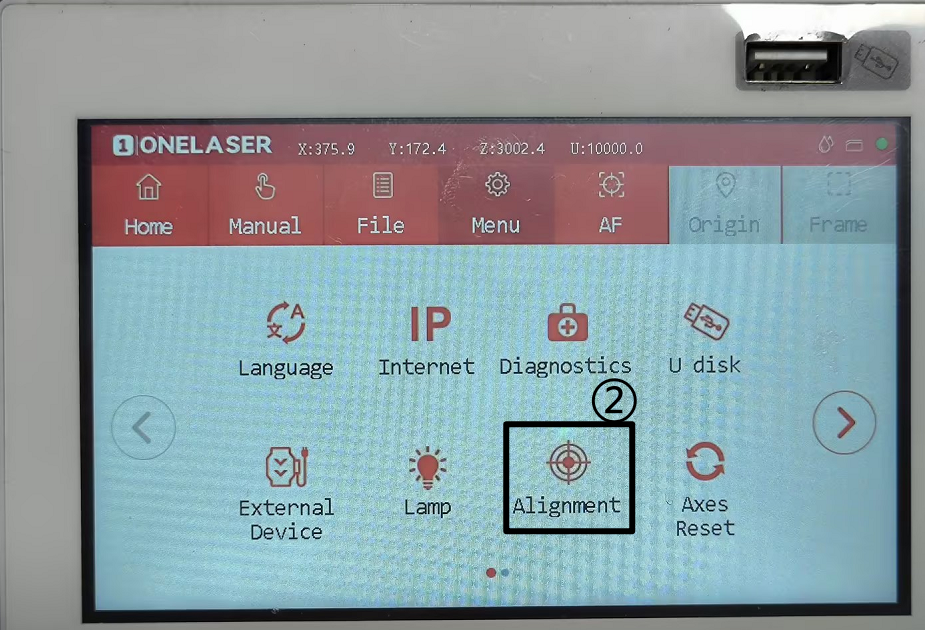
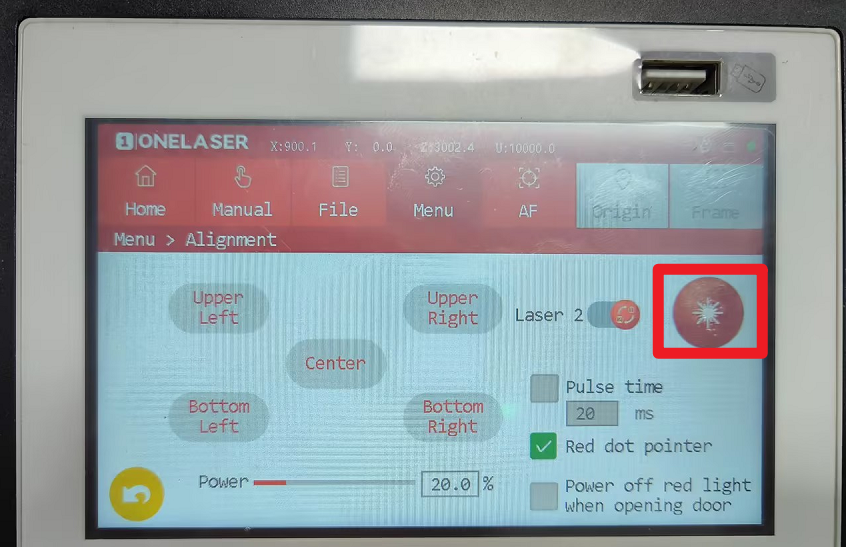
¶ Check whether the equipment switches the dual light source correctly
On the control panel:
Click Menu→Alignment→Set the burst power to 20%→Click to switch the light source, and the laser ① will switch to the laser ②

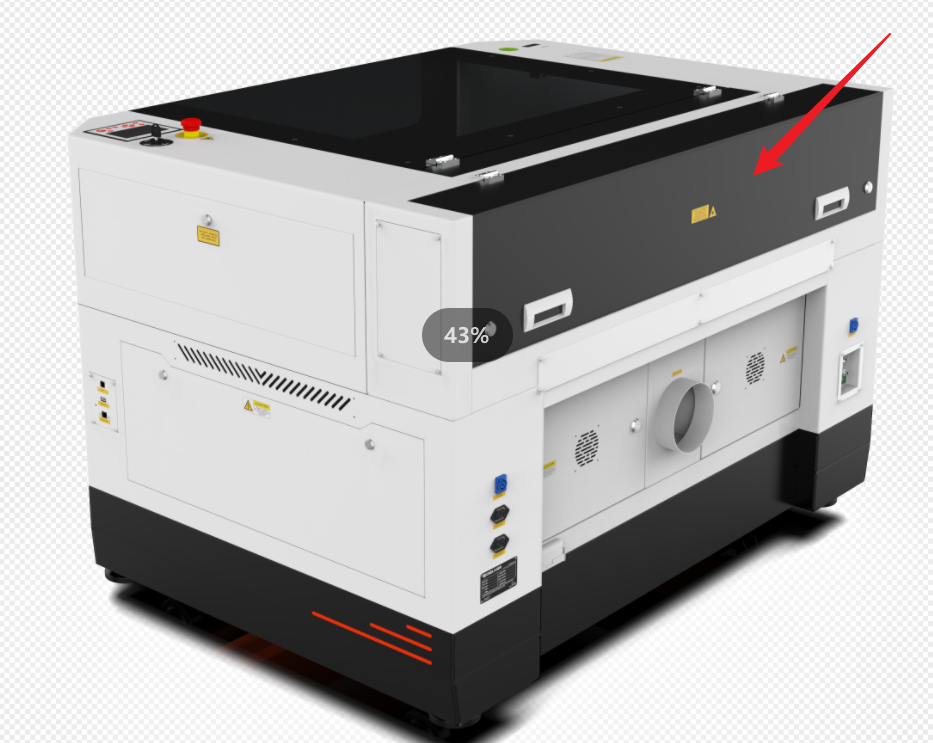
Open the back cover of the machine:
You can see the reflector will rise:
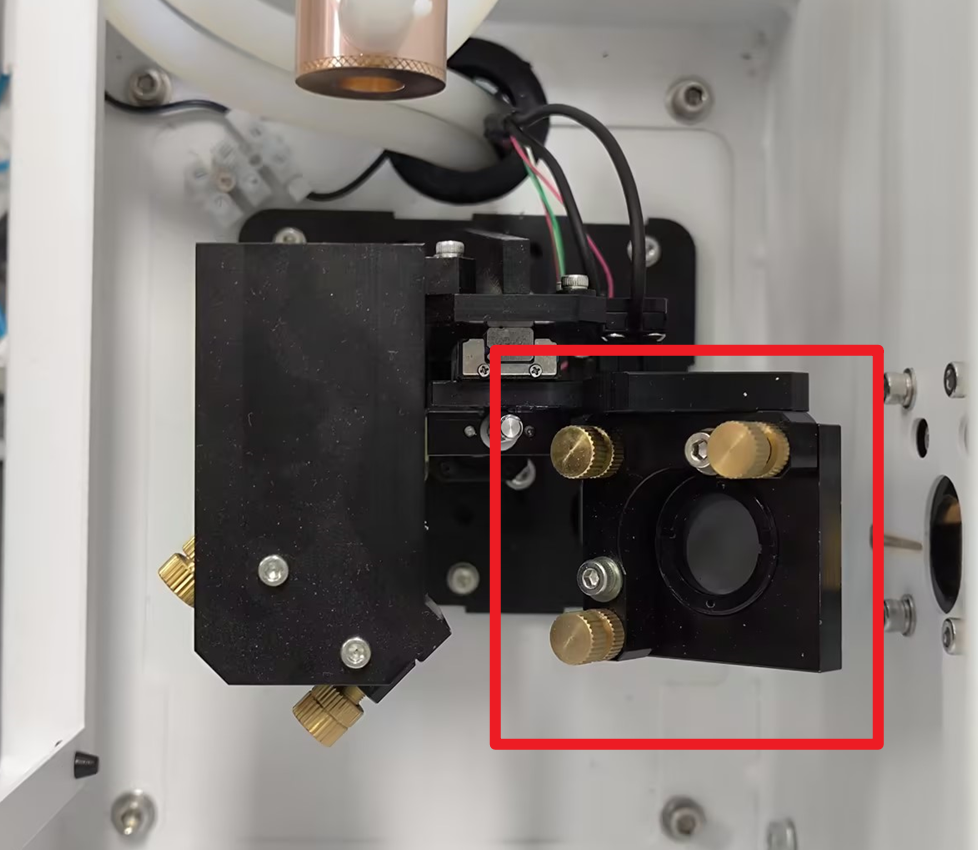
At this point, you can click the shot button on the panel to see if light is emitted:
¶ LightBurn software connection use
¶ Set the device type to Ruida and connect the machine
¶ Device Setup
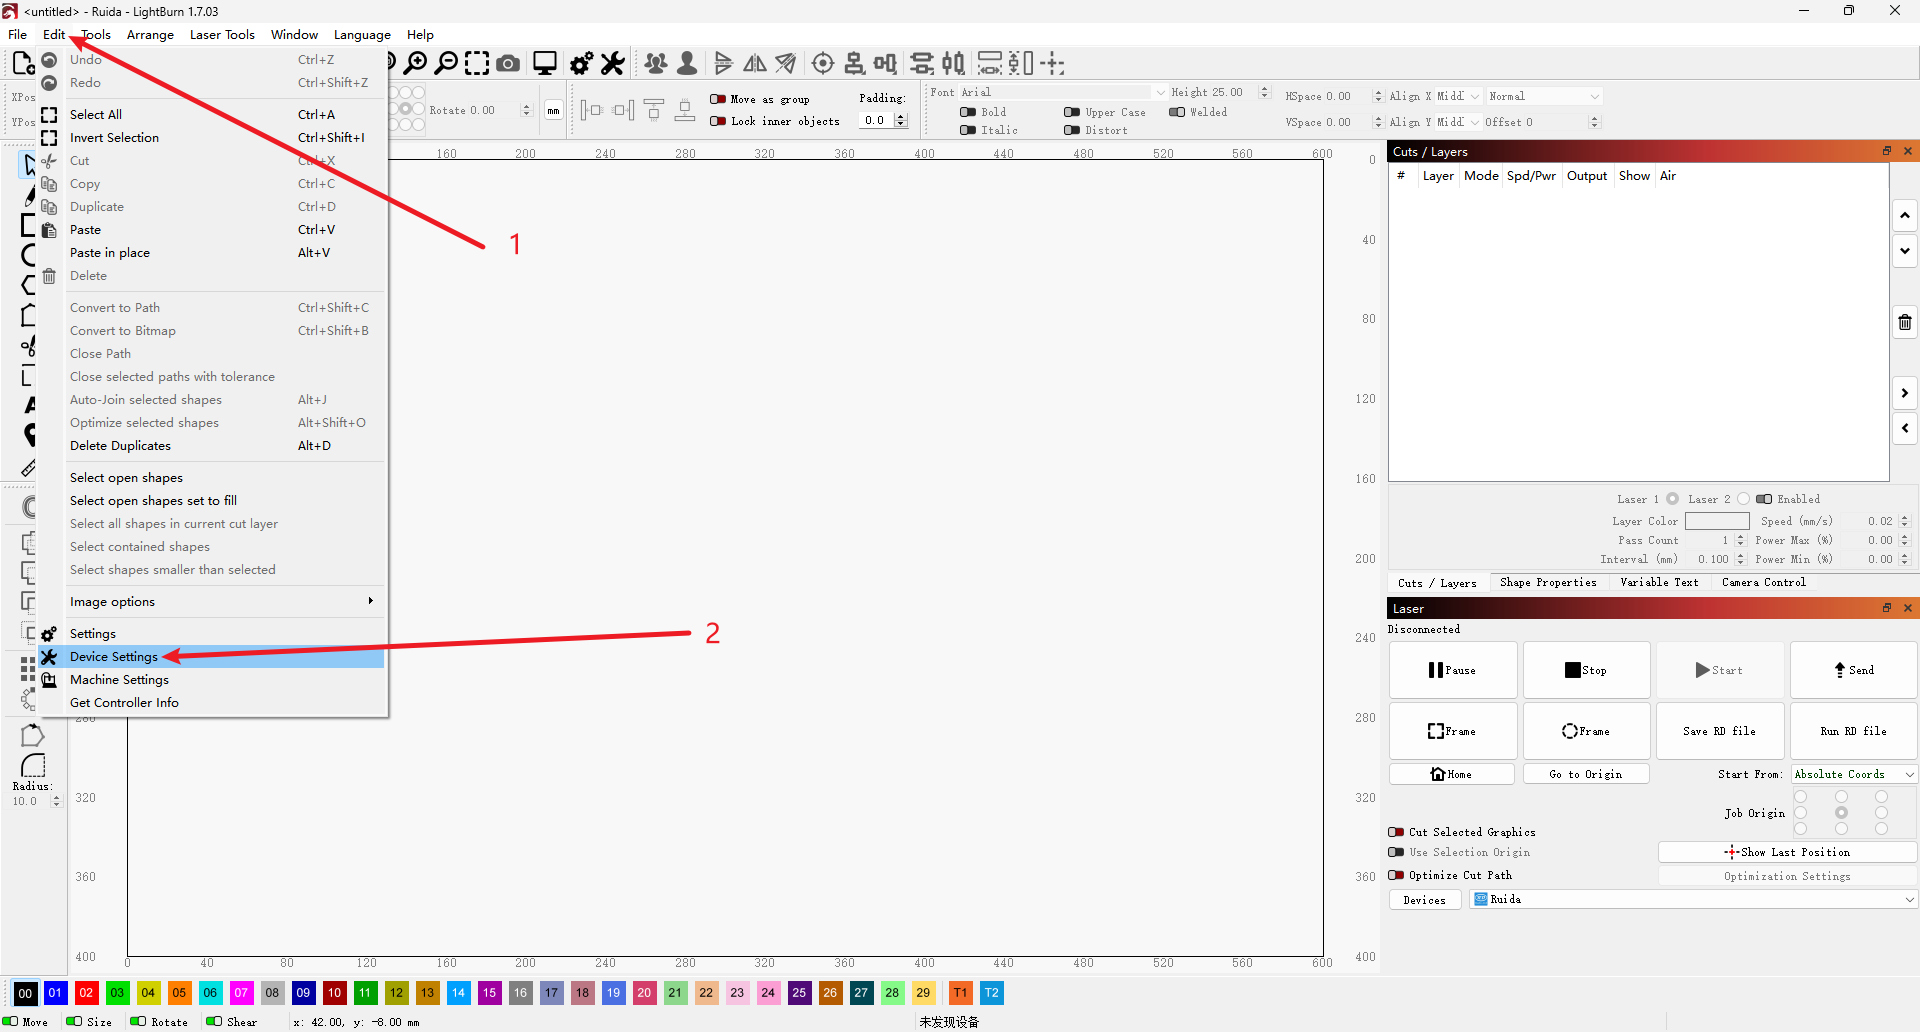
In the Edit menu, click Device Settings.
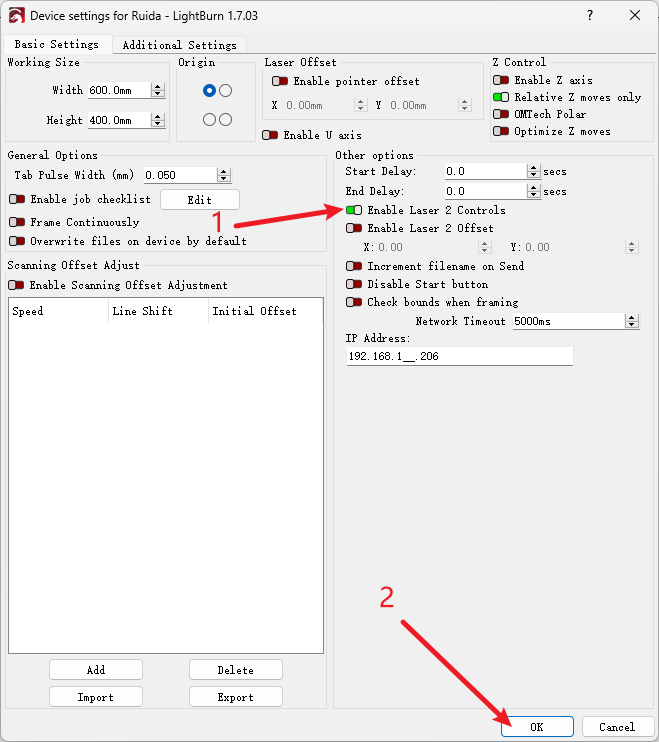
Turn on "Enable Laser 2 Controls", and make sure the "Enable Laser 2 Offset" switch is off and click OK
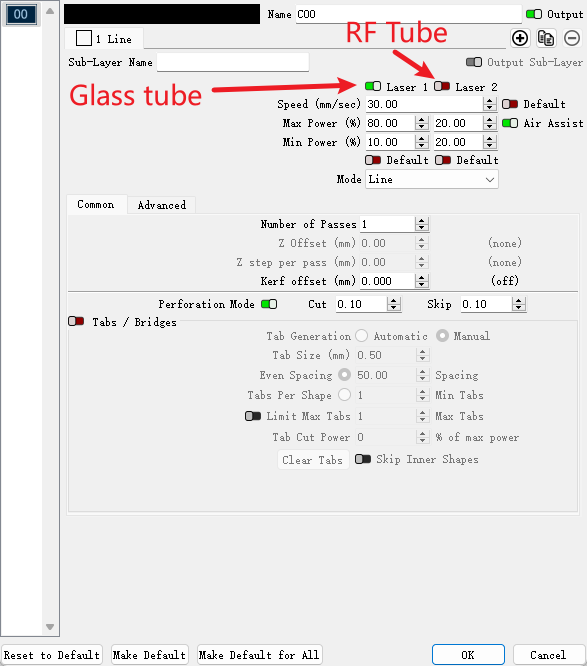
¶ Layer parameter settings
In the Layers menu:
"Laser 1" is a glass tube laser, and "Laser 2" is a radio frequency tube laser:
- Layers that require glass tube lasers: turn on "Laser 1"; turn off "Laser 2"
- Layers that require RF tube lasers: turn on "Laser 2"; turn off "Laser 1"
Important Reminder:
If these steps do not resolve the issue, please submit a support ticket. A technician will then be able to conduct a more in-depth diagnosis.