¶ Excessive Charring at Corners and Start Points - Hydra Series
This guide explains how to eliminate burn marks and charred spots that appear at corners and starting points during laser cutting. These defects are typically caused by heat buildup due to speed and power mismatches. By optimizing cutting parameters and airflow, you can achieve cleaner edges and more consistent results.
¶ Problem Description
During cutting, prominent burn marks or charred spots appear specifically at the starting point and the corners of the graphic.
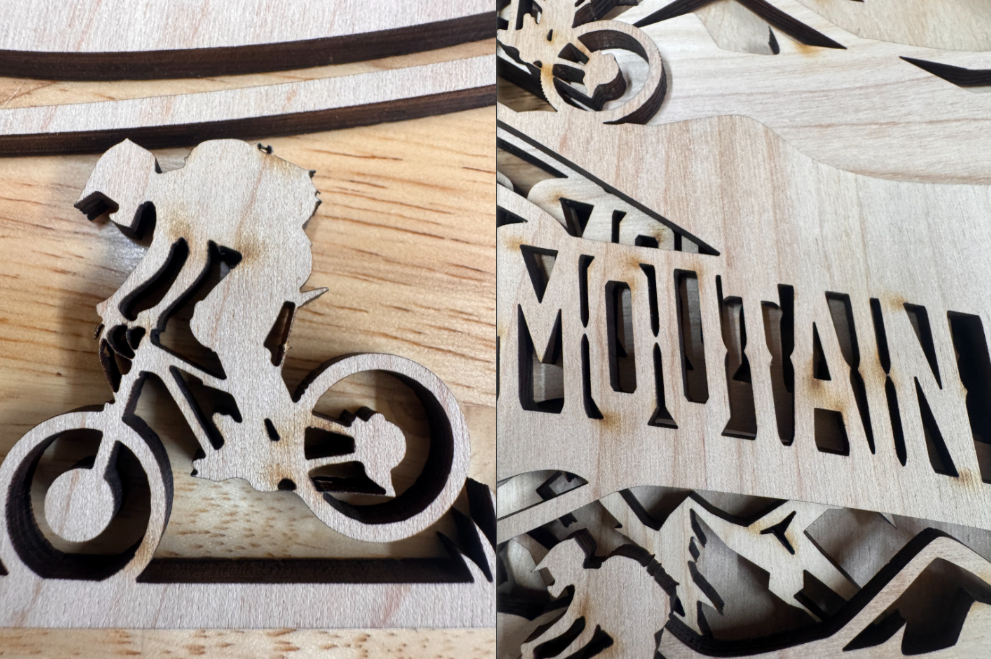
¶ Cause
If the laser maintains high power while moving slowly or dwelling in one spot, it causes localized heat accumulation and over-burning.
¶ Solution
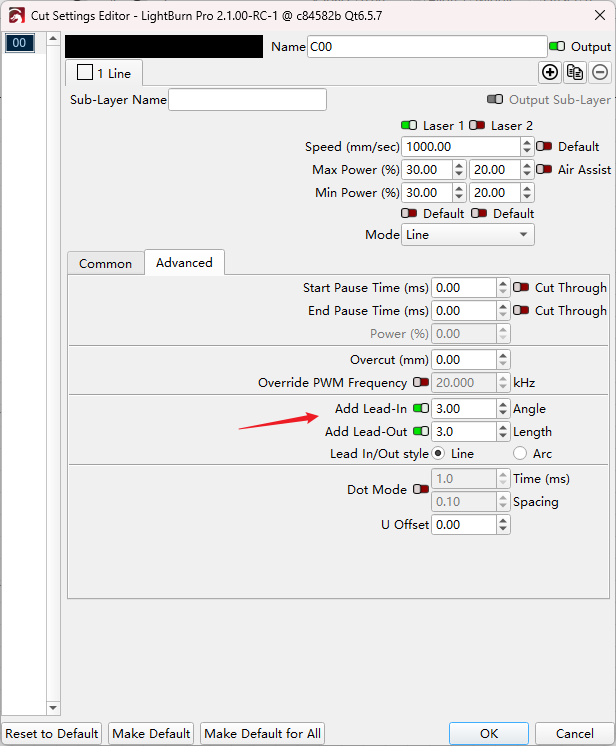
¶ Method 1. Add Lead-in and Lead-out Lines
When the laser first fires, there is an instantaneous power surge before the laser head reaches its programmed speed. This "low speed + high power" combination causes over-burning.
Please enable Lead-in and Lead-out in your layer settings. This allows the laser to start firing on a small sacrificial path outside your actual design, ensuring the head is at the correct speed by the time it reaches your cut line.
¶ Method 2. Reduce the Min Power Value
At sharp corners, the controller slows down the laser head. The Min Power setting determines the output during these slower moments.
Please lower the Min Power (%) value in your Cut Settings Layers. By reducing power as the machine slows down for a turn, you can achieve a much more uniform edge and prevent corner melting or charring.

¶ Method 3. Optimize Air Assist
Charring is often caused by the combustion of material vapors. If you have an Air Assist Kit installed, increase the airflow setting. Stronger airflow blows away smoke and rapidly cools the cutting area, significantly reducing burnt edges.
Important Reminder:
If these steps do not resolve the issue, please submit a support ticket on ZOHO: https://zohodesk.1laser.com/portal/en/newticket. A technician will then be able to conduct a more in-depth diagnosis and resolve your problem.