¶ Camera Replacement
This guide explains how to replace the camera module on the One Laser Hydra series. It outlines the required tools, safe removal procedures, installation steps, and important calibration requirements after replacement.
Replacing the camera properly ensures accurate positioning, alignment, and visual workflow performance.
¶ Required Tools
- 1.5mm Allen wrench
- 2mm Allen wrench
- New Camera Module
¶ Replacement Steps
¶ 1. Remove camera
Open the front door cover and loosen the fixing screws on both sides of the camera cover, but there is no need to remove the screws.
Remove the camera cover.
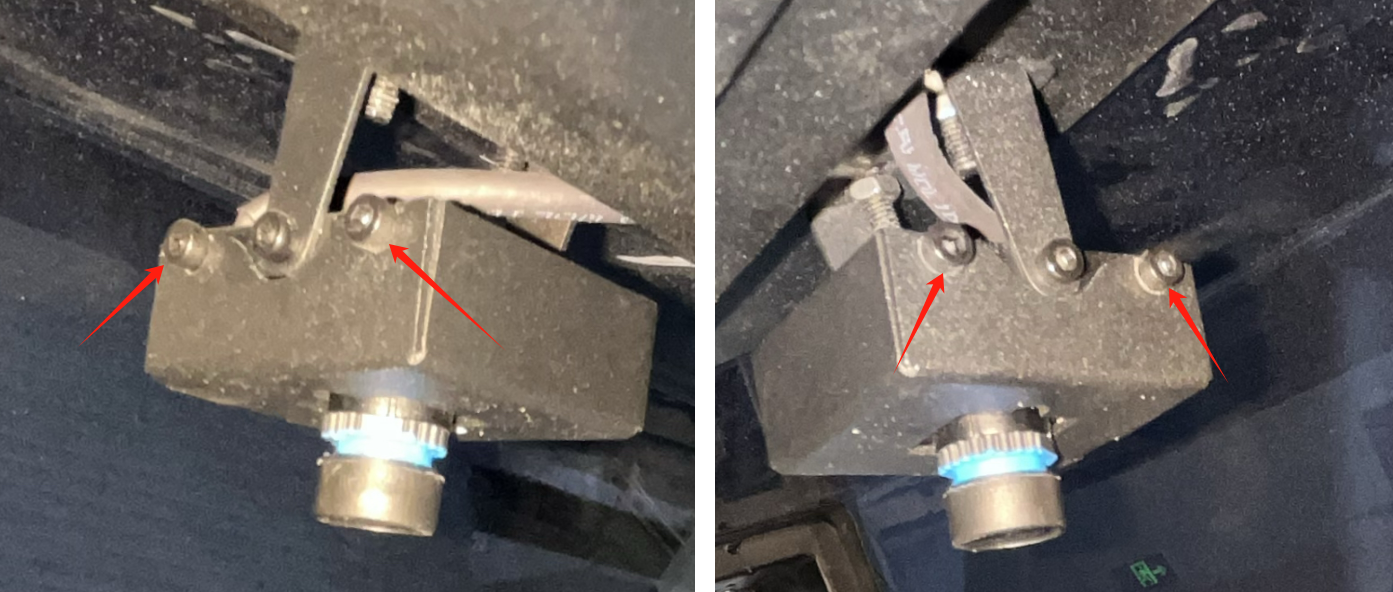
Unplug the signal cable of the camera, and then unscrew the 4 screws fixing the camera to take out the camera
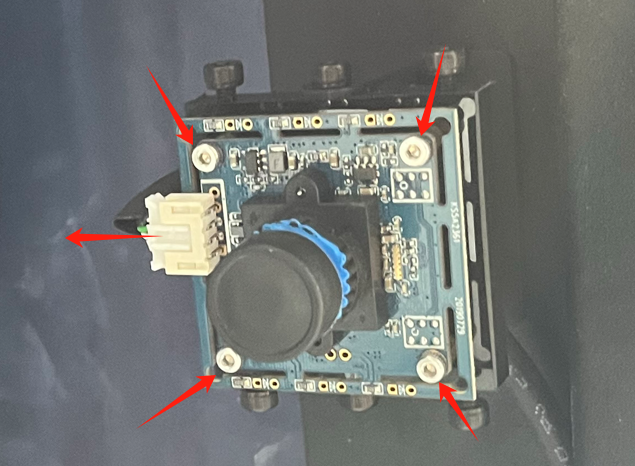
¶ 2. Installation of camera
Fix the brand new camera on the door cover and connect the signal cable
Reinstall the camera cover.
NOTE:
After completing the camera replacement, you will need to perform the camera calibration manually. The calibration file in the USB flash drive that came with the machine will no longer work.
Important Reminder:
If these steps do not resolve the issue, please submit a support ticket. A technician will then be able to conduct a more in-depth diagnosis.