¶ Hydra Series Maintenance Guide
This Hydra Maintenance Guide provides a complete cleaning and servicing checklist for Hydra laser machines. It covers optical component maintenance, hardware upkeep, cooling system care, and a recommended maintenance schedule to ensure stable laser performance, extended component lifespan, and consistent engraving and cutting quality.
¶ Optical Component Maintenance
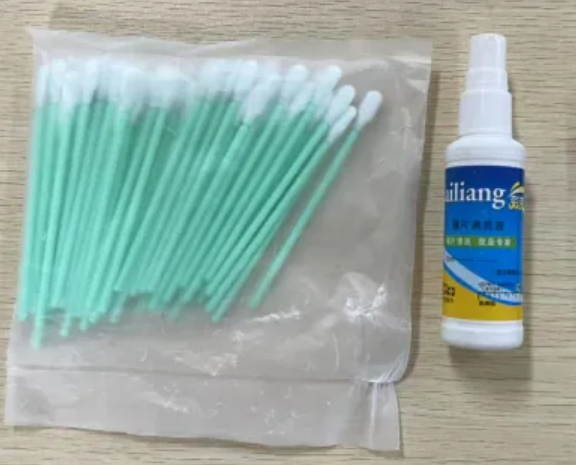
¶ Tools Required
• Lens cleaning solution
• Cotton swabs
• Door cover key
• Mirror disassembly tool
If the provided cleaning solution runs out, use anhydrous ethanol to clean the lenses. Do not use isopropyl alcohol to avoid damaging the mirror coating.
If cotton swabs are used up, use a soft lint-free cloth or high-quality cotton swabs.
¶ Maintenance Method
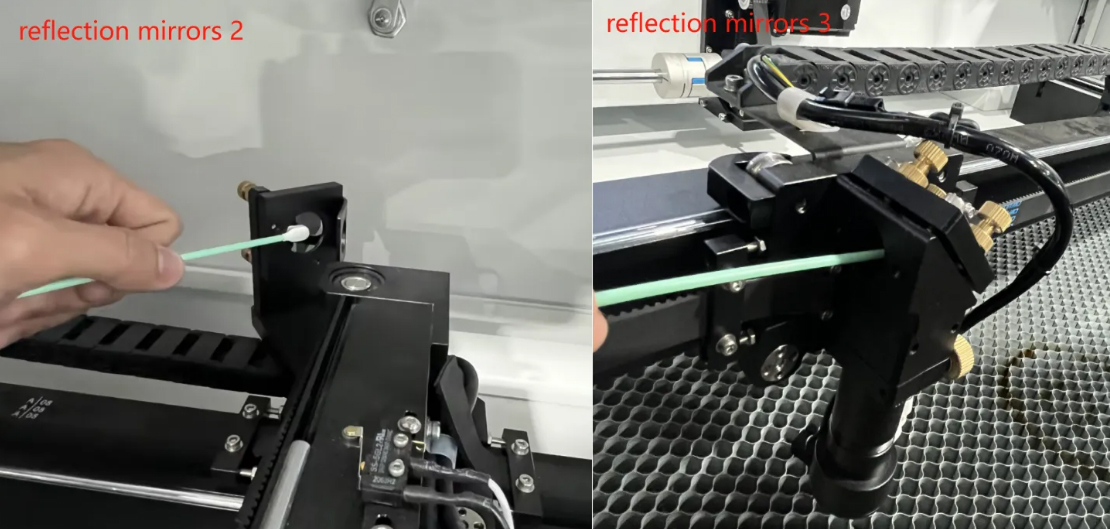
• Wipe the mirror with a cotton swab soaked in lens cleaning solution.
• Use a dry cotton swab to remove residual liquid.
• Perform maintenance on the following mirrors:
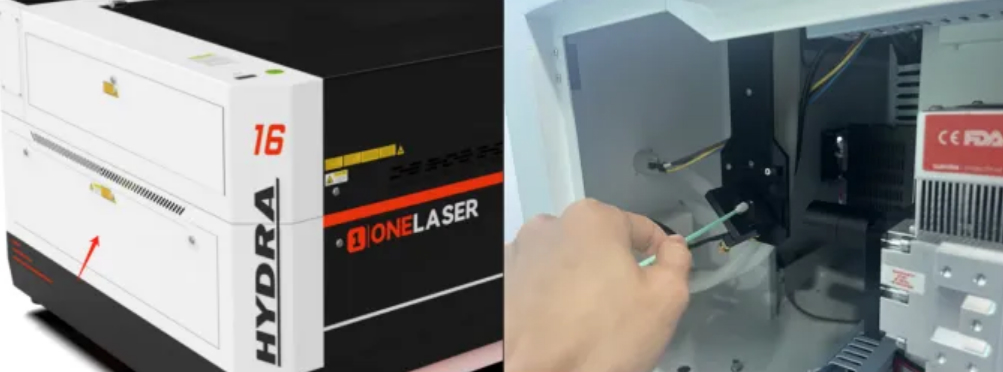
Step 1: RF tube reflection mirror 1
Located on the lower left side of the device (ignore for single-source configuration).
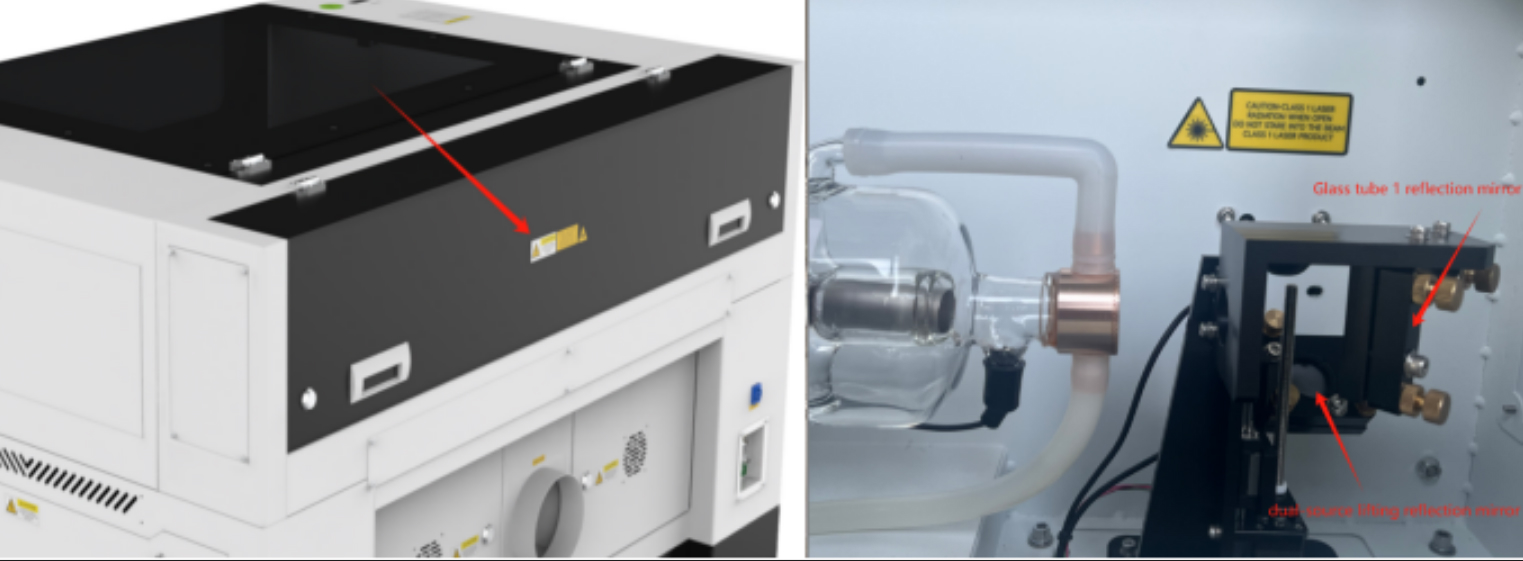
Step 2: Glass tube reflection mirror 1 & dual-source lifting reflection mirror
Located inside the upper rear door (single-source machines do not require dual-source lifting mirror maintenance).
Step 3: Beam combiner
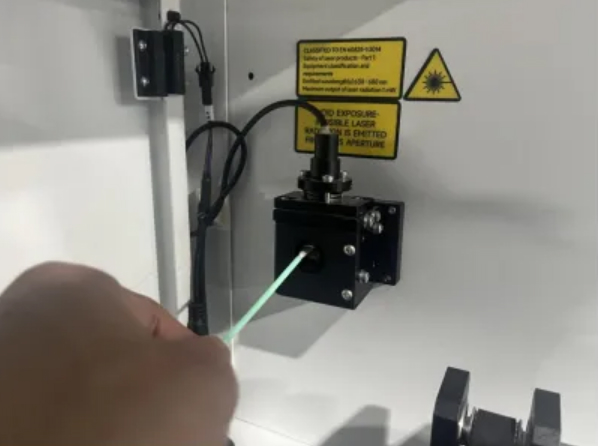
Step 4: Reflection mirrors 2 and 3
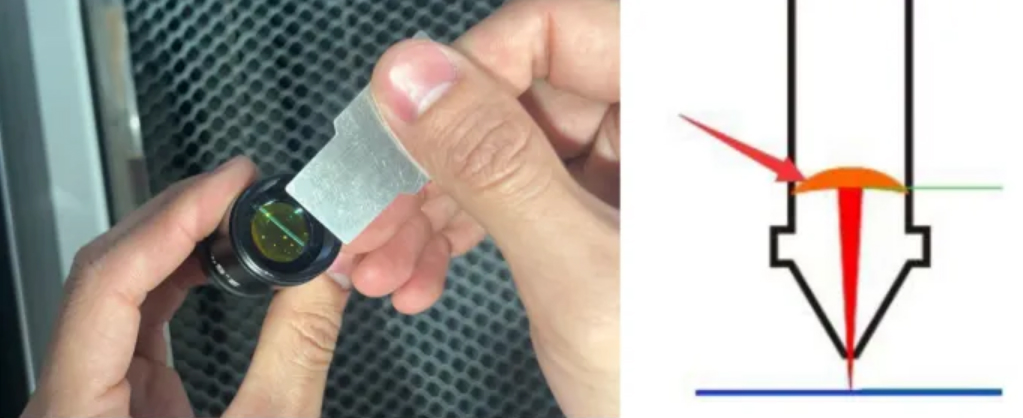
Step 5: Focusing mirror
A. Hold the quick connector and pull out the air pipe. Rotate the golden nut counterclockwise to remove the laser head module.
B. Separate the mirror tube from the laser head. The focusing mirror is inside the mirror tube.

C. Use the mirror disassembly tool to remove the focusing mirror.
D. Install the focusing mirror with the convex side up.
¶ Hardware Maintenance
¶ Tools Required
• Air gun
• Lubricating oil
• Rag
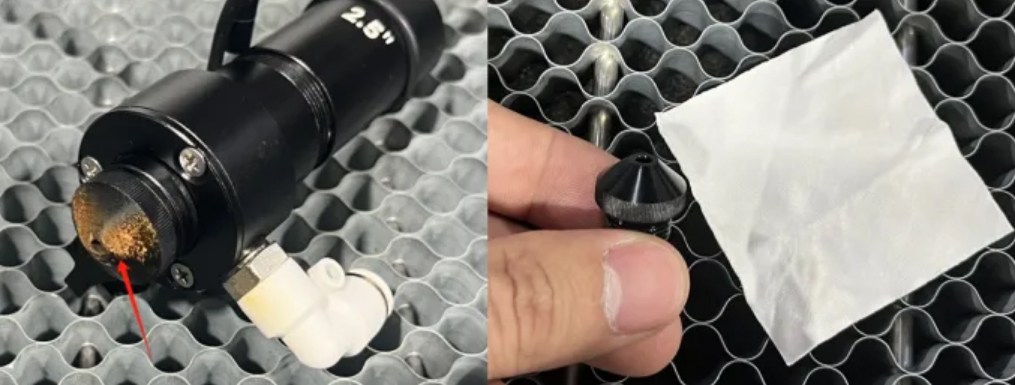
Step 1: Blow nozzle
Rotate counterclockwise to remove and wipe off dirt.
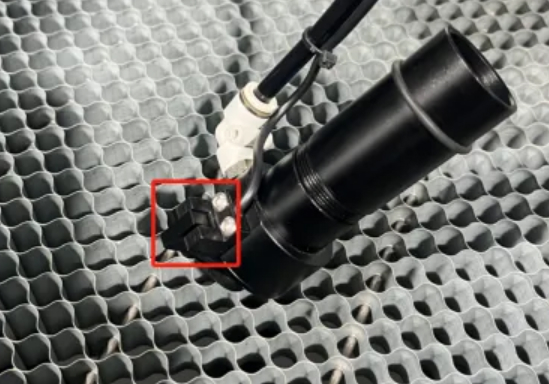
Step 2: Auto-focus sensor
A. Blow away foreign objects using an air gun.
B. Wipe clean with a dry cloth.
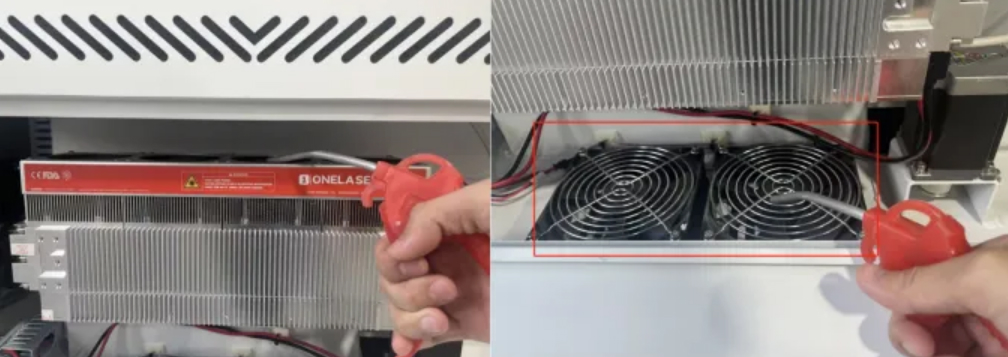
Step 3: RF tube maintenance & exhaust fan maintenance (ignore for single-source machines)
A. Open the left lower door and blow dust from the RF tube cooling fan.
B. Blow dust from the exhaust fan.
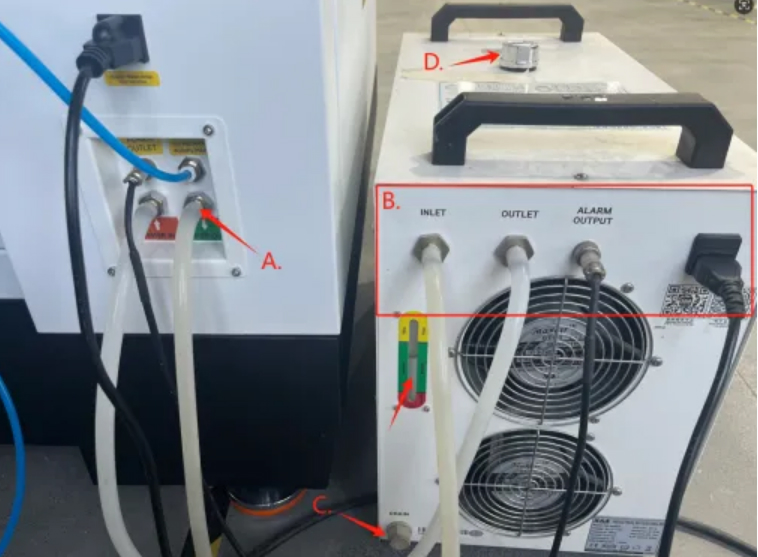
Step 4: Chiller maintenance
A. Remove the outlet water pipe and allow water to flow back into the chiller.
B. Unplug inlet/outlet pipes, power cord, and water protection line.
C. Open drainage port and drain water completely.
D. Refill with pure water up to the green water level line.
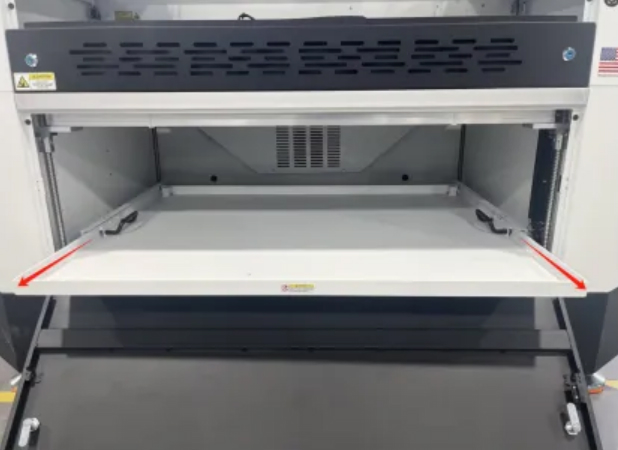
Step 5: Waste hopper cleaning
Open lower front door, remove waste hopper, and clean debris.
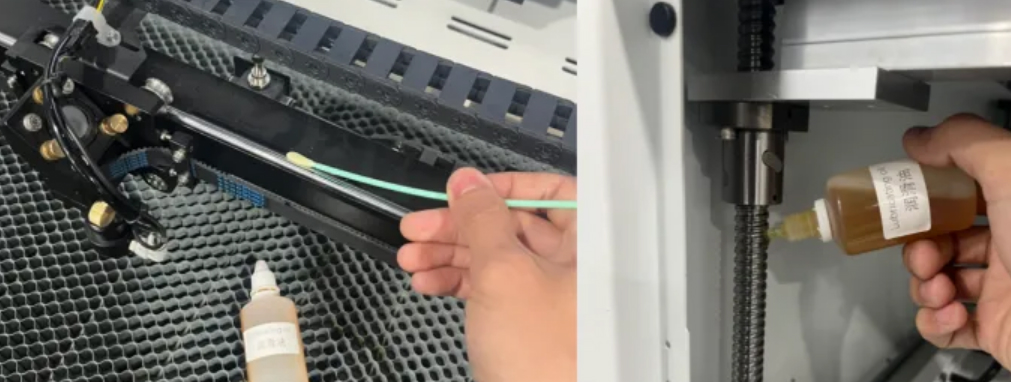
Step 6: Guide rail maintenance
A. Blow debris from X/Y guide rails and Z-axis lead screw, then wipe clean.
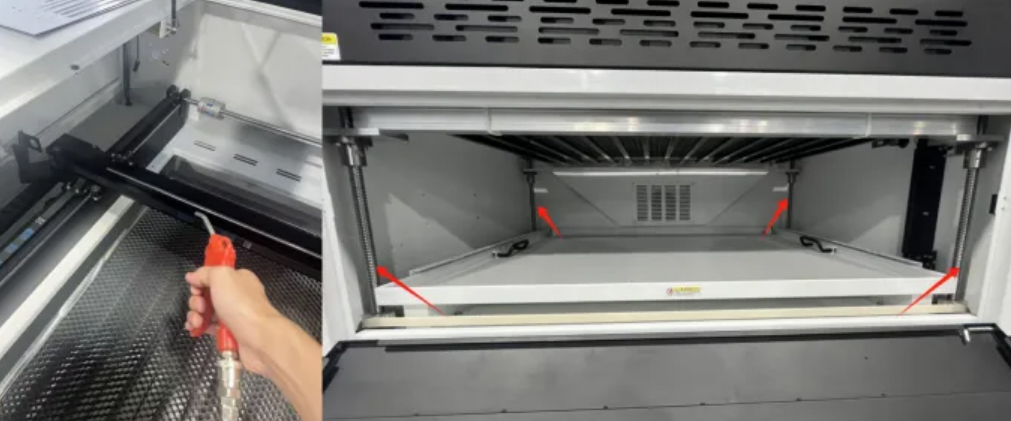
B. Apply lubricating oil to X/Y guide rail rollers and Z-axis lead screw.
Move axes to distribute oil evenly.
Note: Use an appropriate amount of lubricating oil to avoid attracting dust.
¶ Maintenance Schedule
¶ Daily
• Focusing mirror
• Auto-focus sensor
¶ Weekly
• Reflection mirrors 2 and 3
• Work table
• Cooling fan
• Beam combiner
¶ Every 3 Months
• Glass tube reflection mirror 1
• RF tube reflection mirror 1
• Dual-source lifting reflection mirror
• Chiller
• Vent slots (back side of machine)
¶ Every 6 Months
• Belts
• Bearing and rails
• Interior work space
¶ Every 12 Months
• Interior work space