¶ Calibrate the Optical Path of the Red Indicator Light - Hydra Series
This guide explains how to calibrate the red indicator light so it aligns precisely with the actual laser beam. Proper alignment ensures accurate positioning, improves engraving precision, and reduces setup errors during operation.
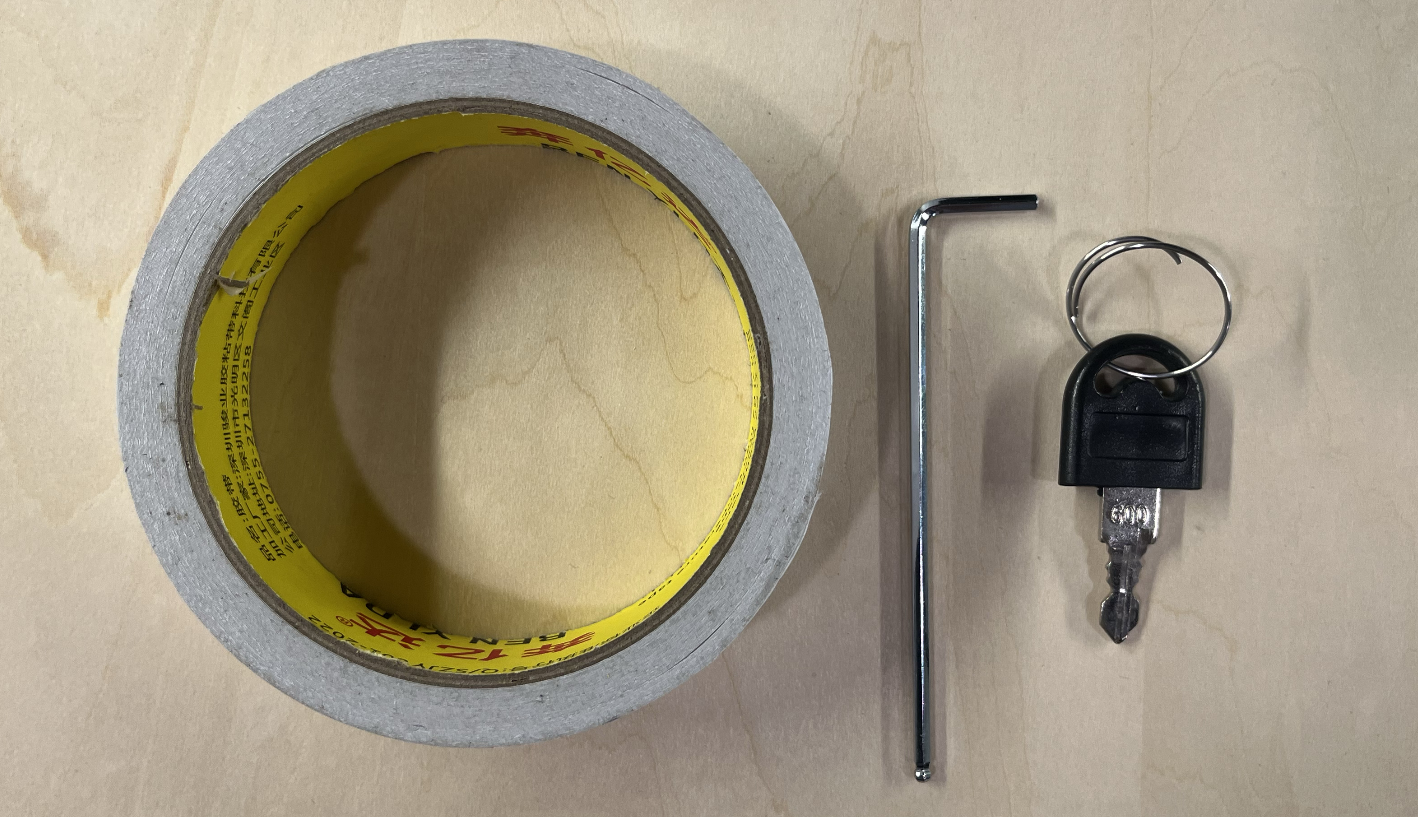
¶ Tools you need to prepare
- M2.5 hexagon socket screwdriver ×1
- Double-sided tape ×1
- Machine door cover key ×1
¶ Preparations before calibration
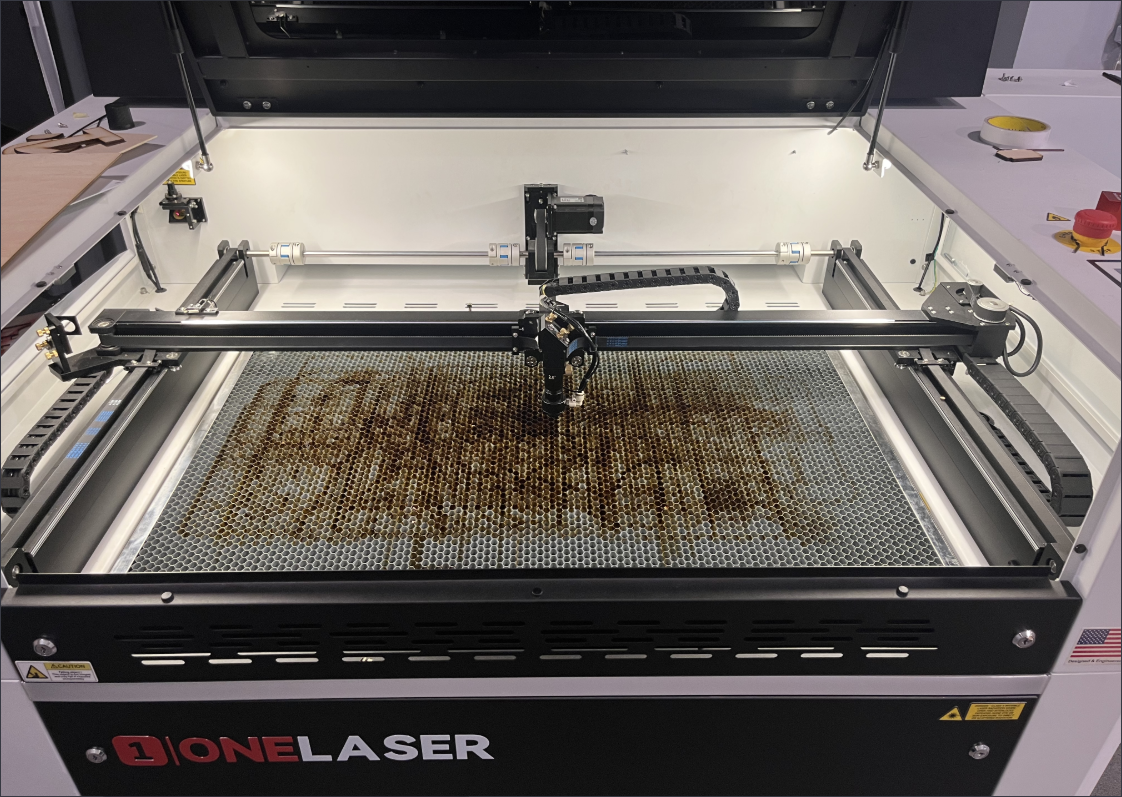
Turn on the machine and move the laser head to the center position of the platform.
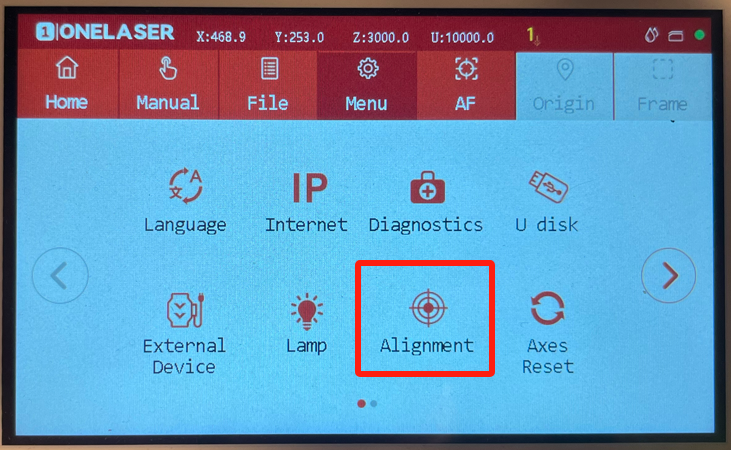
Click Menu → Alignment → Uncheck Pulse time → Set Power to 20%.
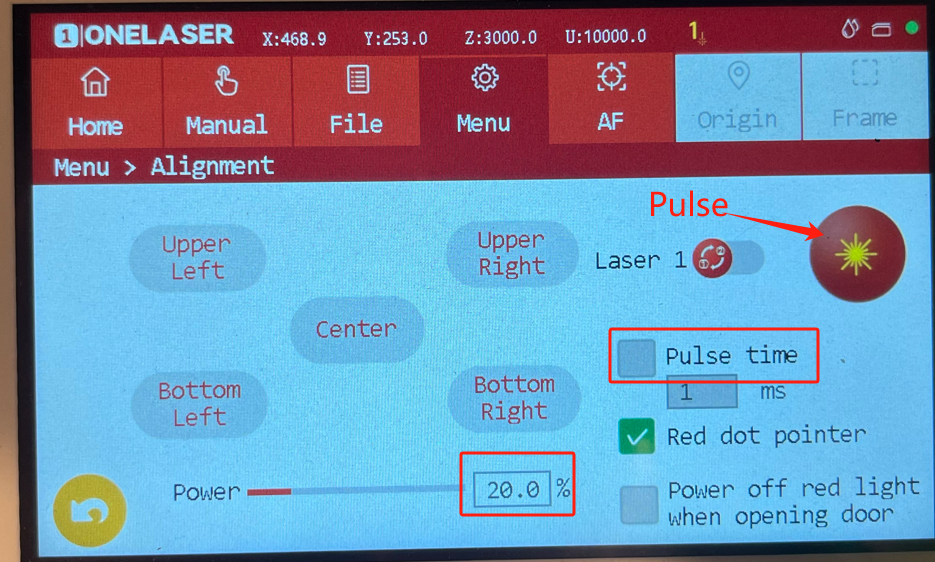
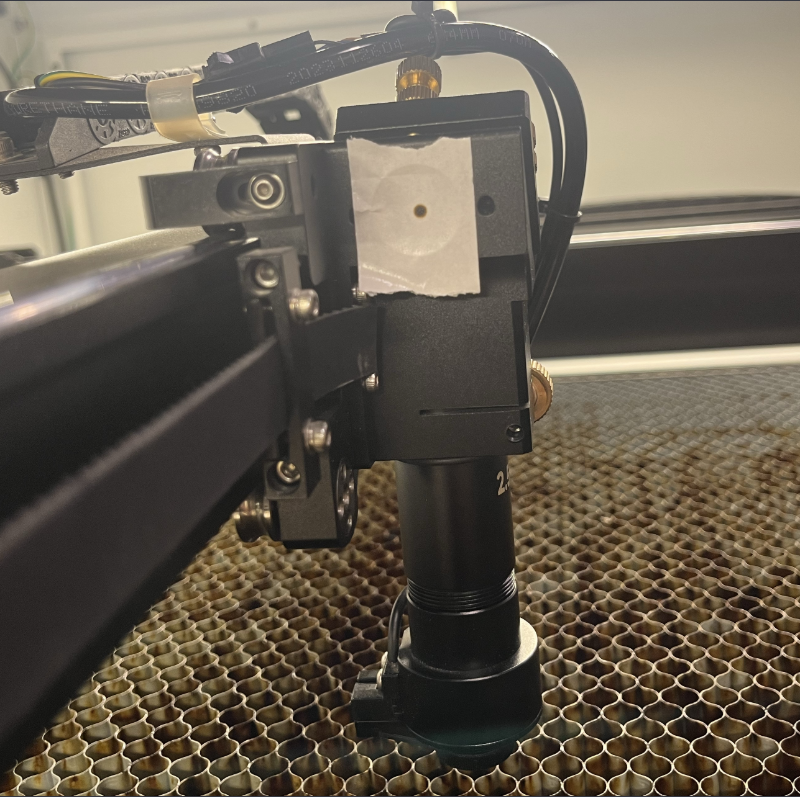
Take a piece of double-sided tape and stick it on the left side of the laser head, then press and hold the “Pulse” button (for about 0.5 seconds) to make a spot on the double-sided tape.
¶ Calibrate the red light path
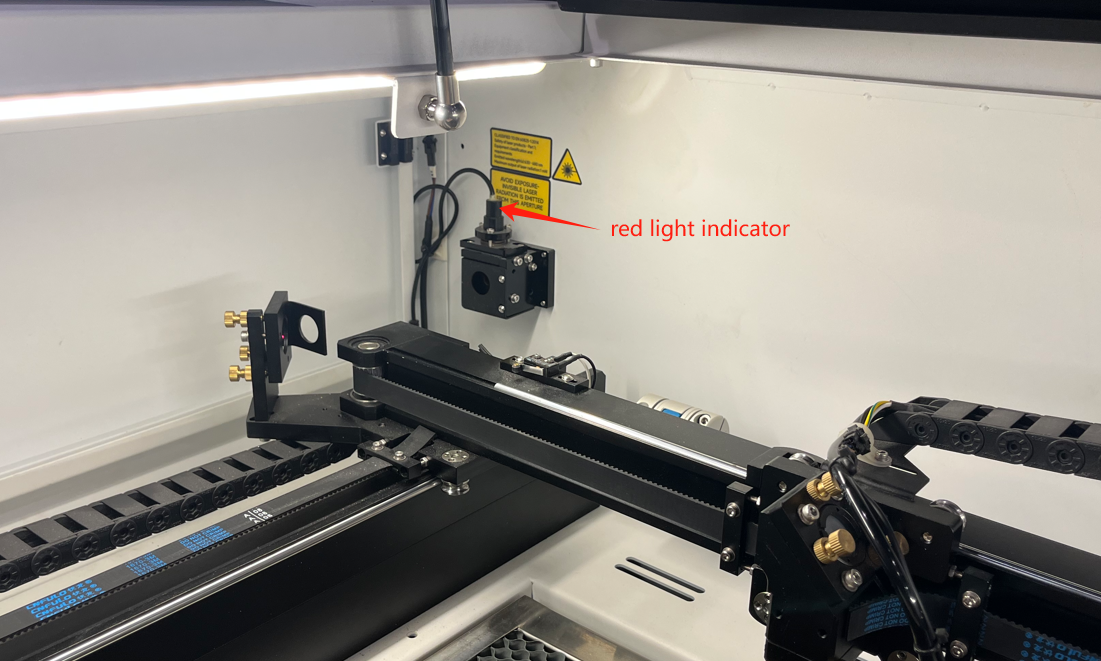
The red light indicator is located at the upper left corner of the platform. You need to use the door cover key to open the upper left door cover of the machine.
Use a hex screwdriver to rotate the adjustment screw shown in the figure to correct the red light path.
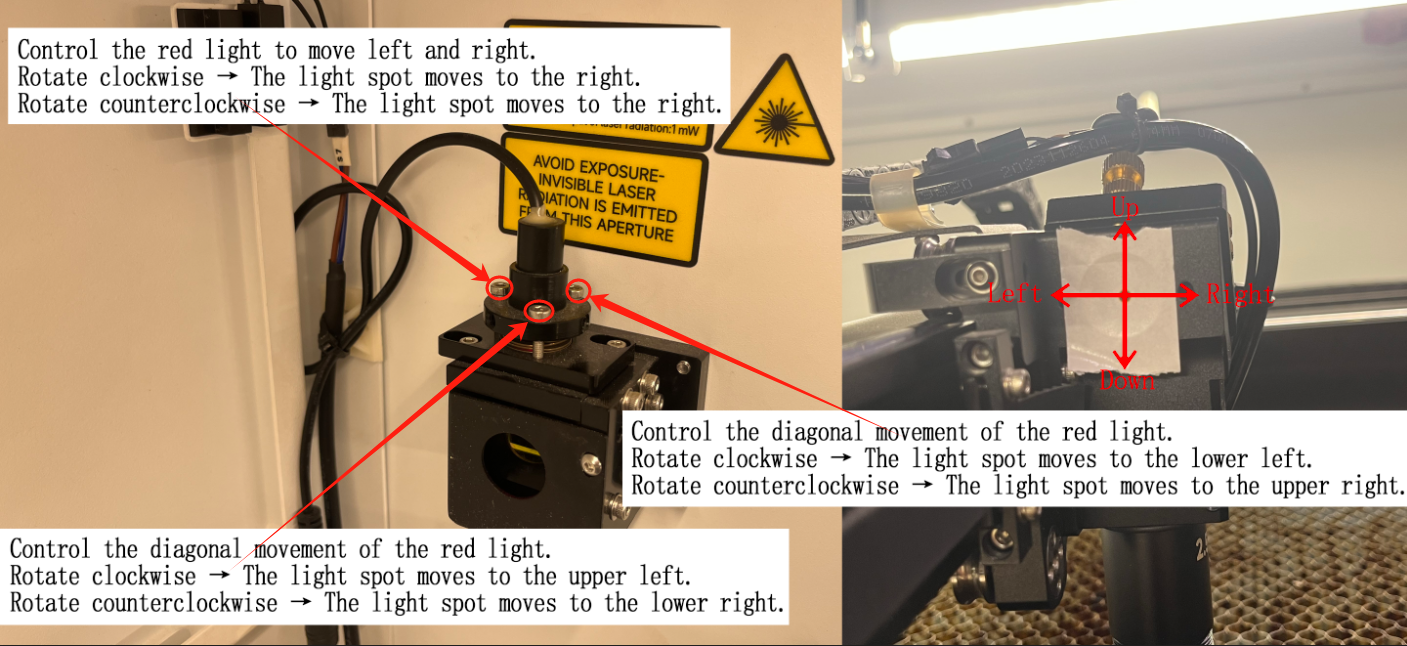
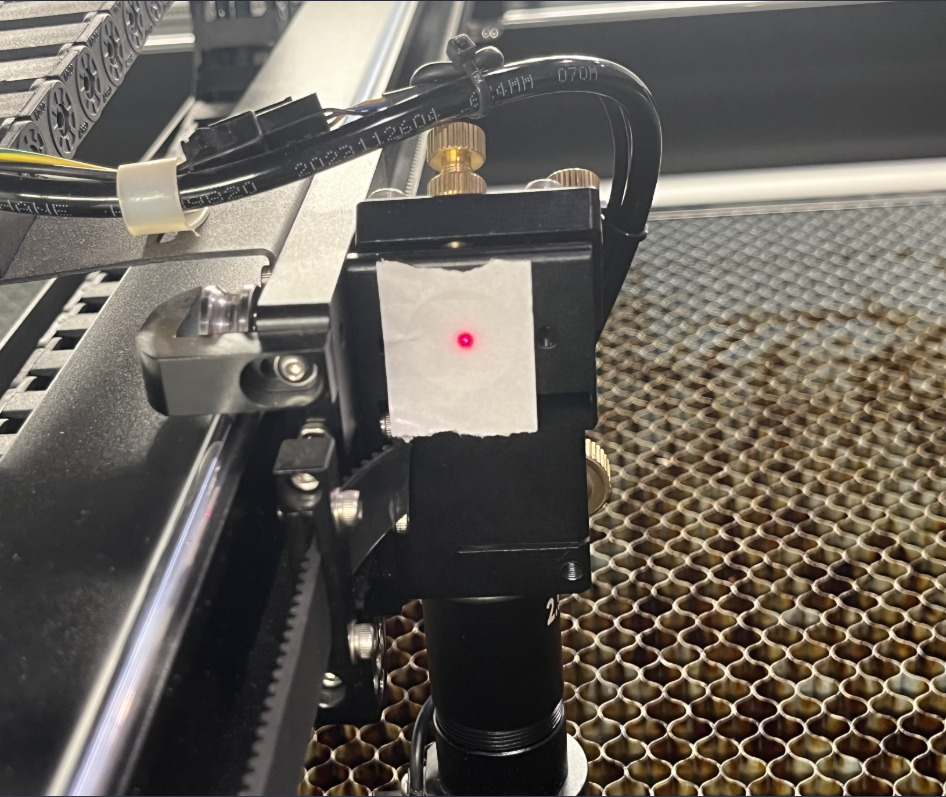
When the red light and the light spot are completely aligned, the calibration process is complete.
Important Reminder:
If these steps do not resolve the issue, please submit a support ticket on ZOHO: https://zohodesk.1laser.com/portal/en/newticket. A technician will then be able to conduct a more in-depth diagnosis and resolve your problem.