¶ How to Adjust the Air Pipe Screw
This guide explains how to properly adjust the air pipe securing screw on X-series laser machines. It outlines when adjustment is necessary, required tools, and step-by-step instructions to restore airflow while preventing damage to the air pipe.
¶ Caution
The screw securing the air pipe is calibrated to its optimal state before leaving the factory. Do not tighten it unnecessarily, as this may crush the pipe and cut off the airflow. Only adjust this screw if there is no airflow during processing.
¶ Preparation
- X-series machine
- M2 hex wrench
- Flat-head screwdriver
¶ Operation
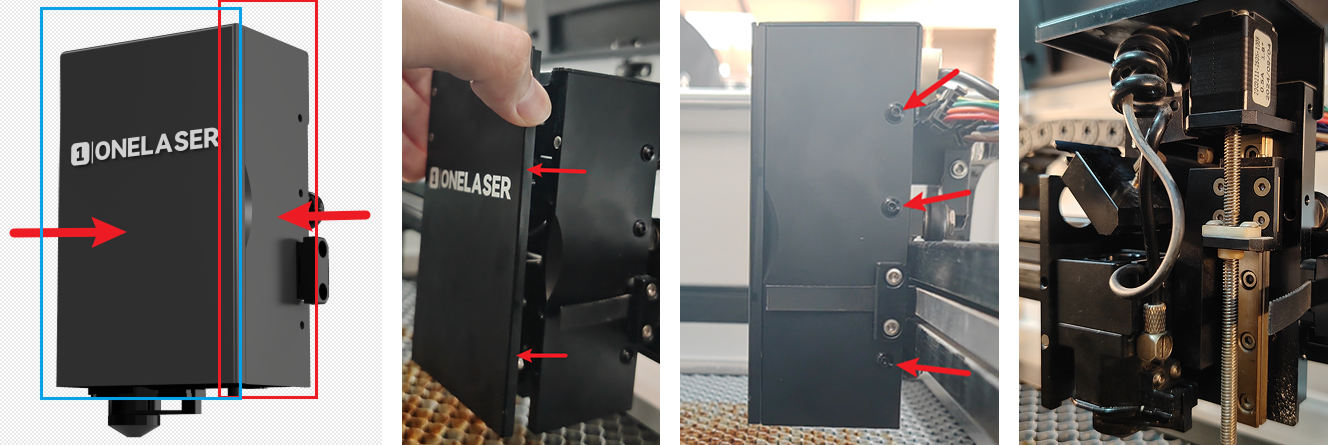
¶ Remove the Laser Head Covers
You will need to remove both the front and right-side covers of the laser head.
- Front Cover: The front cover is magnetic; pull it off directly.
- Right-Side Cover: Use the 2 mm hex wrench to remove the securing screws.
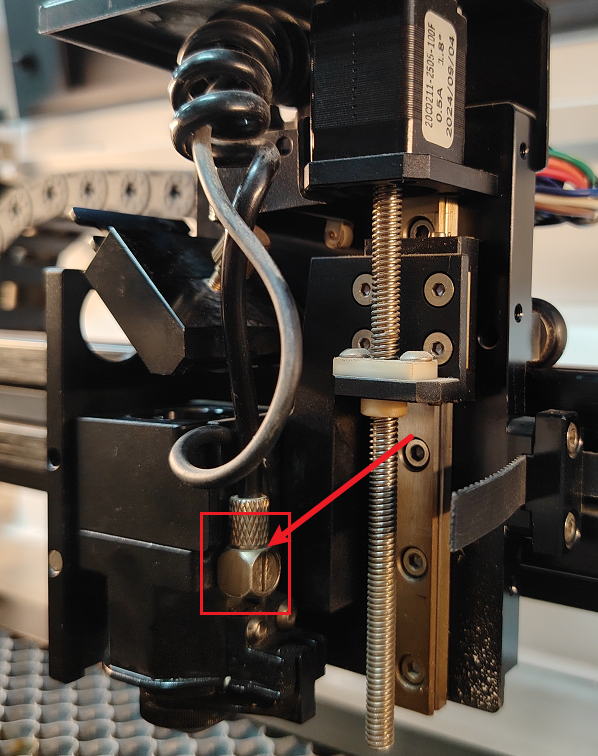
¶ Adjust the Air Pipe Securing Screw
Locate the air pipe adjustment screw as shown below.
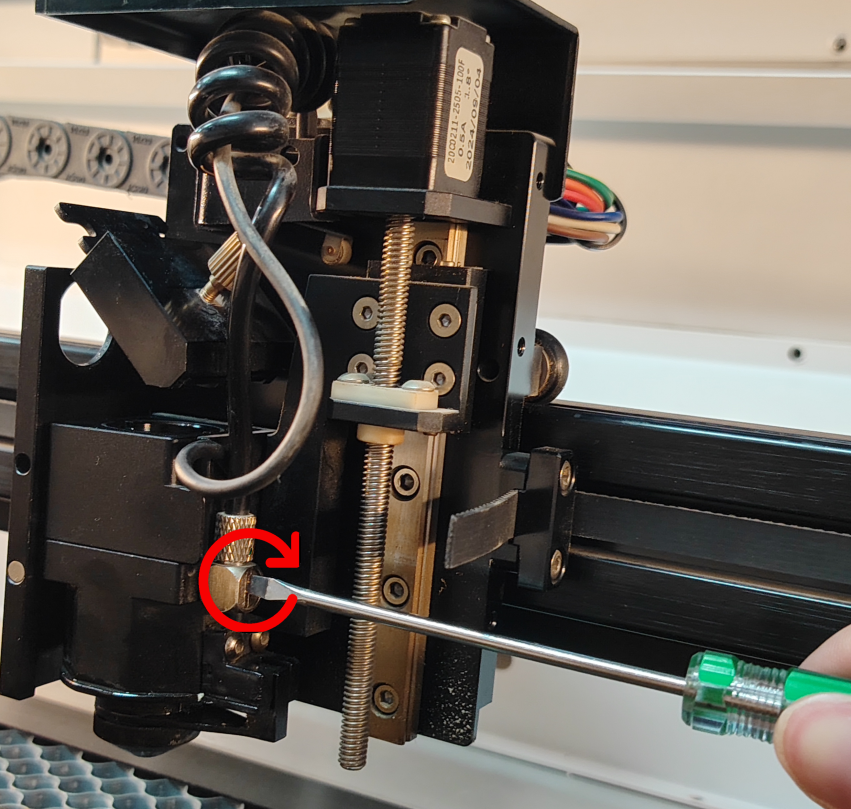
Use a flat-head screwdriver to perform the adjustment:
- Clockwise: Tightens the screw.
- Counter-clockwise: Loosens the screw.
IMPORTANT: If the screw is too loose, it may fall out during operation. If it is too tight, airflow may be restricted or completely blocked. Adjust until the pipe is secure while maintaining proper airflow.
¶ Reassembly
Once the adjustment is complete, reinstall the right-side cover with the screws and snap the magnetic front cover back into place.

Important Reminder:
If these steps do not resolve the issue, please submit a support ticket. A technician will then be able to conduct a more in-depth diagnosis.