¶ Operational Guide
¶ Configure computer
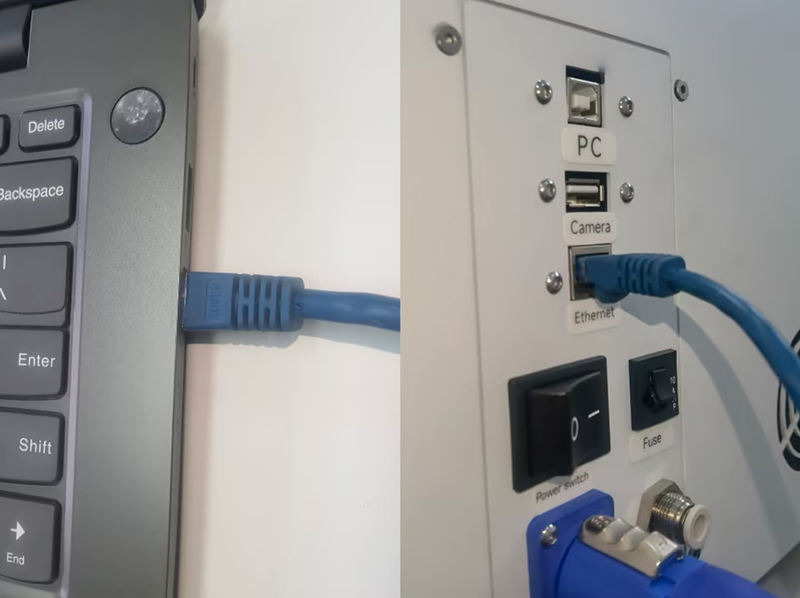
Step 1. Connect the machine and computer with Ethernet cable.
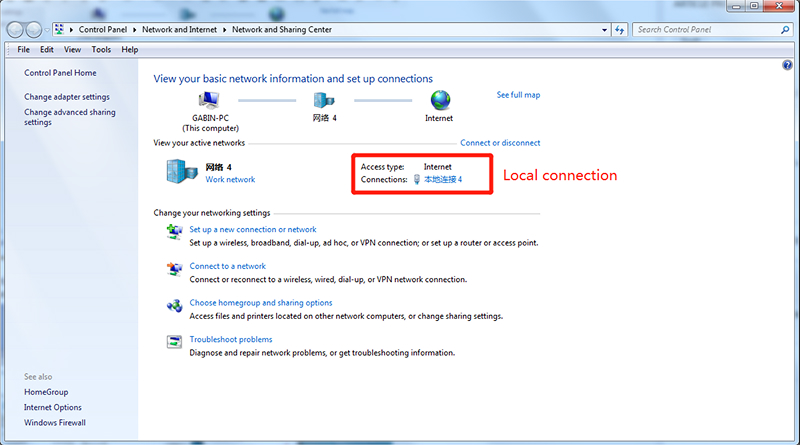
Step 2. Go to Start > Control Panel > Network and Sharing Center, configure the connection for local connection.
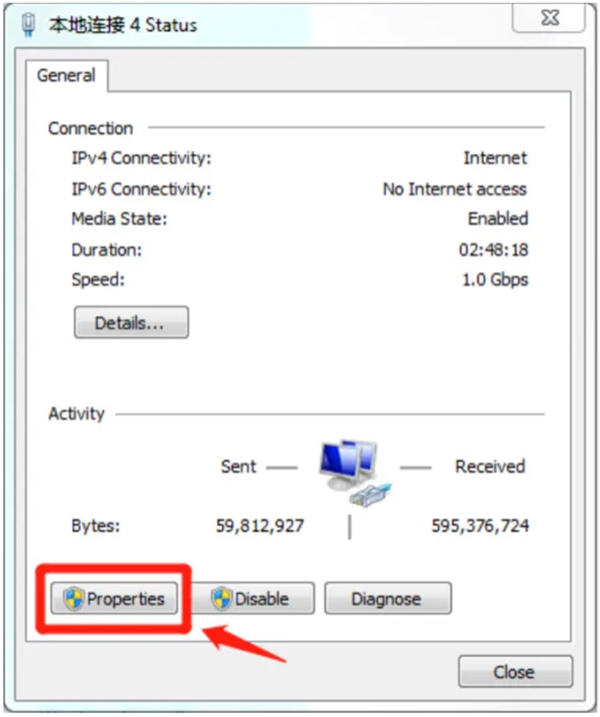
Step 3. Select Properties.
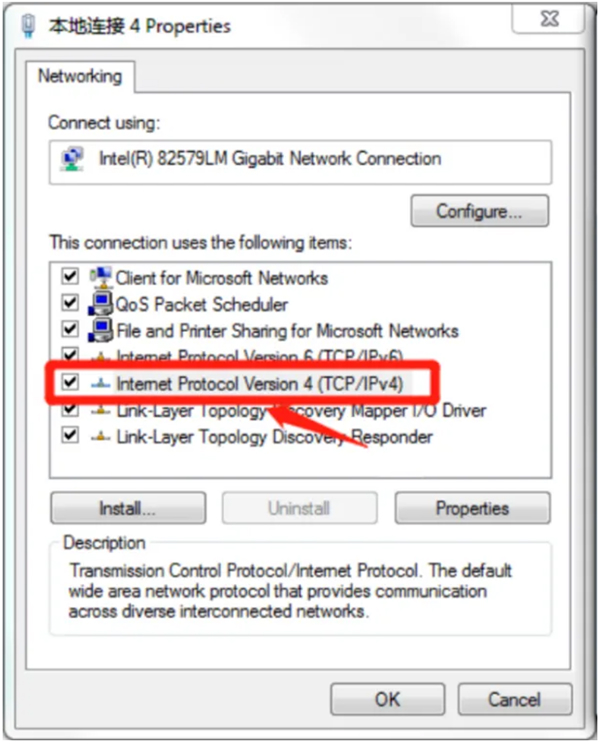
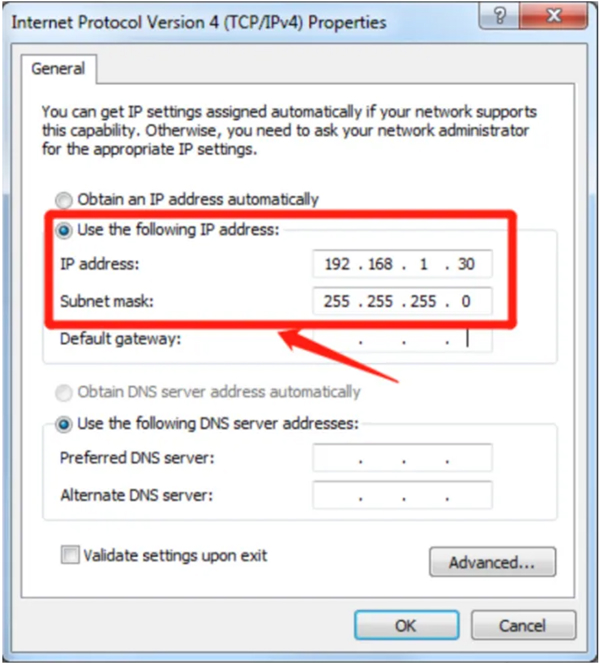
Step 4. In the Properties window, select Use the following IP Address.
Step 5. Set the IP Address to 192.168.1.30 and the Subnet Mask to 255.255.255.0.
¶ Configure the Laser Software
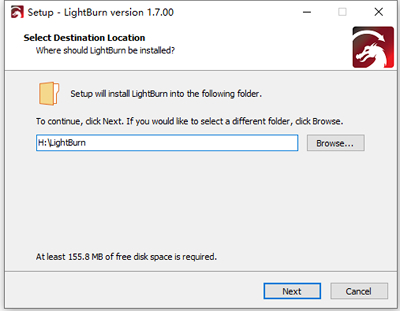
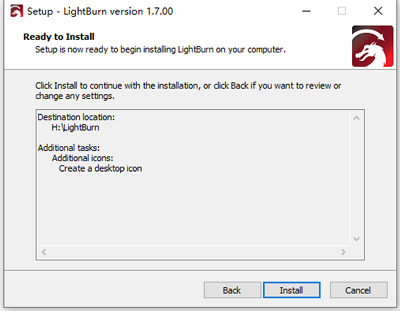
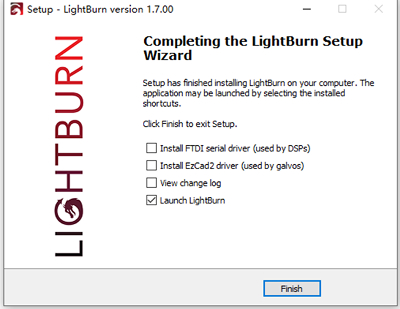
Step 1. The first step is installing the LightBurn software.
| Run the LightBurn Installer | Install LightBurn | Finish installing |
|
|
|
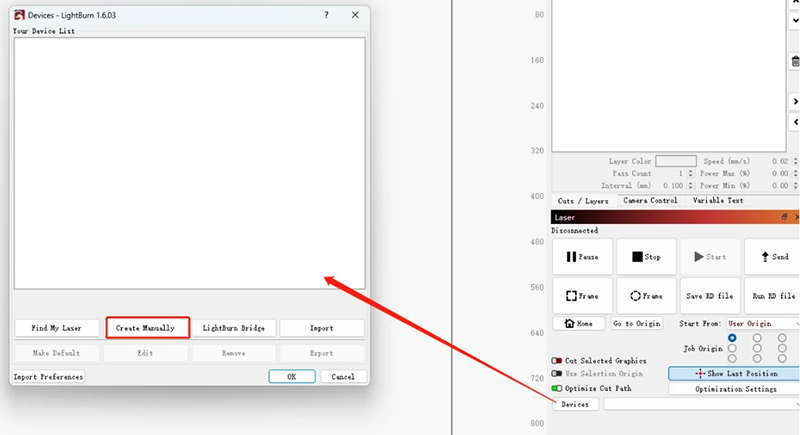
Step 2. Open LightBurn and set a connection.
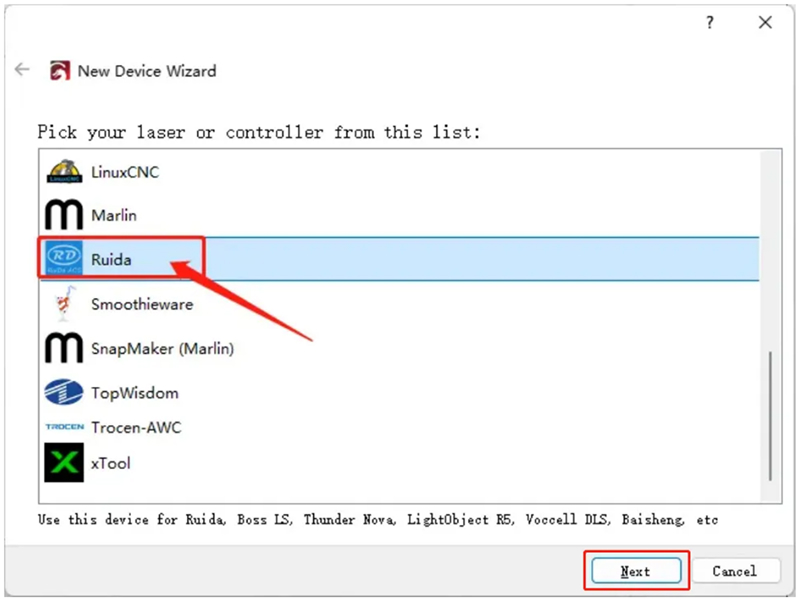
Step 3. Select Ruida, then click Next.
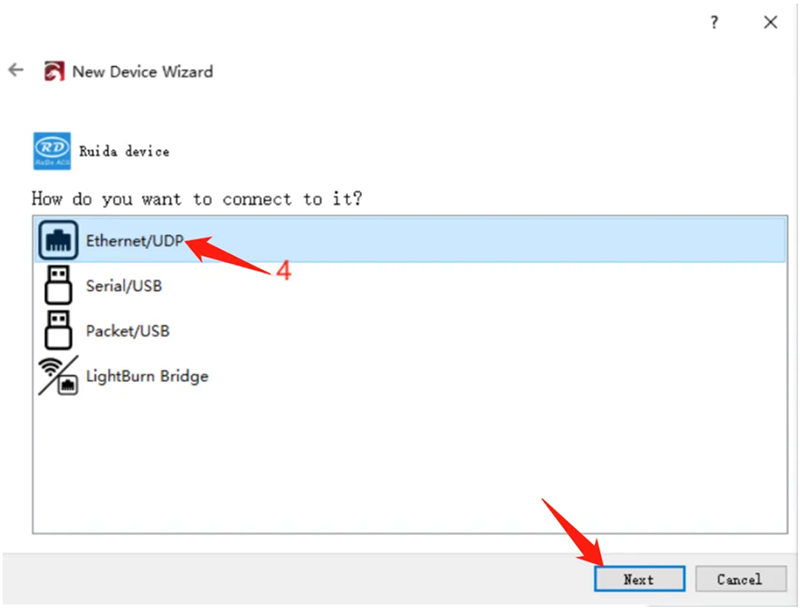
Step 4. Select Ethernet/UDP and continue.
Step 5. Enter the default IP 192.168.1.100 to complete LightBurn network configuration.
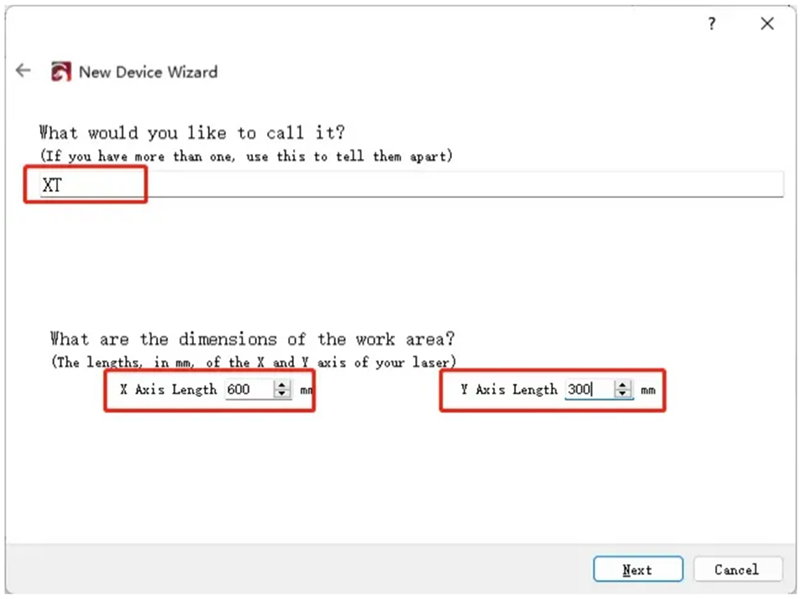
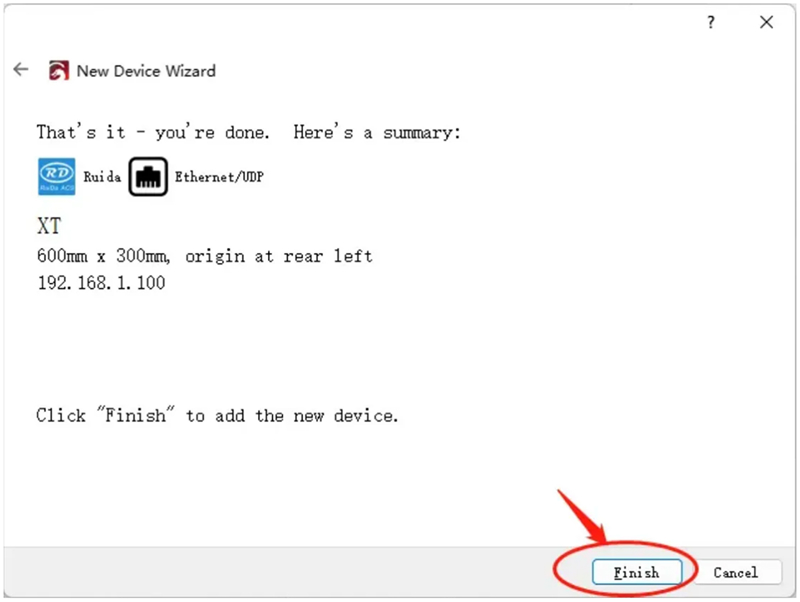
Step 6. Name your laser and enter the work area — for X Series, 600 × 300 mm.
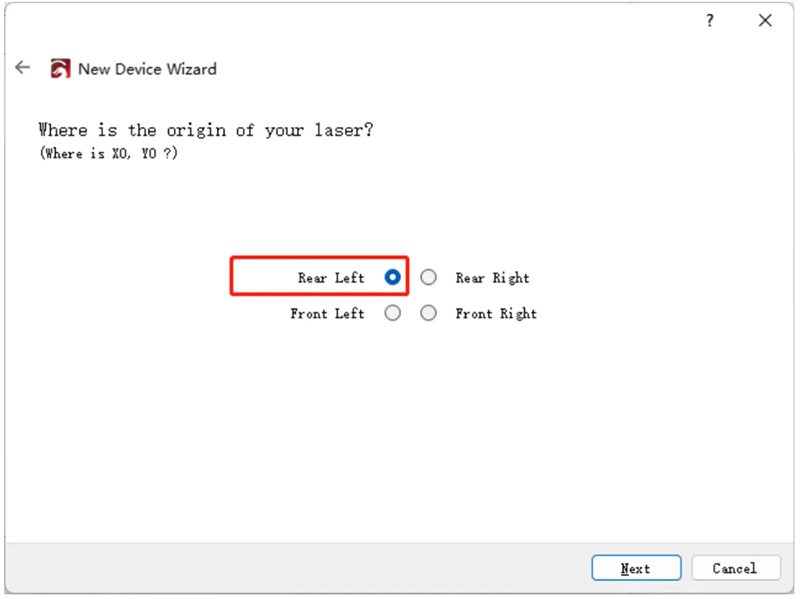
Step 7. Select Rear Left as the origin.
Step 8. The connection is finished.
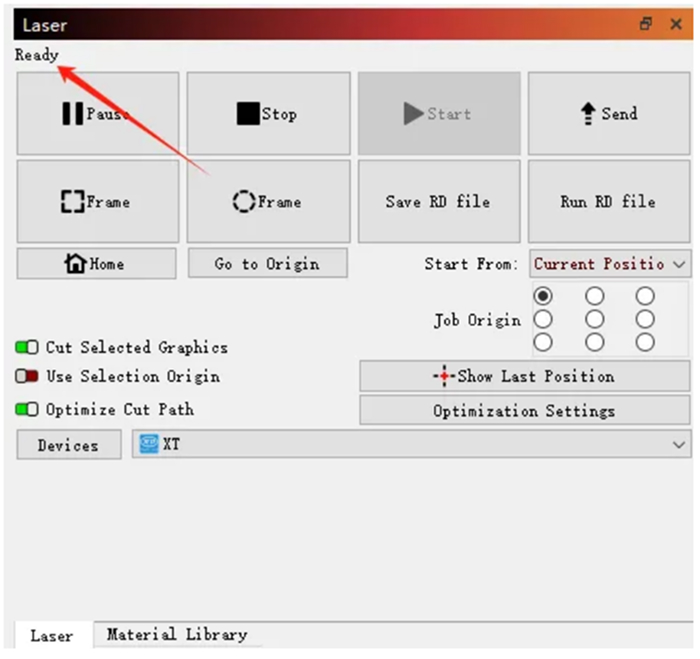
¶ Start Your Project
The connection interface will display the laser status as “Ready”, and now you can start your project.
Note: The Ethernet connection is not Plug and Play and requires manual configuration. It does not work with LightBurn’s “Find My Laser” feature. The laser uses a static IP that must match your network. Default IP: 192.168.1.100 | Subnet Mask: 255.255.255.0.