¶ How to Use the Rotary
This guide is designed for makers and businesses engraving cylindrical objects such as tumblers, bottles, cups, and pipes, ensuring accurate rotation, proper focus, and clean engraving results.
Notice:
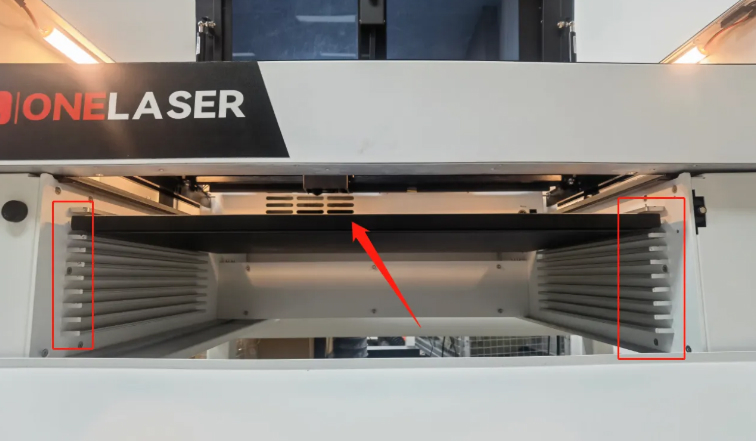
Due to height restrictions, the rotary needs to be used with an optional base.
¶ Operation Steps
Step 1: Remove the four screws with a 2.5 mm Allen wrench and take it out.

Step 2: Adjust the drawer installation position according to the height of the rotary and the workpiece.
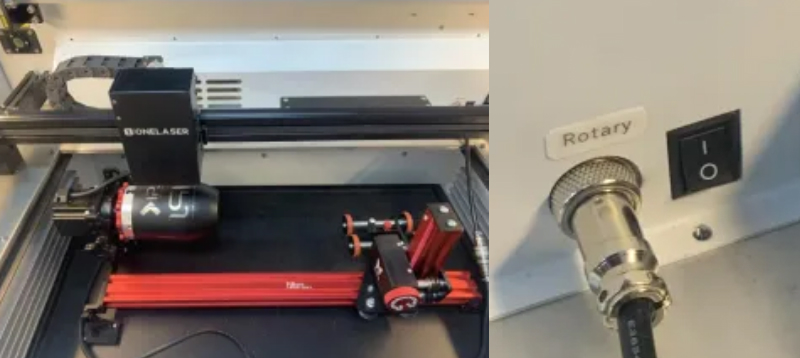
Step 3: Place the rotary axis on the work platform.
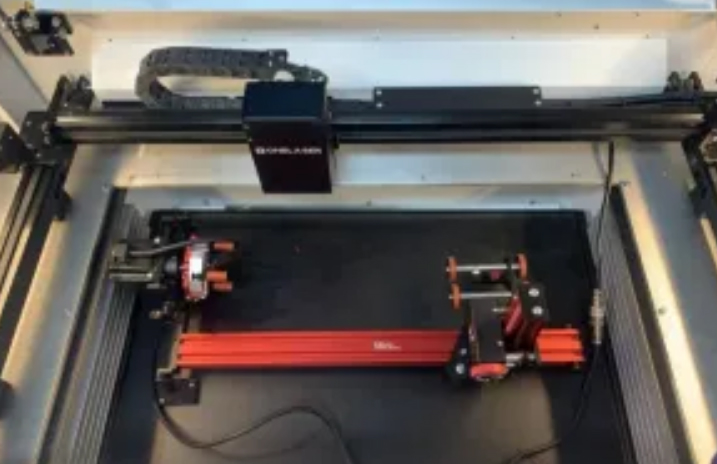
Step 4: Align the groove of the plug with the protrusion of the jack and tighten the screw.

Step 5: Place the material to be processed on the rotating shaft and turn the red knob to fix the material.
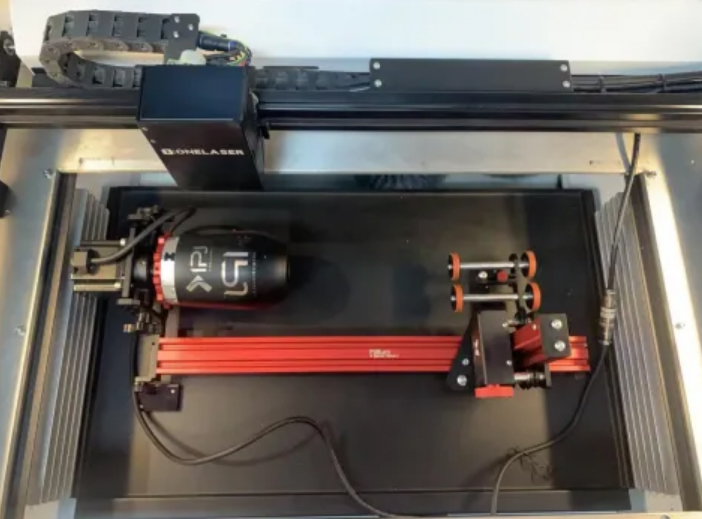
Step 6: Move the laser head so that the red light is positioned correctly on the material to complete automatic focusing, then turn on the rotary switch.
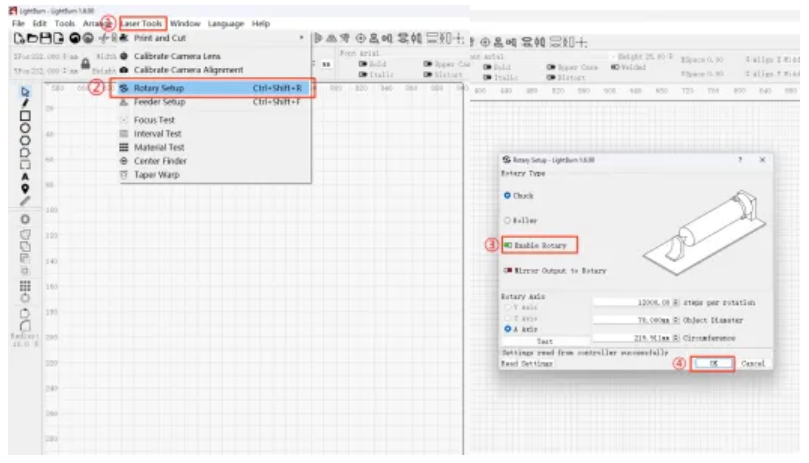
Step 7: After the software connects to the device:
① Click Laser Tools
② Click Rotary Setup
③ Enable Enable Rotary
④ Click OK
Step 8 – Further Operations
① Click Edit
② Select Machine Settings
③ Save the file
④ Click Calibrate Axis

Step 9: Upload the file, set the origin and border, then start processing.
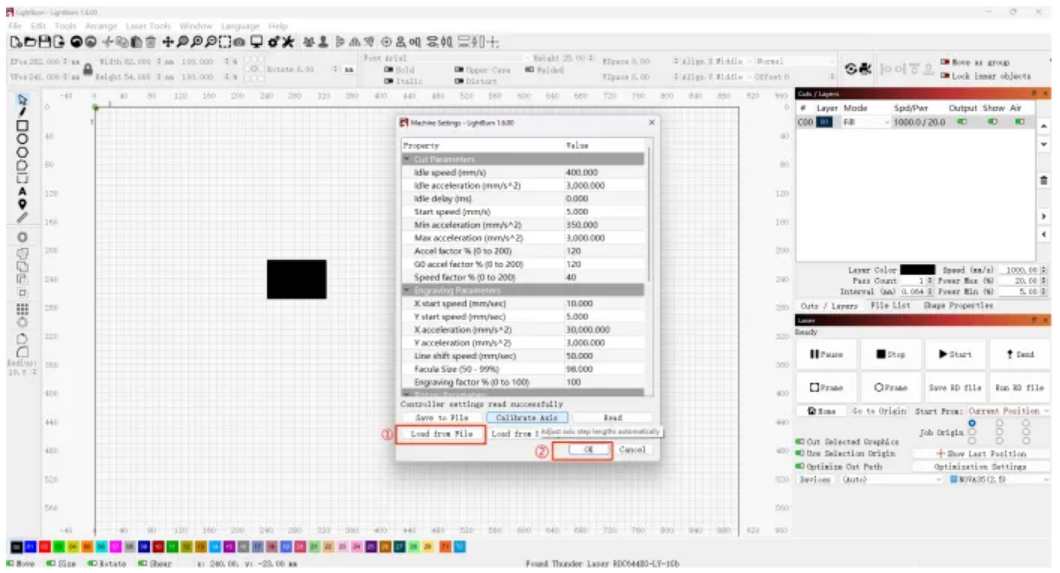
After using the rotary axis, open the Machine Settings window:
① Load the file saved in Step 2
② Click OK