¶ KERF Widening, Dark Engraving and Blurred Edges: Addressing Defocus Issues - X Series
¶ Problem Description
Cutting:
- The cut line appears wide and thick.
- The machine cannot cut through the material with standard parameters.
- The bottom edge of the material is not cut cleanly.
- Severe burn marks, charring and potentially flaming occur.
Engraving:
- Engraved edges are blurry.
- The material exhibits fraying or rough edges.
¶ Cause
- The auto-focus function was not used before processing began.
- The focus distance value pre-set at the factory has been altered.
- The material surface is uneven or warped.
- The focus lens is installed incorrectly (e.g., loosely mounted or installed beneath the lens holder).
- The focus lens or mirror optics are dirty.
- The laser beam path is misaligned.
¶ Solution
- Always remember to use the "Auto-Focus" function before starting a job to set the focal distance to the correct value.

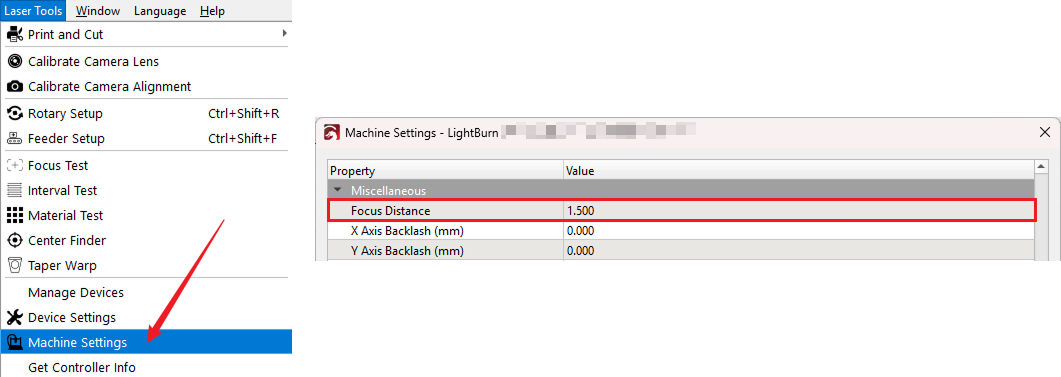
- Enter the Machine Settings window, locate the Focus Distance parameter, and check if the value is set to 1.5 (or the correct default value for your machine).
- If the material is uneven, use magnets or clamps to press down on the four corners of the material.
- Remove the cover of the laser head. Take out the focus lens holder and check if the lens is loose or installed beneath the lens holder. Use the focus lens removal tool or a thin steel ruler to gently tighten the lens or reinstall it above the lens holder. Be extremely careful not to scratch the lens itself.

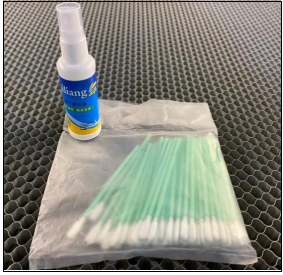
- Use the cleaner and cotton swabs found in your toolbox to clean the optics.
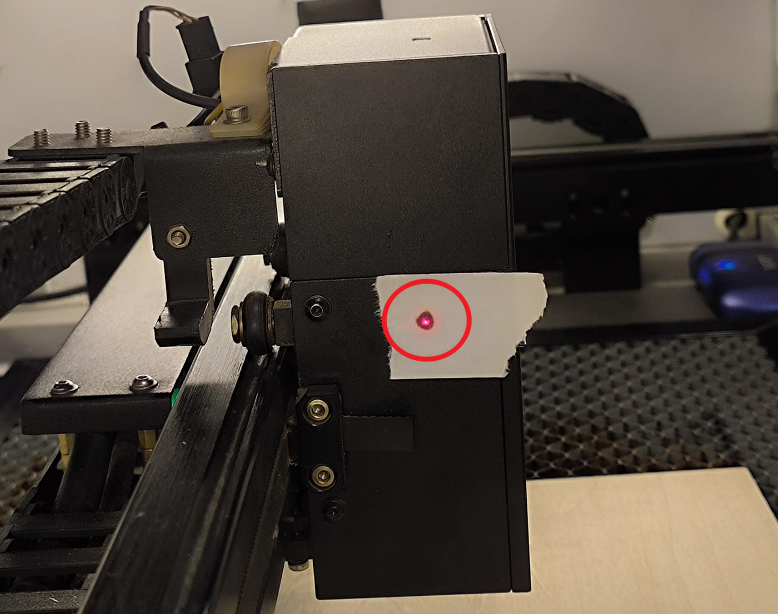
- Affix tape to the outside of the third mirror mount on the laser head. Move the laser head to the four corners of the workbed (e.g., top-left, bottom-left, etc.), and tap the Pulse button on the control panel at each corner. Observe if the four burn marks are consistent and centered. If they are not consistent, you must re-align the beam path.
Important Reminder:
If these steps do not resolve the issue, please submit a support ticket on ZOHO: https://zohodesk.1laser.com/portal/en/newticket. A technician will then be able to conduct a more in-depth diagnosis and resolve your problem.