¶ Laser Power Supply Replacement
This guide provides a step-by-step explanation of laser power supply replacement, covering both XRF switching power supplies and XT laser power supplies. It outlines required tools, safety precautions, disassembly steps, wiring instructions, and correct installation to ensure safe and reliable machine operation.
¶ NOTE:
Please keep the disassembled screws properly to avoid loss.
Before unplugging the cable, please take a photo to record the connection status to prevent incorrect wiring during reinstallation.
¶ Tools That Need to Be Prepared
Hexagonal wrench M2 & M3, cross screwdriver (XRF)
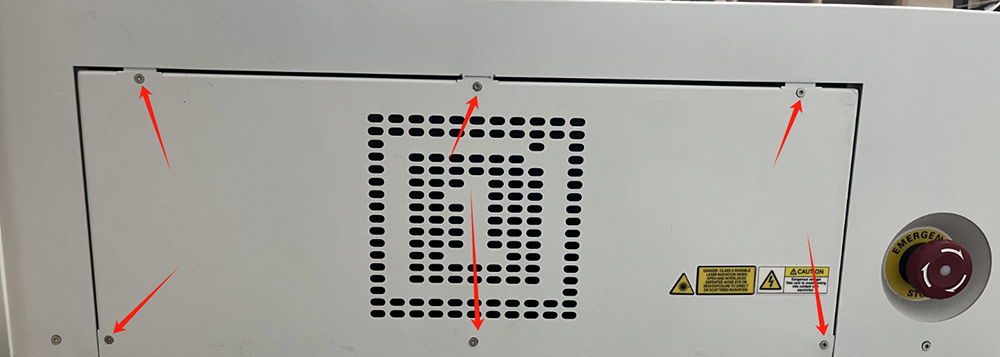
¶ Disassemble the Casing
① Ensure that the device power is disconnected.
② Use an M2 hex wrench to unscrew the screws on the back cover of the device, and then remove the back cover.
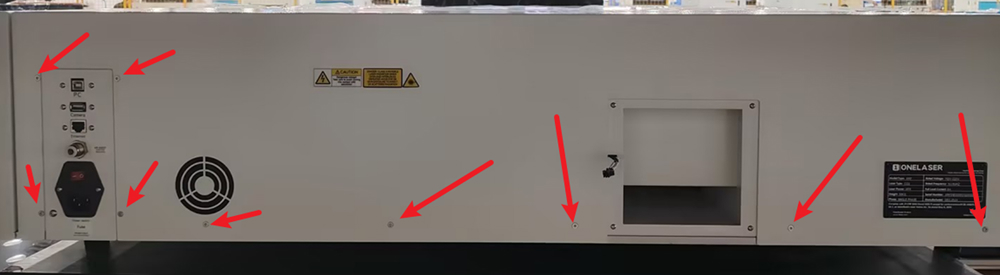
③ Unscrew the screws on the right cover plate.
¶ XRF Switching Power Supply Replacement
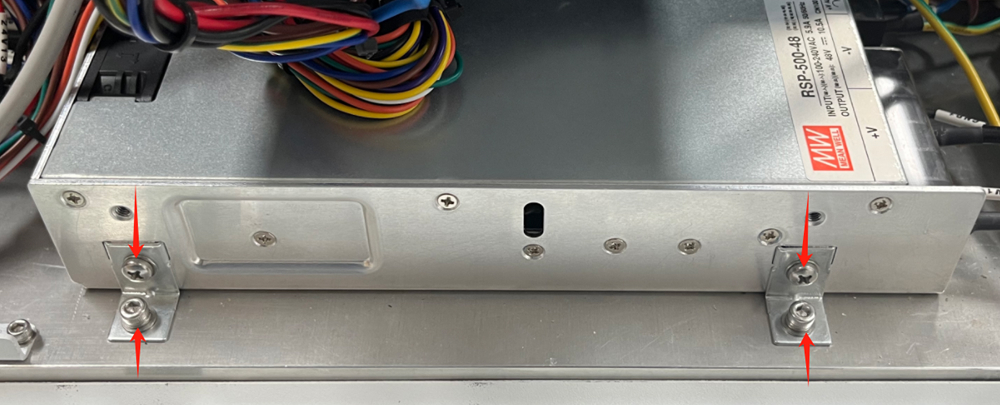
¶ Disassemble the Switch Power Supply
① Use a hex wrench to unscrew the screw that secures the switch power supply.
② Use a Phillips screwdriver to remove the installation bracket for the switch power supply.
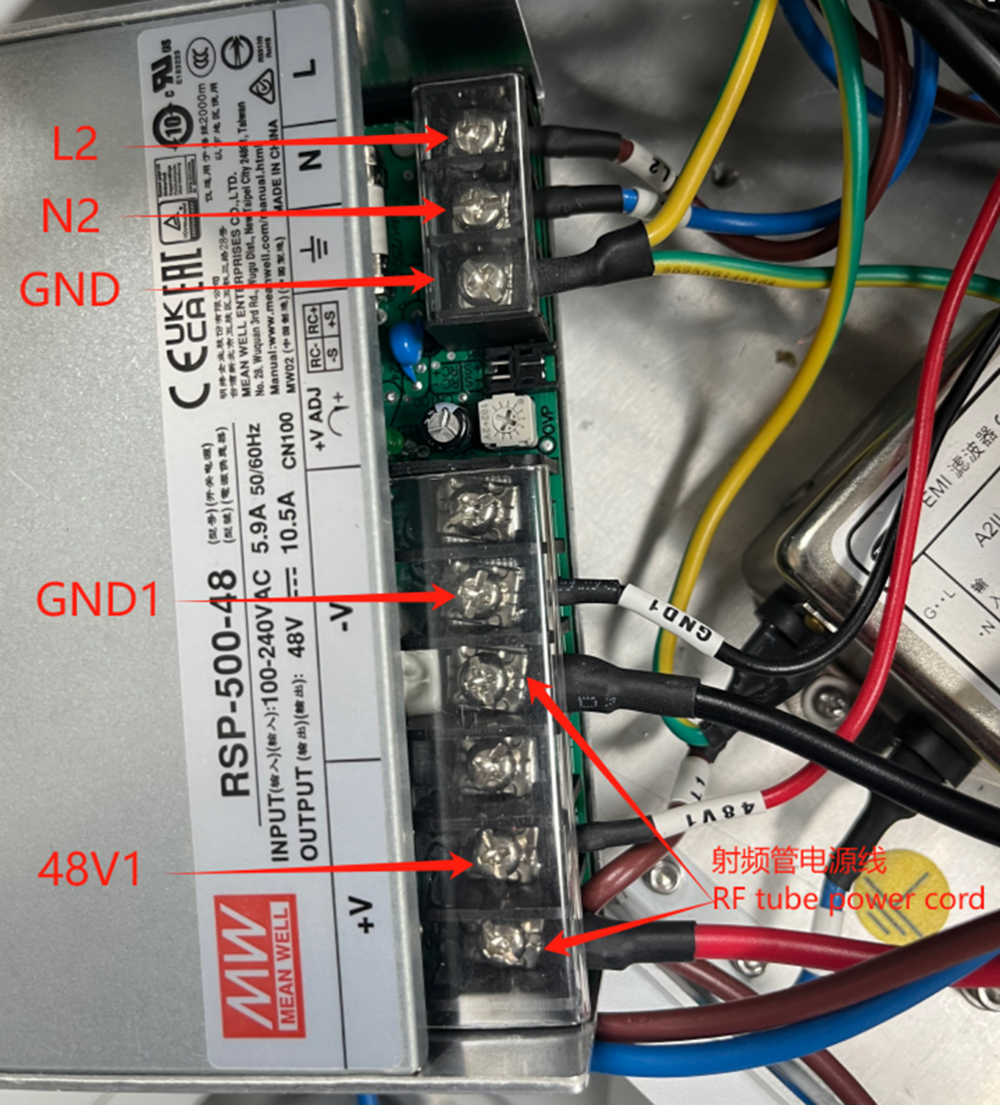
③ Use a Phillips screwdriver to disconnect all the wires connected to the switch power supply, and then remove the switch power supply.
¶ Install Switch Power Supply
① Fix the new switch power supply on the casing and connect the wires.
② Install and fix the casing.
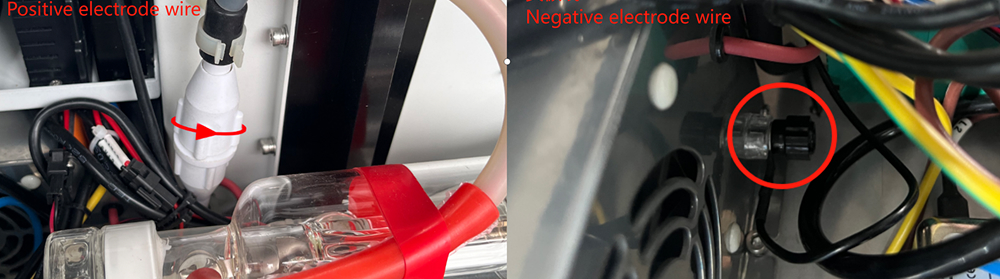
¶ XT Laser Power Supply Replacement
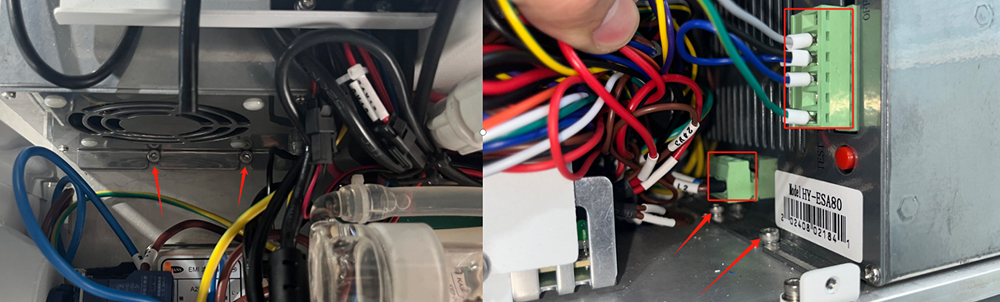
¶ Disassemble the Laser Power Supply
① Rotate counterclockwise to unscrew the positive and negative wires.
② Pull out the terminals of the power and signal wires.
③ Unscrew the screw that secures the laser power supply with a hex wrench to remove the laser power supply.
¶ Install Laser Power Supply
① Fix the new laser power supply onto the casing.
② Connect the terminals of the positive and negative pole lines, power line, and signal line.
③ Install and fix the casing.