¶ Laser Replacement
Laser Replacement is a complete maintenance guide covering both glass tube replacement (XT models) and RF tube replacement (XRF models). This page walks you through safe disassembly, proper installation, and optical path alignment to ensure stable laser performance and long machine lifespan.
¶ Safety Notes
- The following operations must be performed after power is disconnected.
- Please store removed screws properly to avoid loss.
¶ Disassembly of the Enclosure
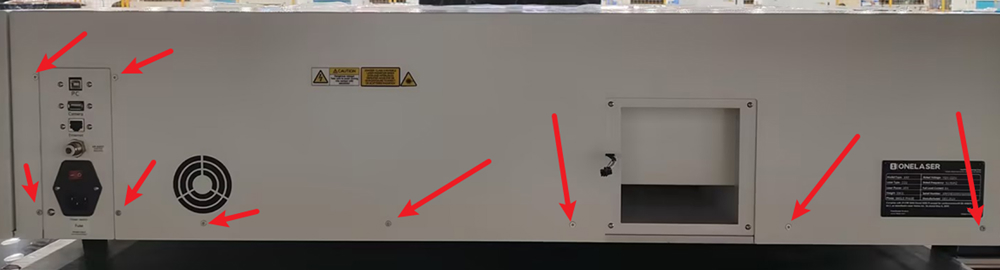
- Both XT and XRF models require disassembly of the enclosure.
- Use an M2 hex wrench to remove the screws on the rear cover, then remove the rear cover.
¶ Glass Tube Replacement (XT)
¶ 1. Tools Required
- Hex wrench
- Steel ruler
- Water pump
- Utility knife
¶ 2. Drain the Water Tank
Step 1: Unscrew the water tank cap counterclockwise.
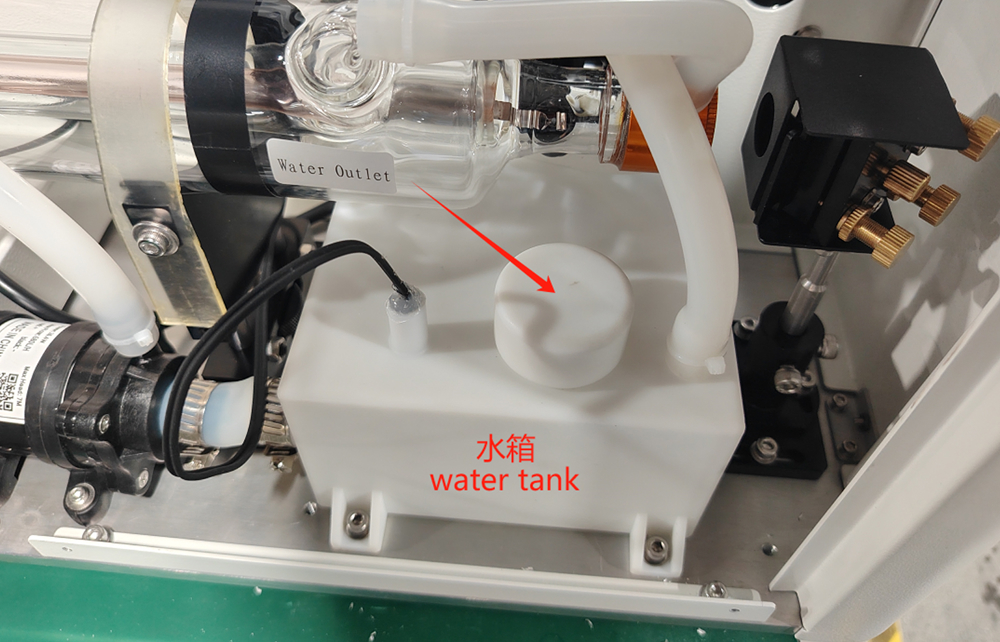
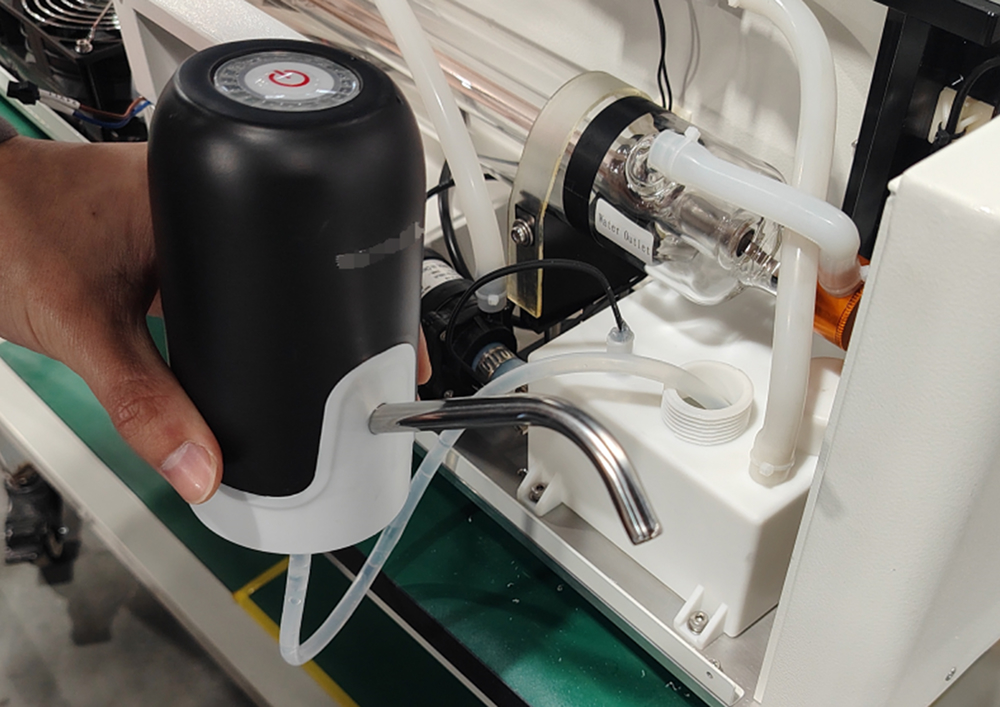
Step 2: Use a water pump to drain all water from the tank.
¶ 3. Disassembly of the Glass Tube
Step 1: Measure the distance from the glass tube to Mirror 1 using a steel ruler and record it.
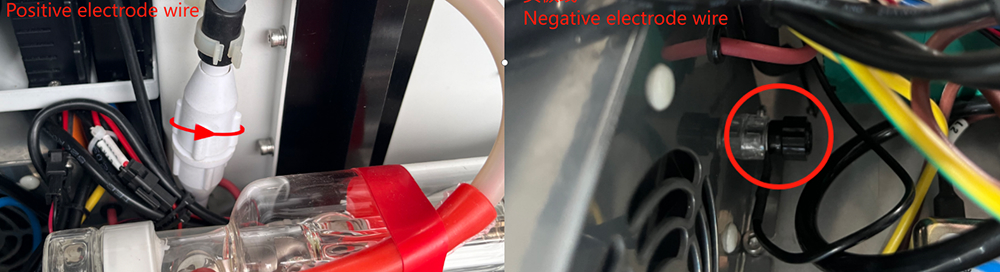
Step 2: Unscrew the positive and negative electrode wires counterclockwise.
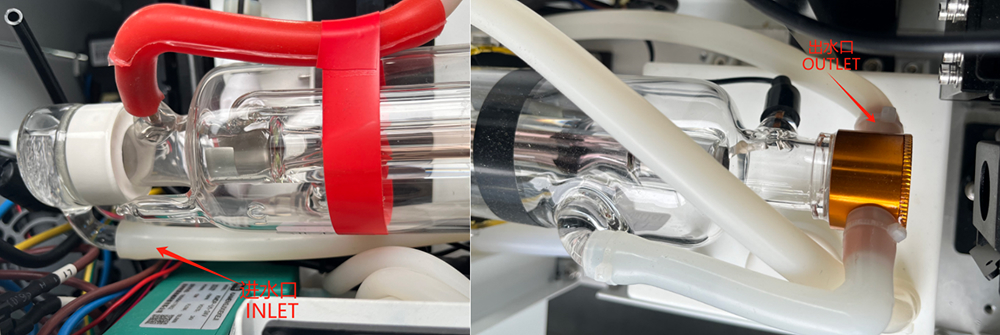
Step 3: Use a utility knife to cut the zip ties at the water inlet and outlet, then remove the water pipes.
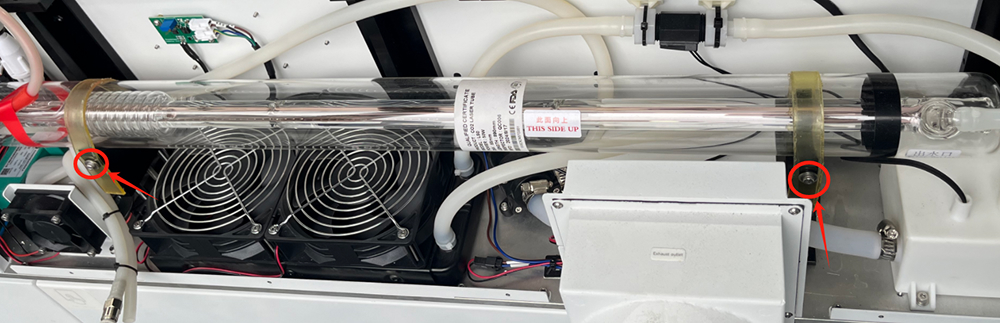
Step 4: Remove the two screws securing the laser tube and carefully take out the glass tube.
¶ 4. Install the Glass Tube
Step 1: Place the new glass tube onto the laser holder and adjust the distance to Mirror 1 using the previously recorded measurement.
Step 2: Secure the laser tube with screws and tighten the fixing tape.
Step 3: Reconnect the inlet and outlet water pipes and secure them with zip ties.
Step 4: Reconnect the positive and negative electrode wires.
Step 5: Adjust the optical path (refer to the Optical Path Adjustment Tutorial).
¶ RF Tube Replacement (XRF)
¶ 1. Tools Required
- Hex wrench
- Phillips screwdriver
¶ 2. Disassembly of the RF Tube
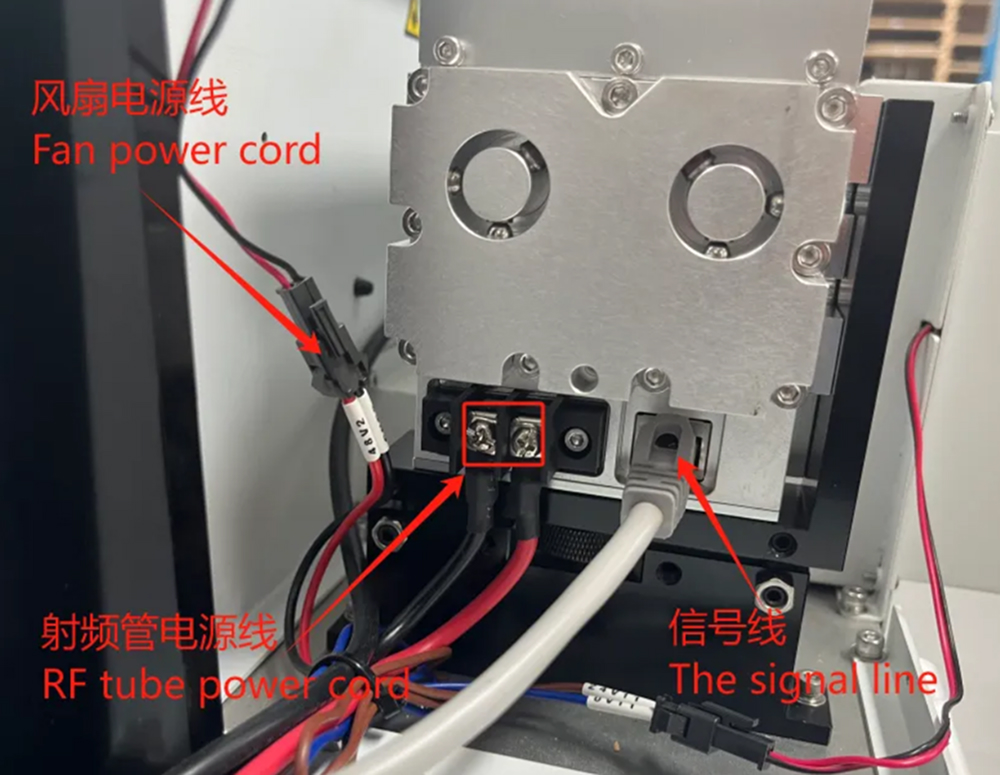
Step 1: Unplug the power cable, fan power cable, and signal cable.
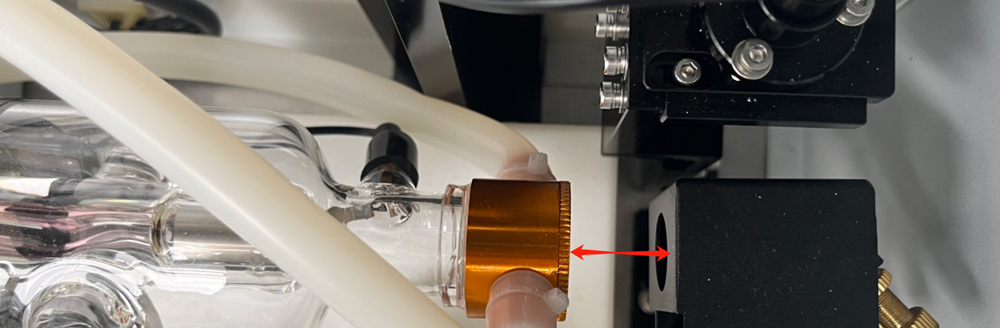
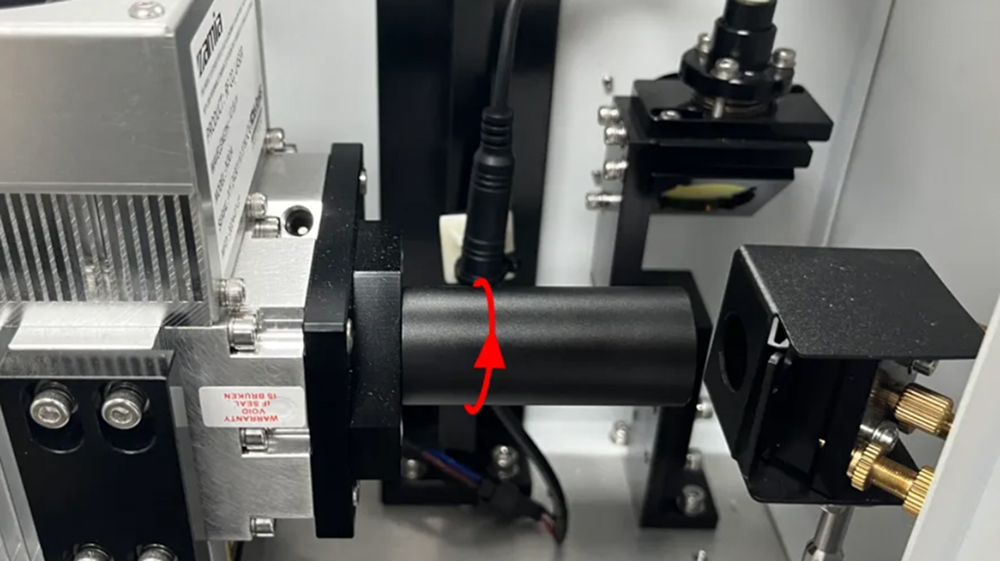
Step 2: Rotate counterclockwise to remove the beam expander.
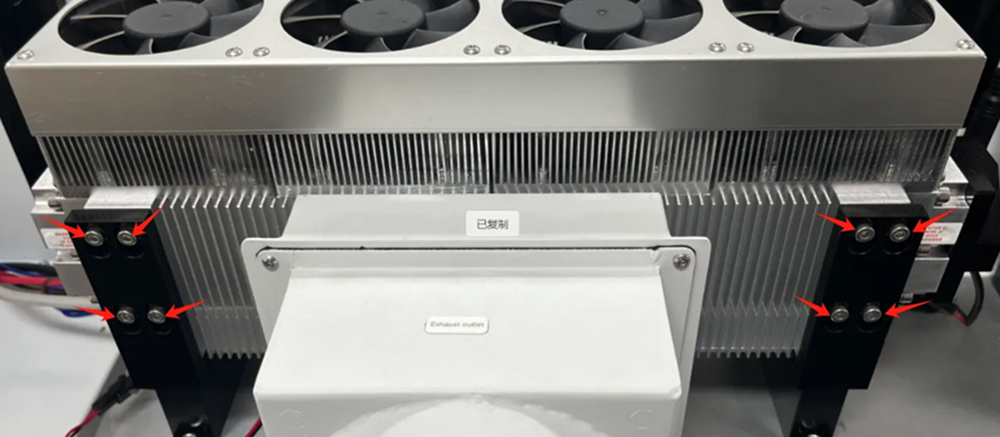
Step 3: Remove the screws securing the RF tube and take out the RF tube.
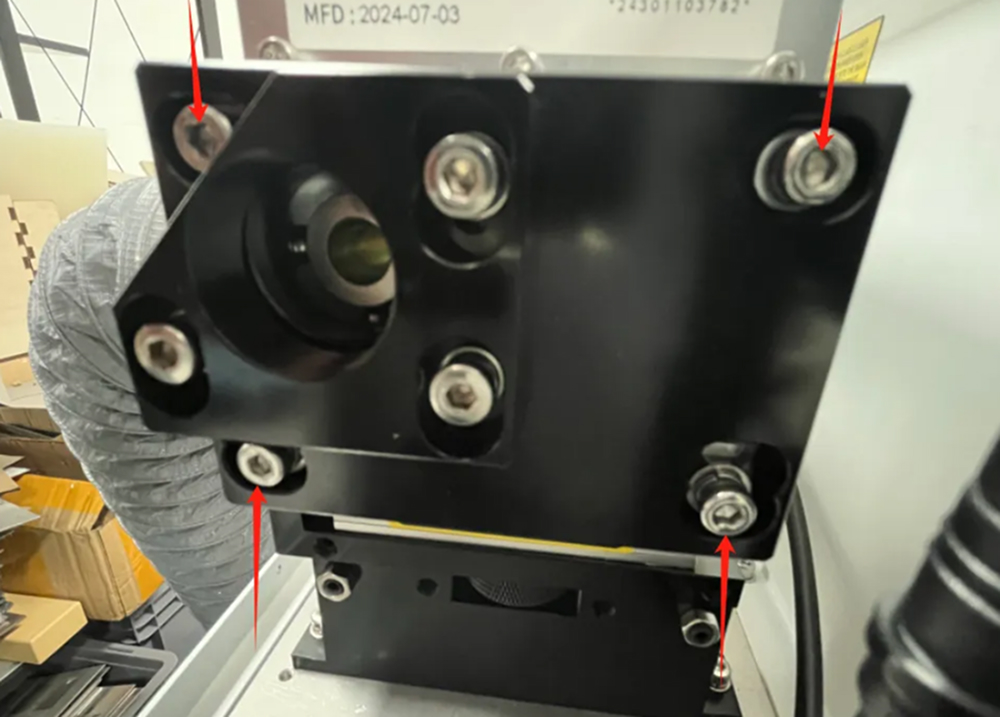
Step 4: Use a hex wrench to remove the beam expander mirror holder.
¶ 3. Installation of the RF Tube
Step 1: Install the beam expander mirror holder onto the new RF tube.
Step 2: Secure the RF tube to the mounting bracket.
Step 3: Reconnect the power cable, fan power cable, and signal cable.
Step 4: Install the beam expander.
Step 5: Adjust the optical path (refer to the Optical Path Adjustment Tutorial).