¶ Red Dot Pointer Misalignment with Laser Beam - X Series
¶ Problem Description
The red dot pointer beam is not collinear with the actual laser beam path.
¶ Cause
The red dot pointer system was not re-aligned after the main laser beam path was adjusted.
¶ Solution
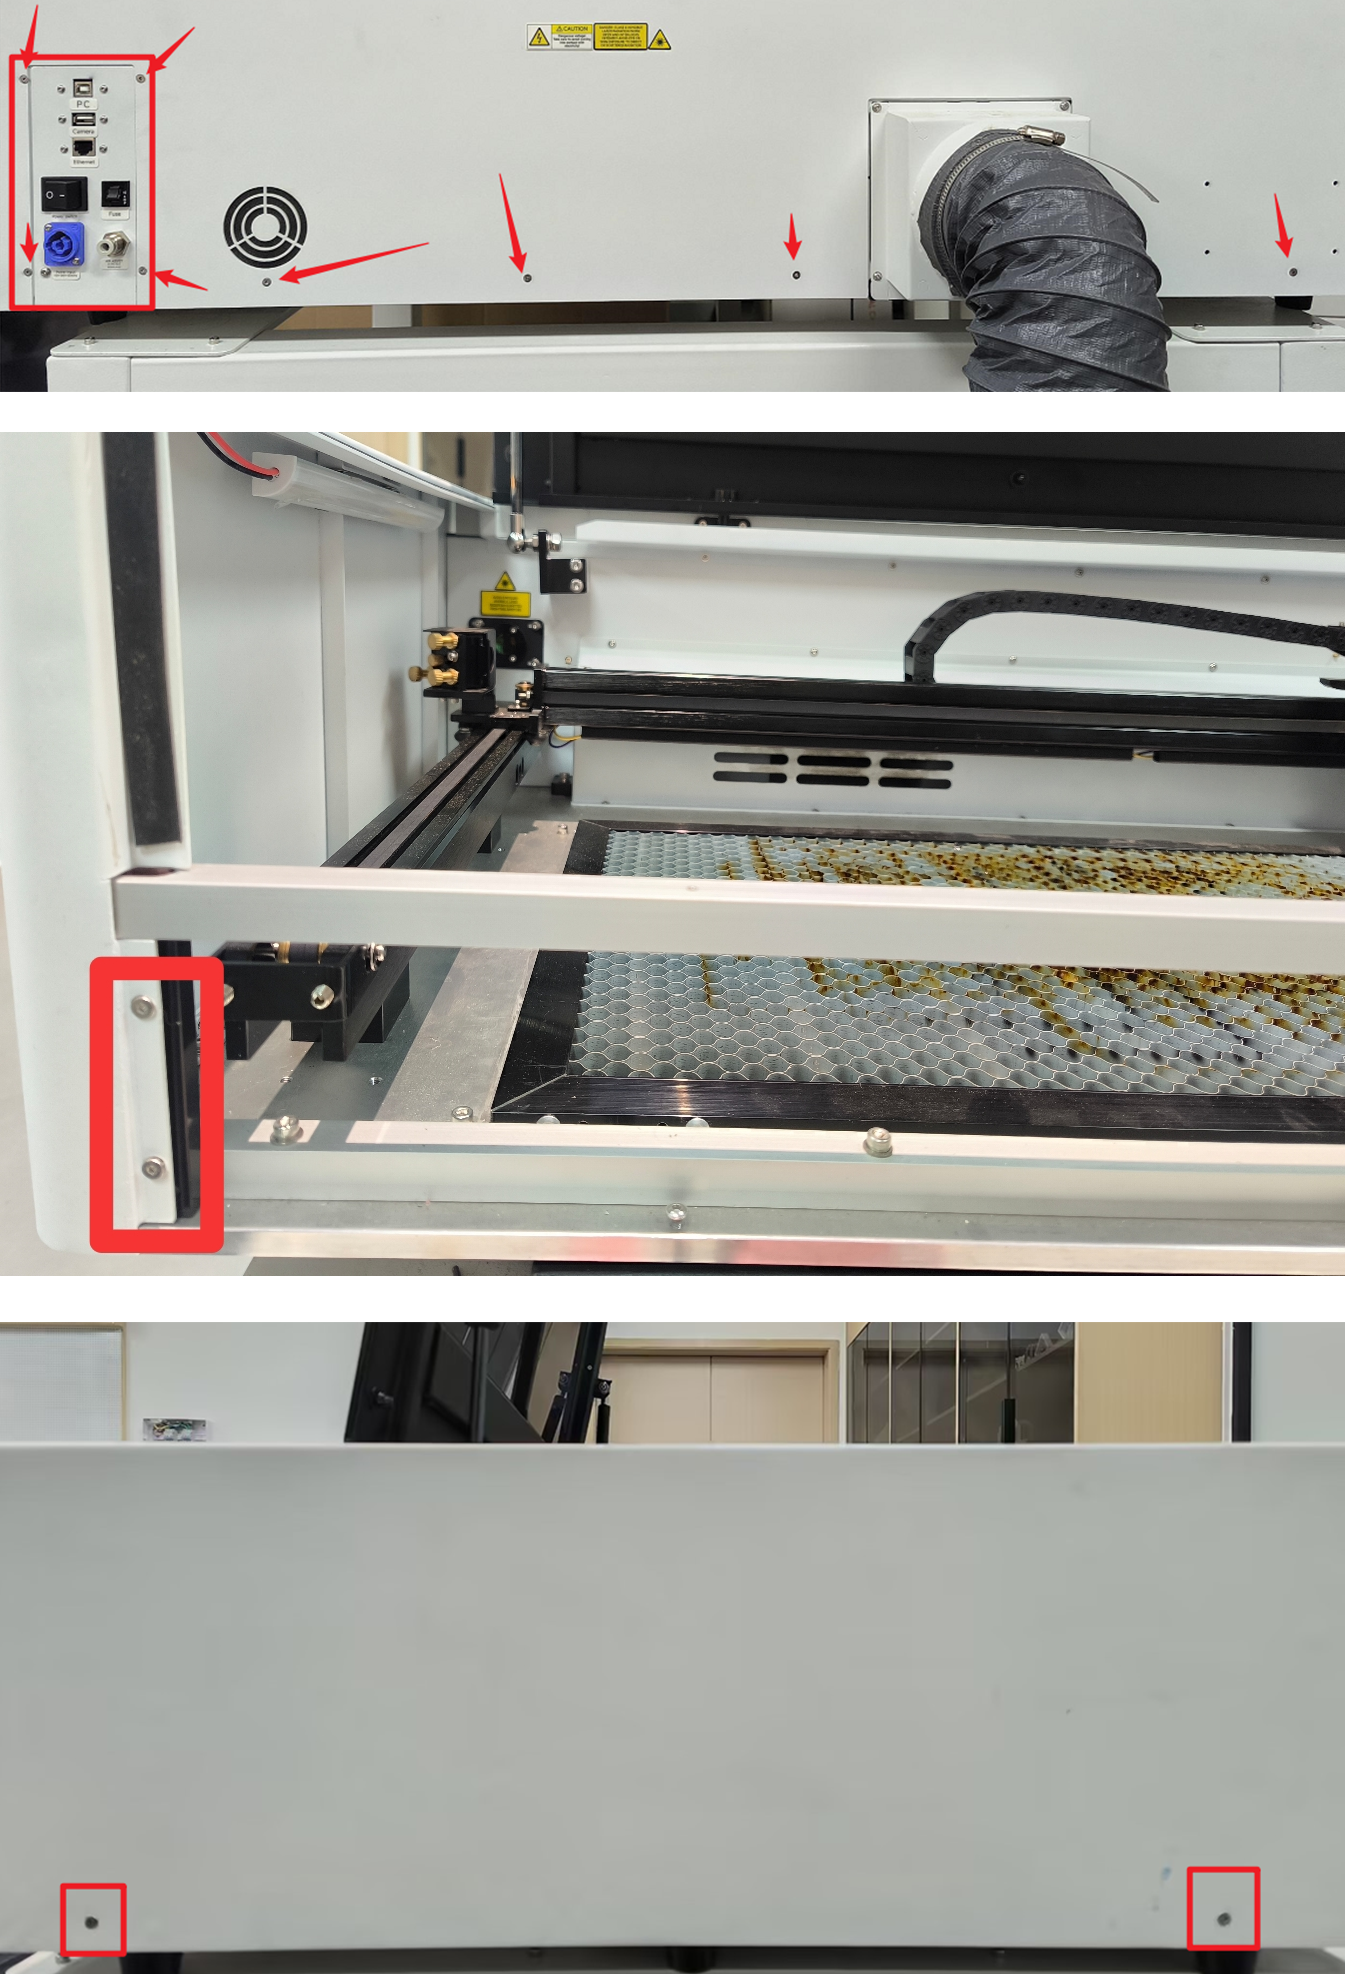
Use an M2 hex wrench to remove the machine's back cover and left side cover (remove the corresponding screws at the arrow positions indicated in the image). Please secure and store these screws.
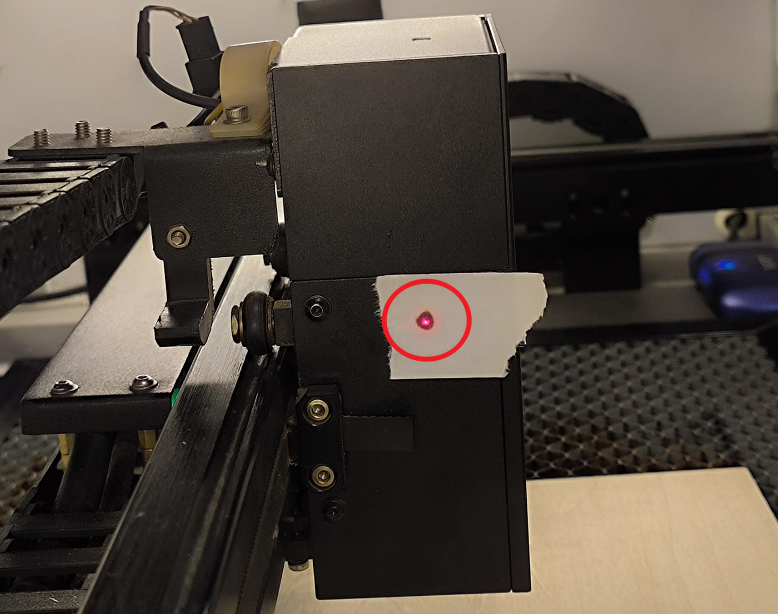
Apply a piece of double-sided tape onto the third mirror mount.
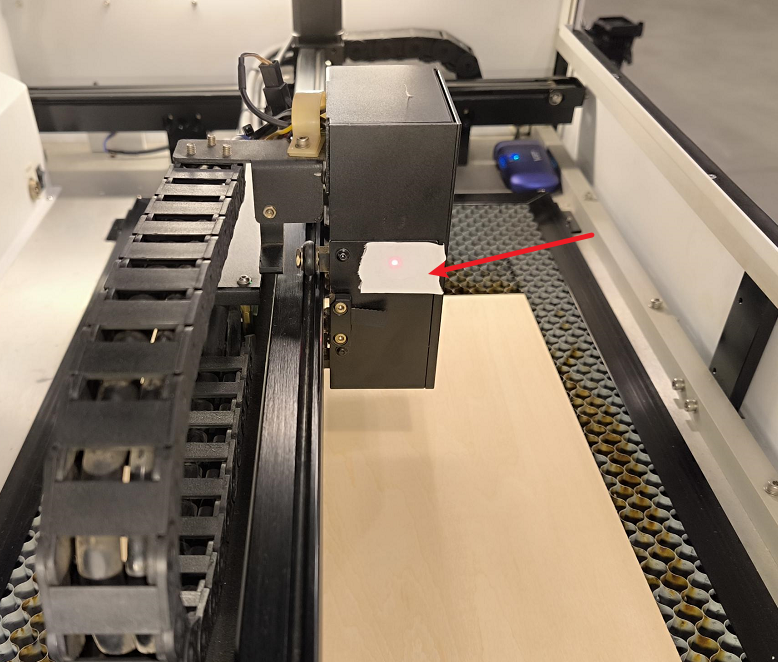
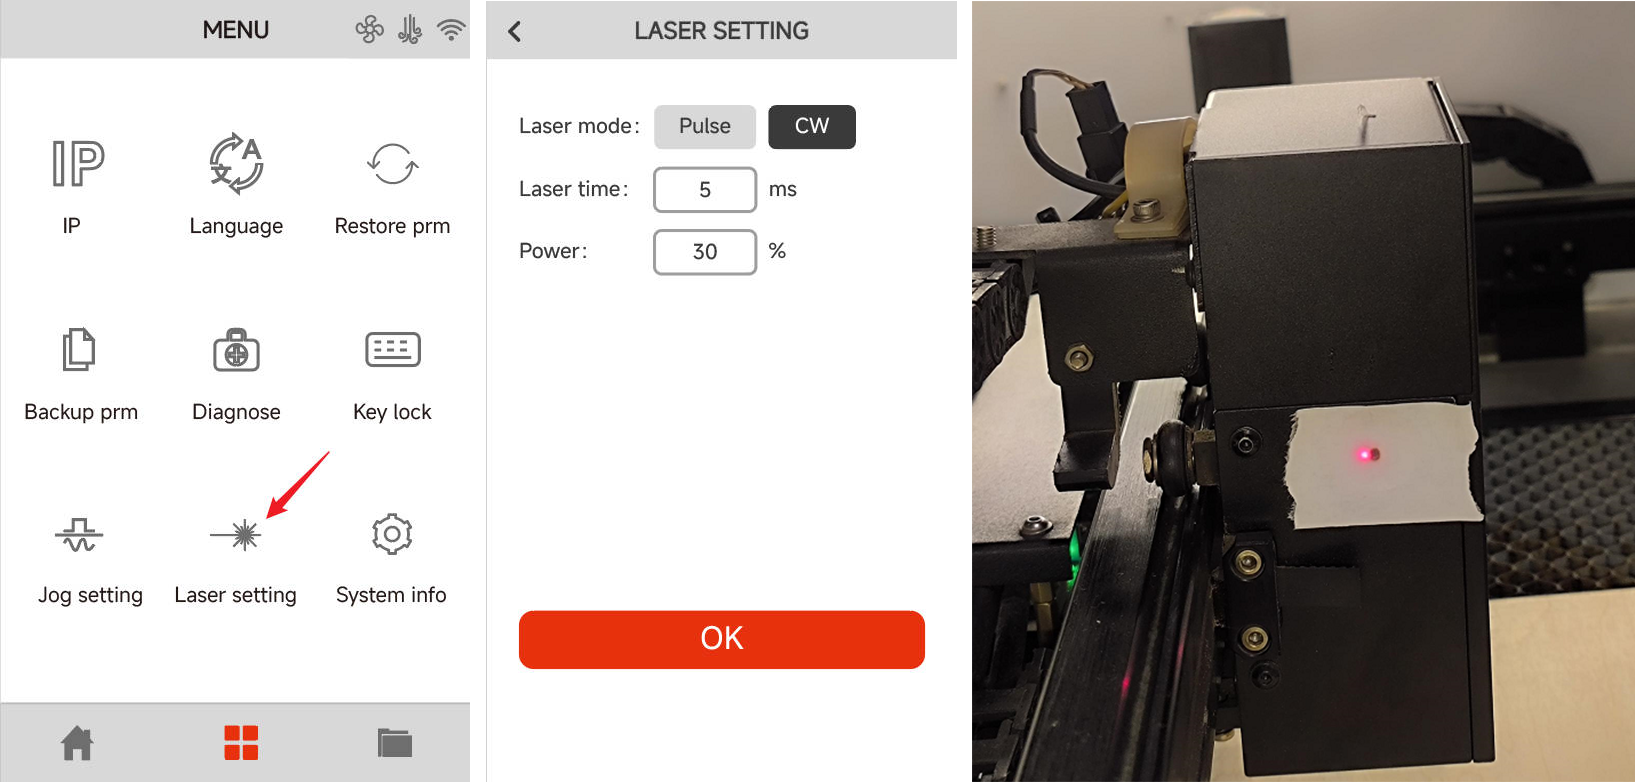
On the control panel, navigate to "Laser Setting." Set the parameters to CW, 5 ms, and 30% power. Then, tap the Pulse icon on the home page to leave a burn mark on the tape.
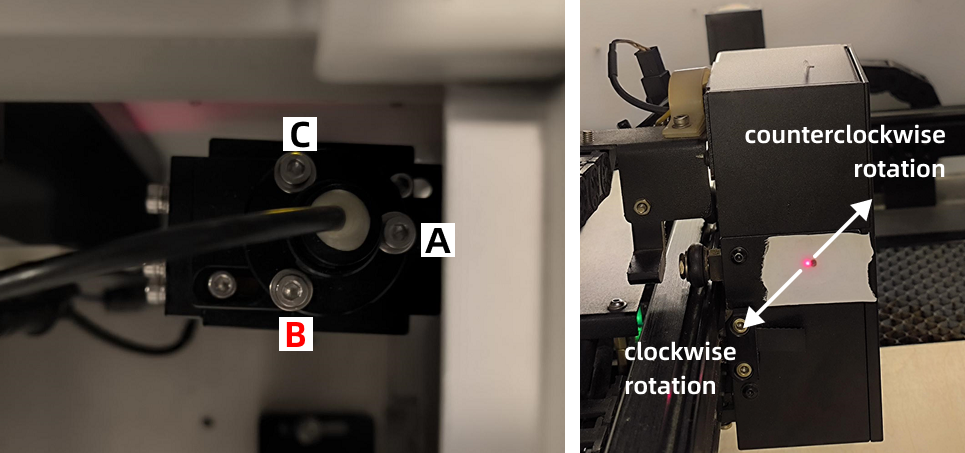
Locate the red dot indicator on the machine. Use an M3 hex wrench to adjust the three screws on the mirror mount to align the red dot position.
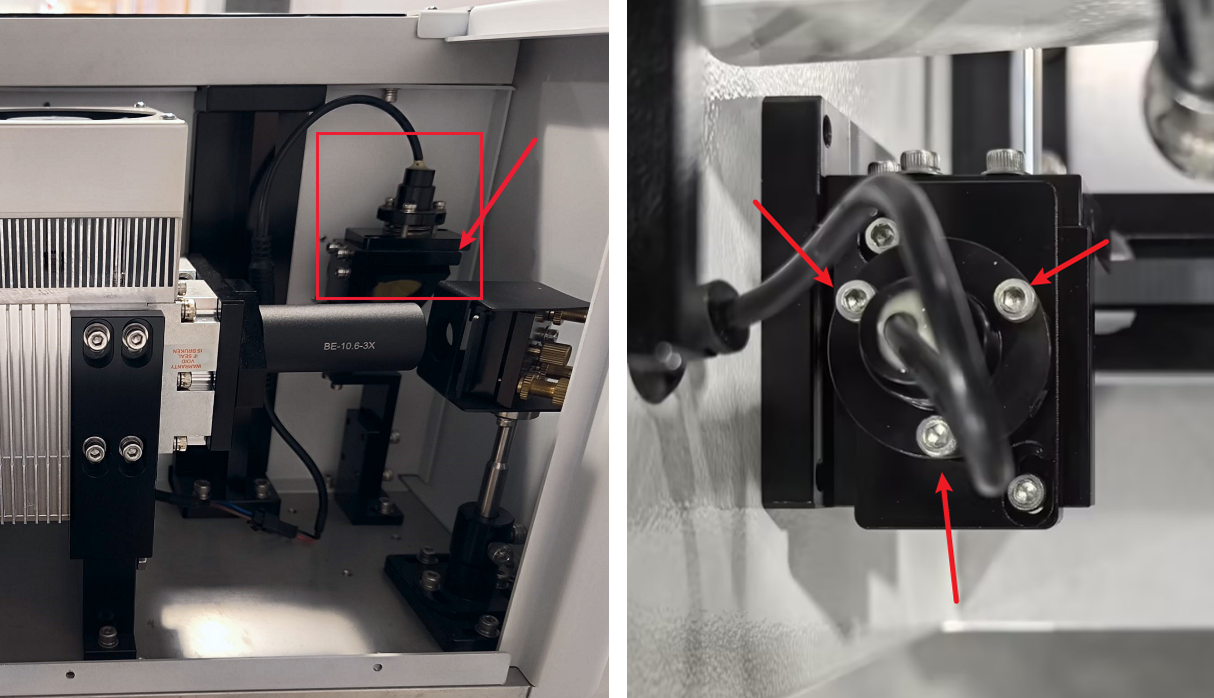
1. Screw A: Adjusts the red dot horizontally (left/right movement).
Turning clockwise moves the red dot path to the right; turning counter-clockwise moves the red dot path to the left.

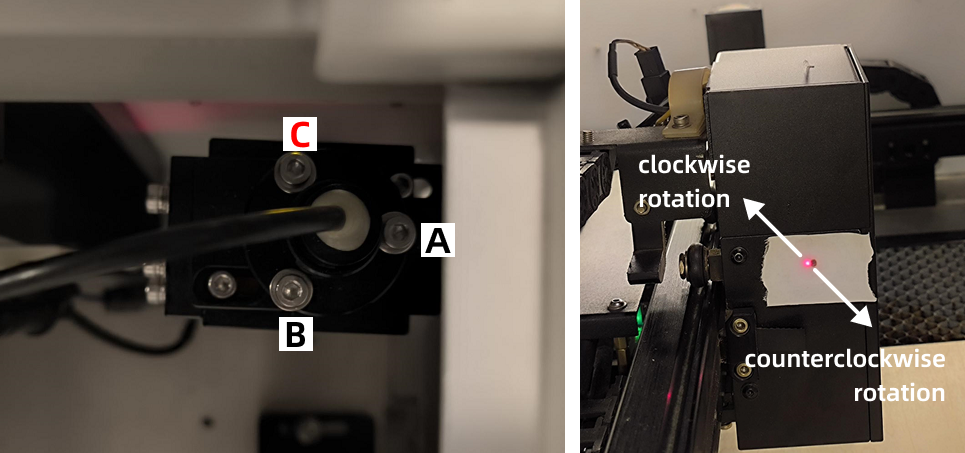
2. Screw B: Adjusts the red dot path diagonally to the upper-right and lower-left.
Turning clockwise moves the red dot path to the lower-left; turning counter-clockwise moves the red dot path to the upper-right.
3. Screw C: Adjusts the red dot path diagonally to the upper-left and lower-right.
Turning clockwise moves the red dot path to the upper-left; turning counter-clockwise moves the red dot path to the lower-right.
Adjust the red dot position until it perfectly overlaps with the burn mark left by the main laser beam.
Important Reminder:
If these steps do not resolve the issue, please submit a support ticket on ZOHO: https://zohodesk.1laser.com/portal/en/newticket. A technician will then be able to conduct a more in-depth diagnosis and resolve your problem.