¶ Replace the control panel
This guide explains how to safely replace the control panel on your OneLaser device. You’ll find important safety notes, required tools, and step-by-step instructions to ensure proper removal, installation, and reconnection of all necessary cables without causing wiring errors.
¶ Note:
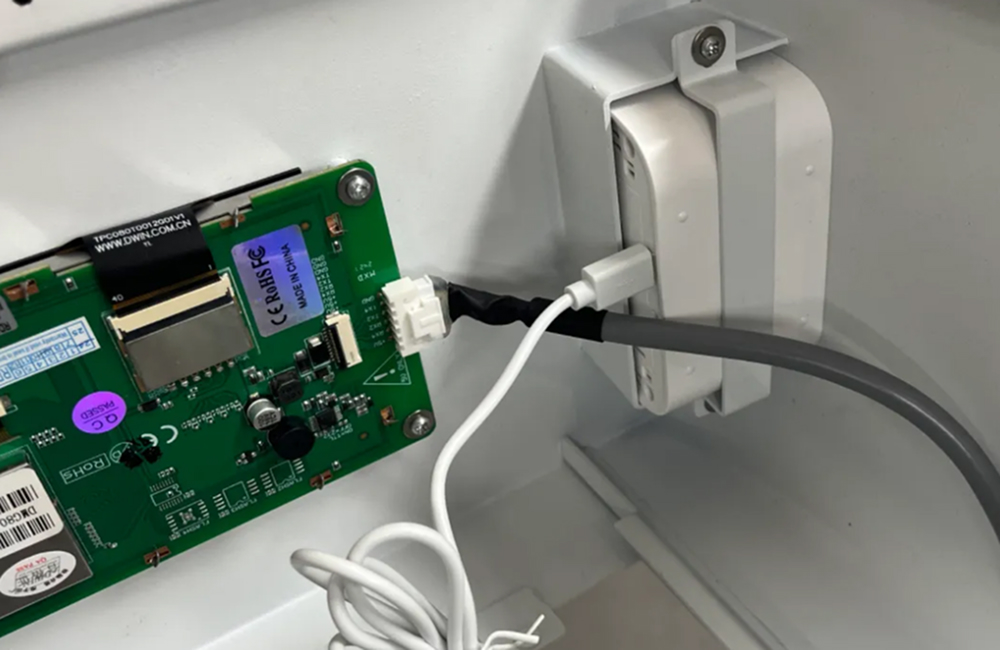
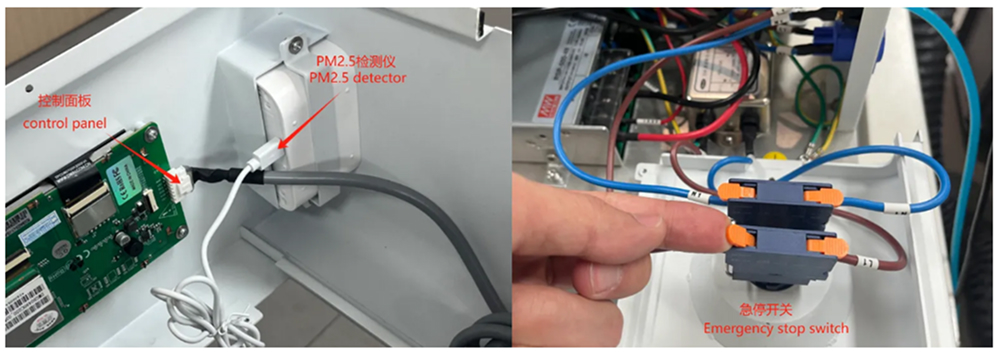
Before unplugging the cable, please take a photo to record the connection status to prevent incorrect wiring during reinstallation.
Keep the removed screws in a safe place to prevent loss.
¶ Tools Required
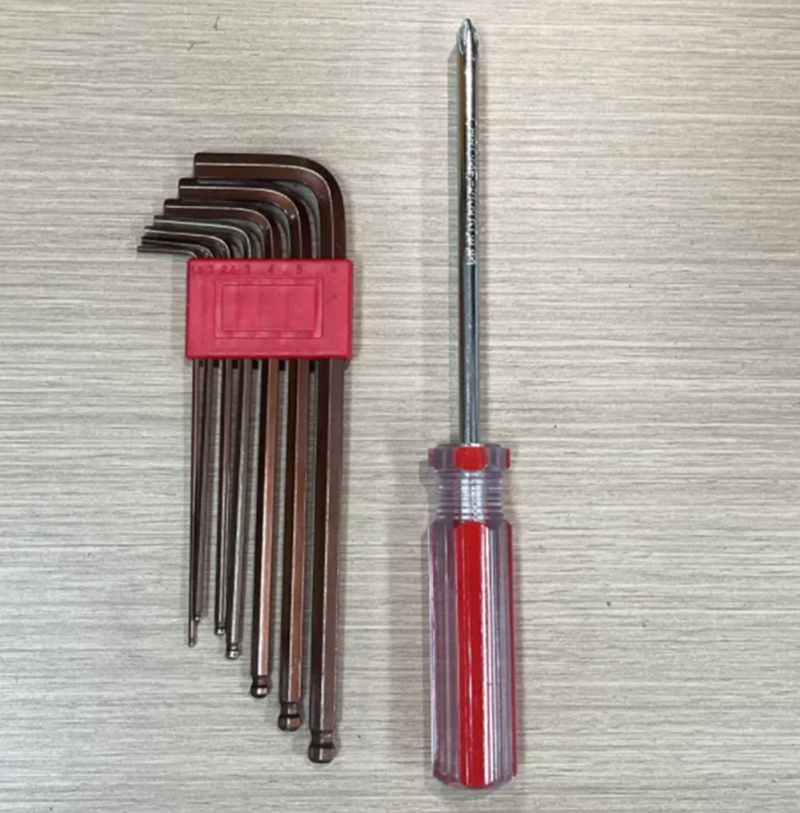
Hex wrenches (M2 & M3), Phillips screwdriver
¶ 1. Removing the Machine Enclosure
① Ensure that the device power is disconnected.
② Use the M2 hex wrench to remove the screws on the rear cover, then take off the cover.
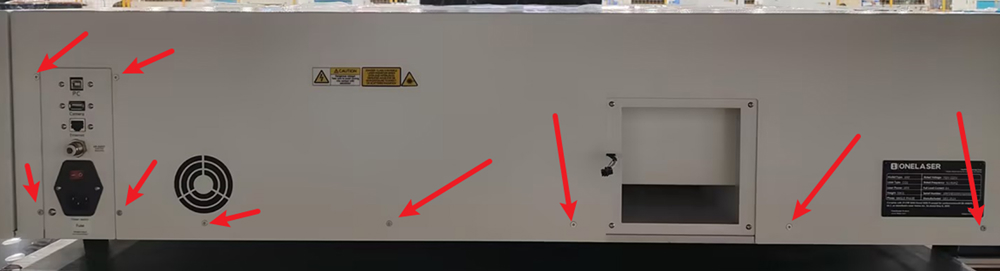
③ Remove the screws on the right-side panel.
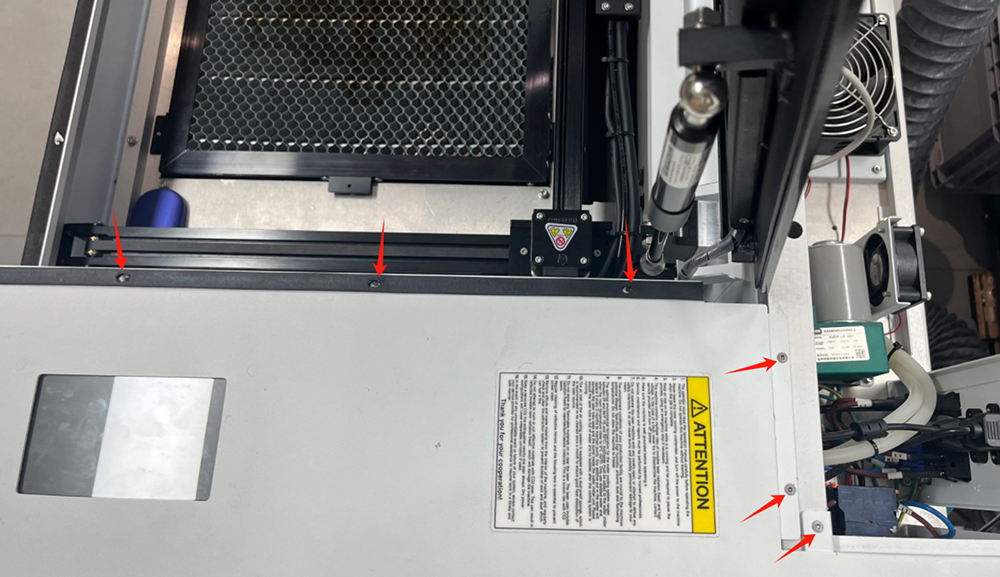
④ Before removing the right-side panel, disconnect the following cables:
- Emergency stop switch power cable
- Touchscreen signal cable
- PM2.5 detector power cable
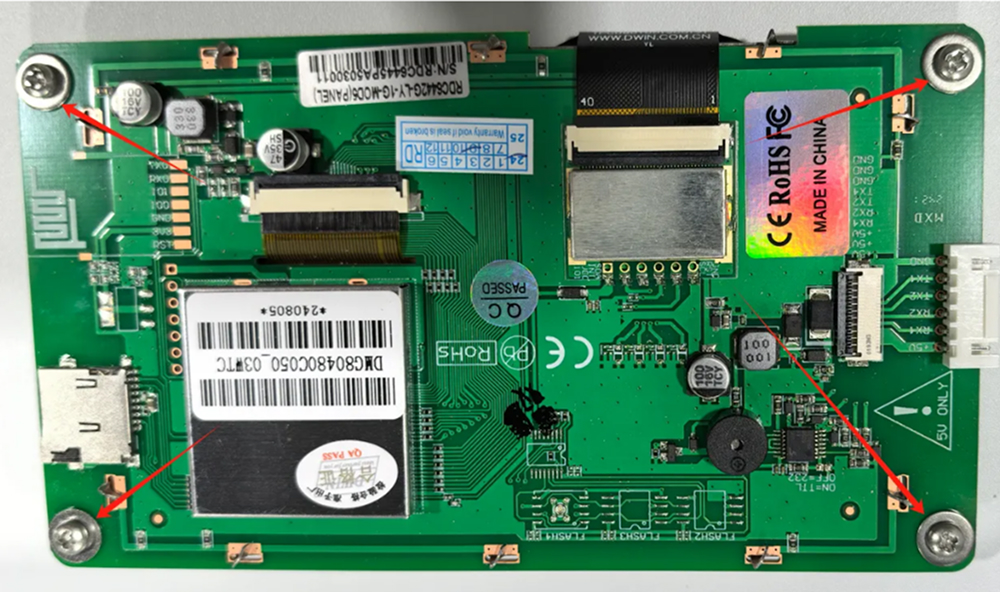
¶ 2. Remove the control panel
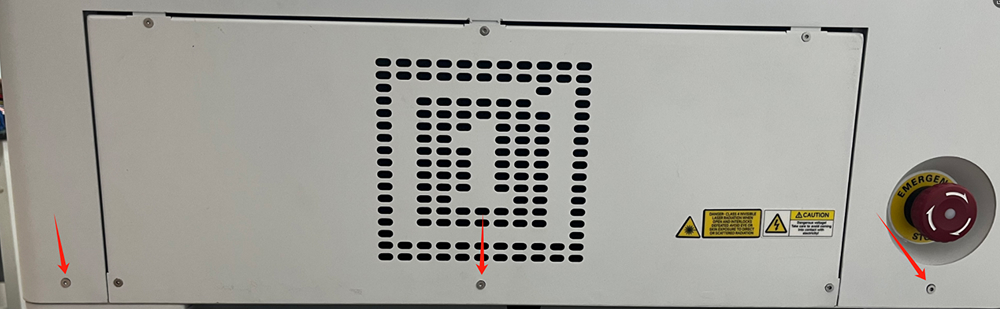
Use a Phillips screwdriver to unscrew the screws in the picture below to remove the control panel.
¶ 3. Reinstall the machine
① Re-fix the new control panel onto the chassis.
Attention: The signal cable interface of the control panel should face the PM2.5 detector and should not be installed upside down.
② Connect the emergency stop switch power cord, control panel signal cord, and PM2.5 detector power cord.
③ Install the casing and secure it with screws.