¶ How to Test the Optimal Focal Length
Testing the optimal focal length is a critical step to achieve sharp engraving, clean cuts, and consistent laser results. This guide walks you through how to test the optimal focal length using a dot test method, covering required tools, file setup, and preparation steps before running the test.
¶ Tools Required
RDWorksV8 software, Dot test focal length file, PC data cable, Limestone board
¶ Download the Focal Length Test File
Right-click the following file and select “Save to File” to save the test file on your computer hard drive.
¶ Test the Focal Length
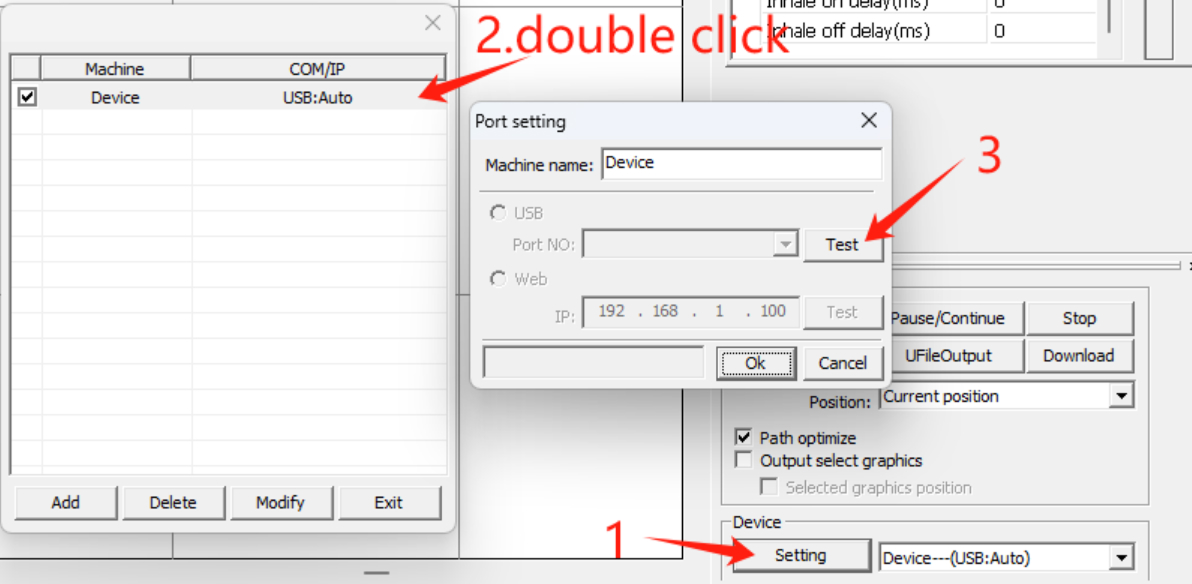
1. Start the device and connect it to the computer using a PC cable.
2. Launch RDWorksV8 software and connect to the device.
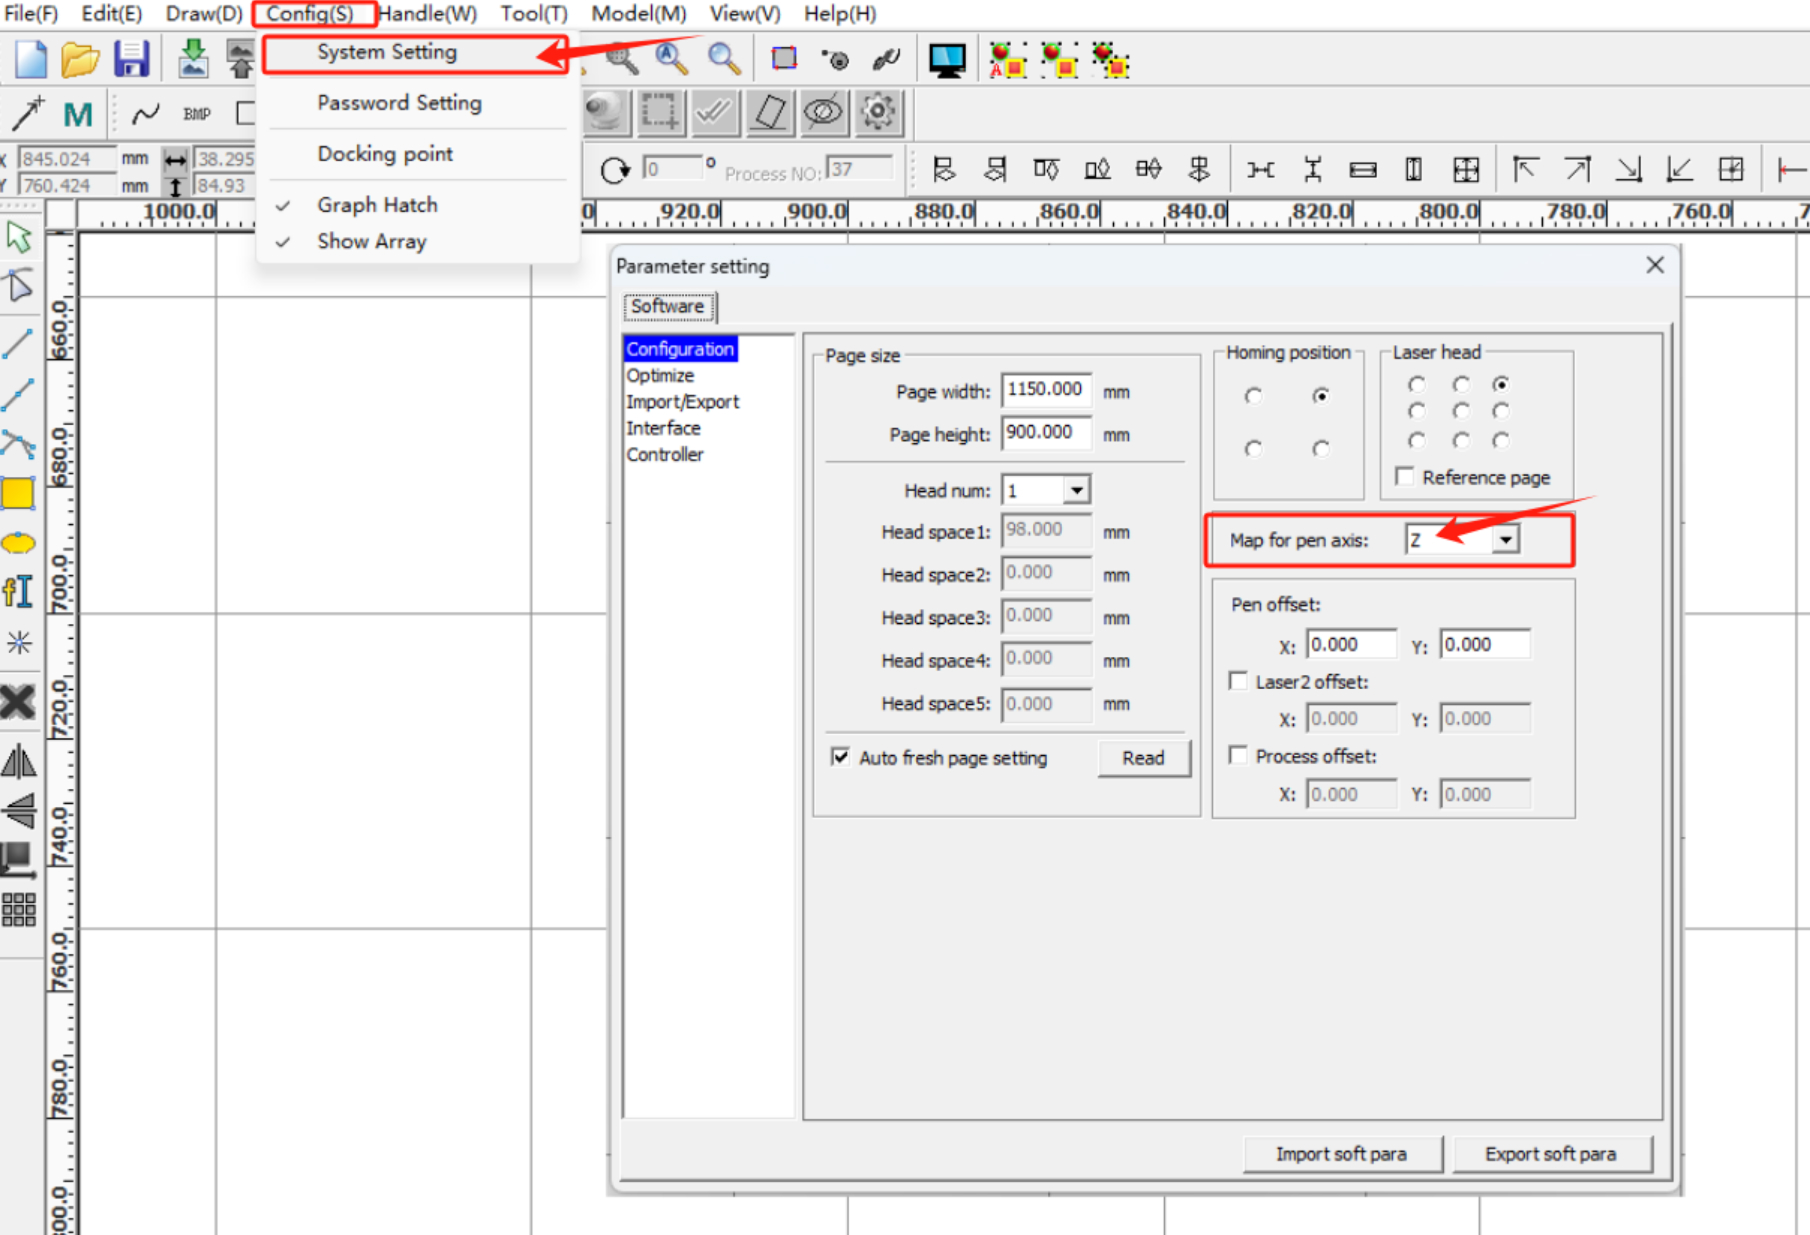
3. Click sequentially:
Config >> System Settings >> Set Map for pen axes to “Z”
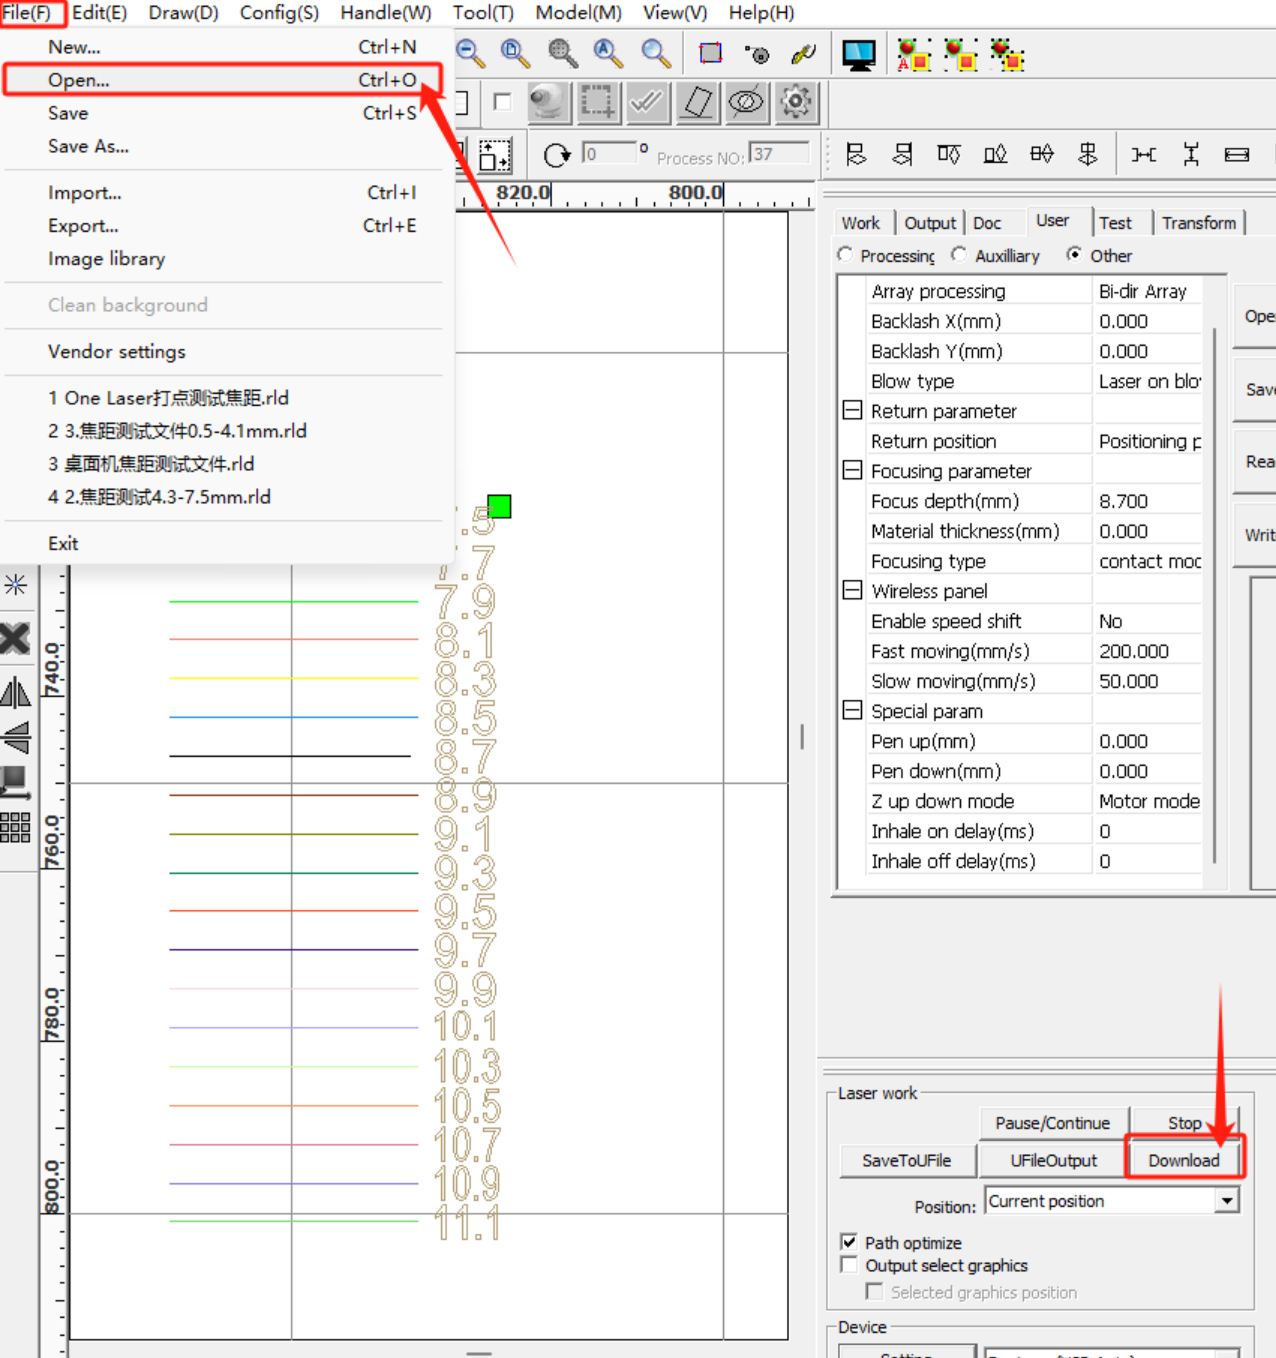
4. Open the focal length test file and click “Download” to transfer the file to the device.
5. Place the wood board on the processing platform and press the material flat.
6. Move the laser head to a suitable processing position, then click sequentially:
Positioning >> Start >> Process the drawing
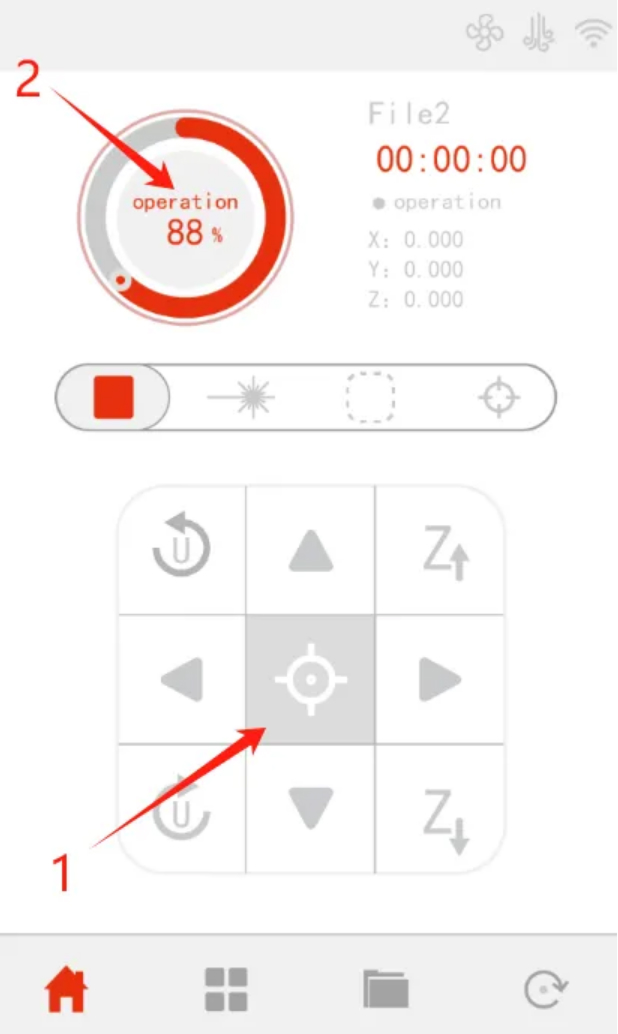
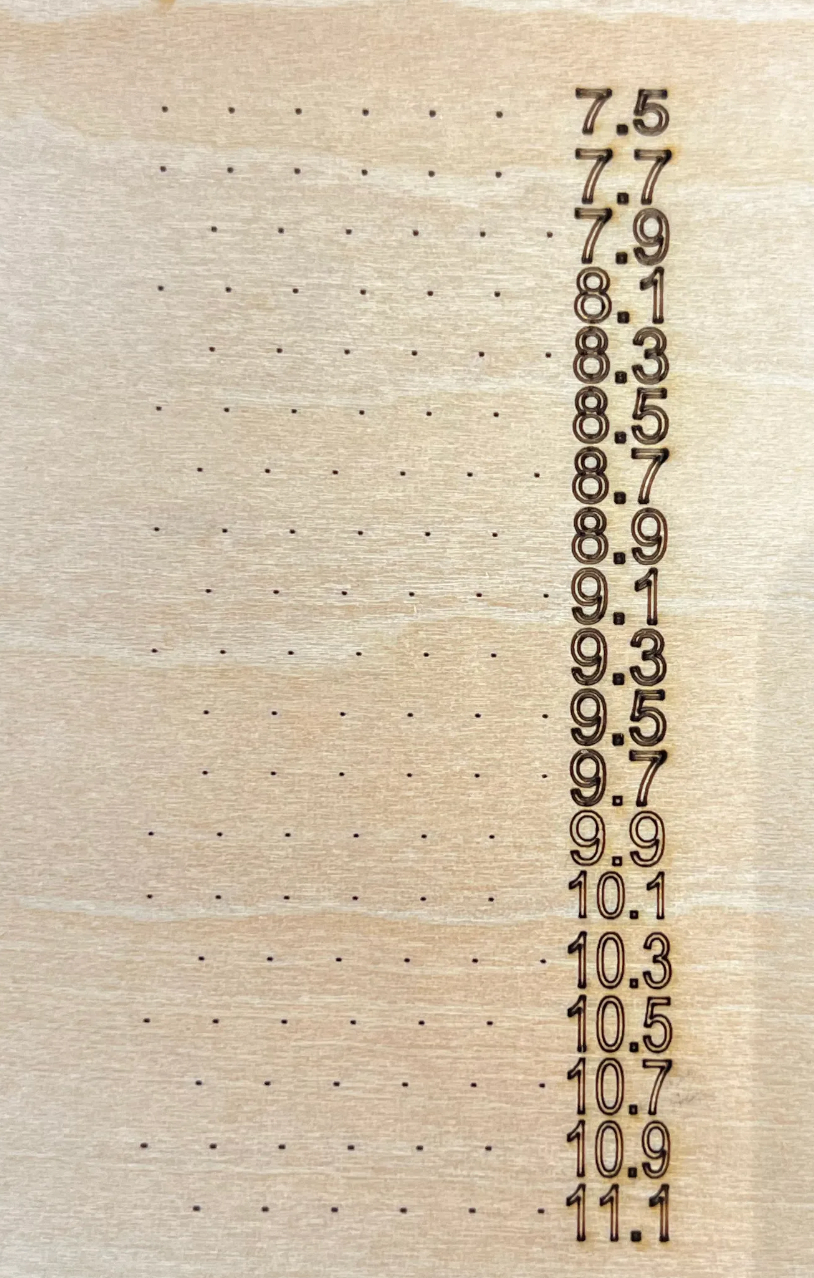
7. After processing is complete, observe the wood board and find the smallest spot. This is the optimal focal point, and the number to the right of the spot is the focal length.
¶ Note
The focal length of each device is different, please refer to the actual test results for accuracy.
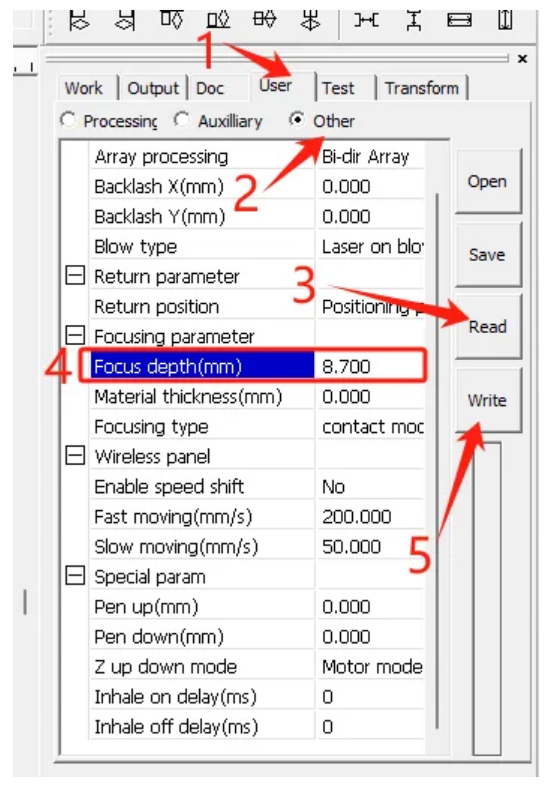
¶ Set the Focus Parameters
Refer to the diagram below and click sequentially:
User >> Other >> Read >> Enter the focal length >> Write
This completes the focus setting.