¶ Adjustment of the X-axis - Hydra Series
This page explains how to properly adjust the X-axis of your laser machine. It covers belt tension balancing and axis alignment to correct skewing, uneven movement, or positioning errors. Follow the steps carefully to ensure smooth motion and accurate cutting or engraving results.
¶ Tools required
- M2,3,4 hexagonal wrench ×1
- 5.5mm open-end wrench ×1
Note: Please complete the following operations under power-off condition and keep the removed screws properly to avoid loss.
¶ Procedure
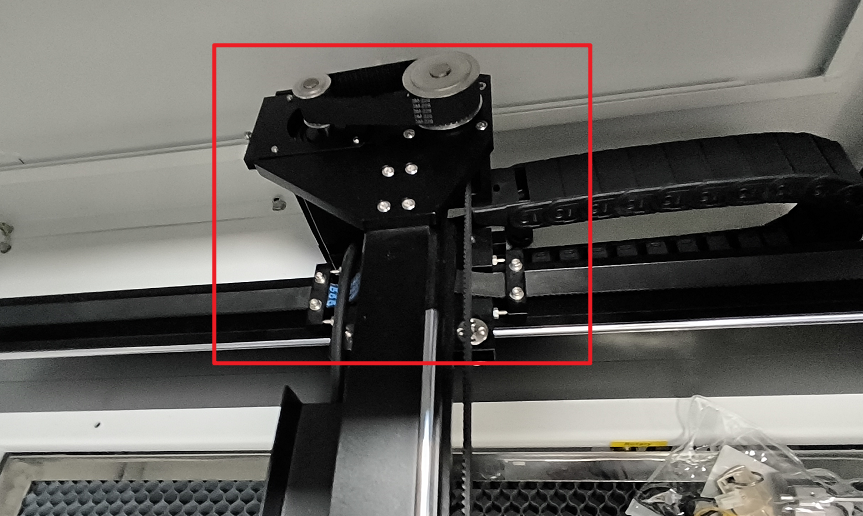
¶ Step 1. Adjust the belt (if the belt elasticity is the same on both sides there is no need to operate)
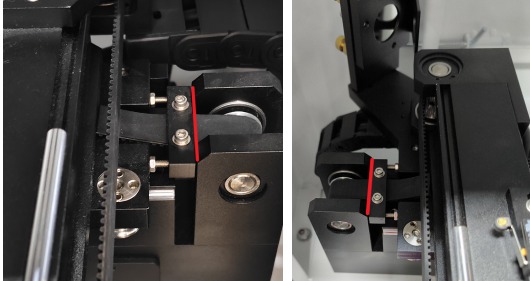
Set the tension of the belts on both sides to the same level
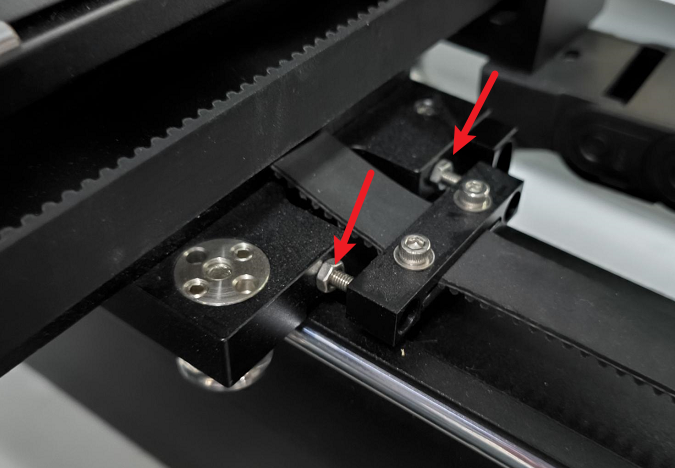
- Unlock the nut first with a 5.5mm open end wrench.

- Adjust the internal screws with M2 hexagonal wrench, tighten the belt by turning inward, loosen the belt by turning outward.
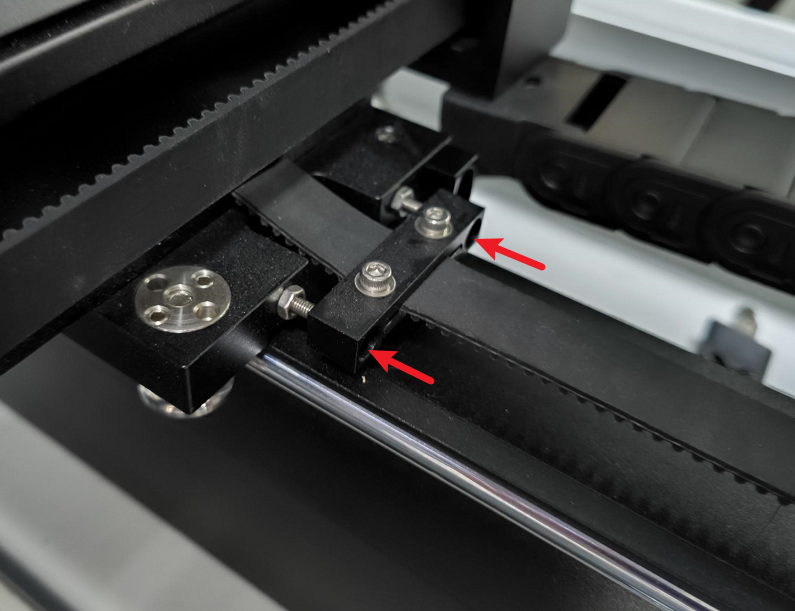
- Adjusted to check whether the two sides of the belt elasticity is consistent, you can press the belt by hand, and at the same time check whether the gap between the two sides of the screws is consistent.
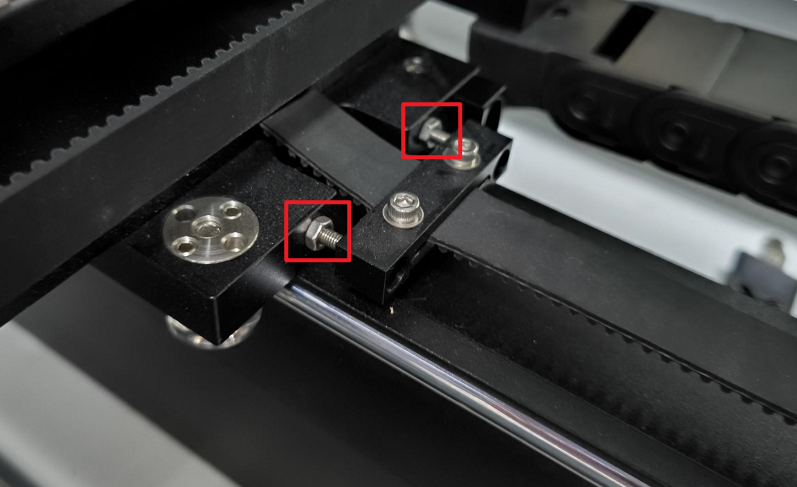
- Tighten the nut after adjustment.
¶ Step 2. Adjustment of X-axis
- If the x-axis is skewed on this side, you need to adjust the parts on this side, and similarly if it is on the other side, adjust the other side.
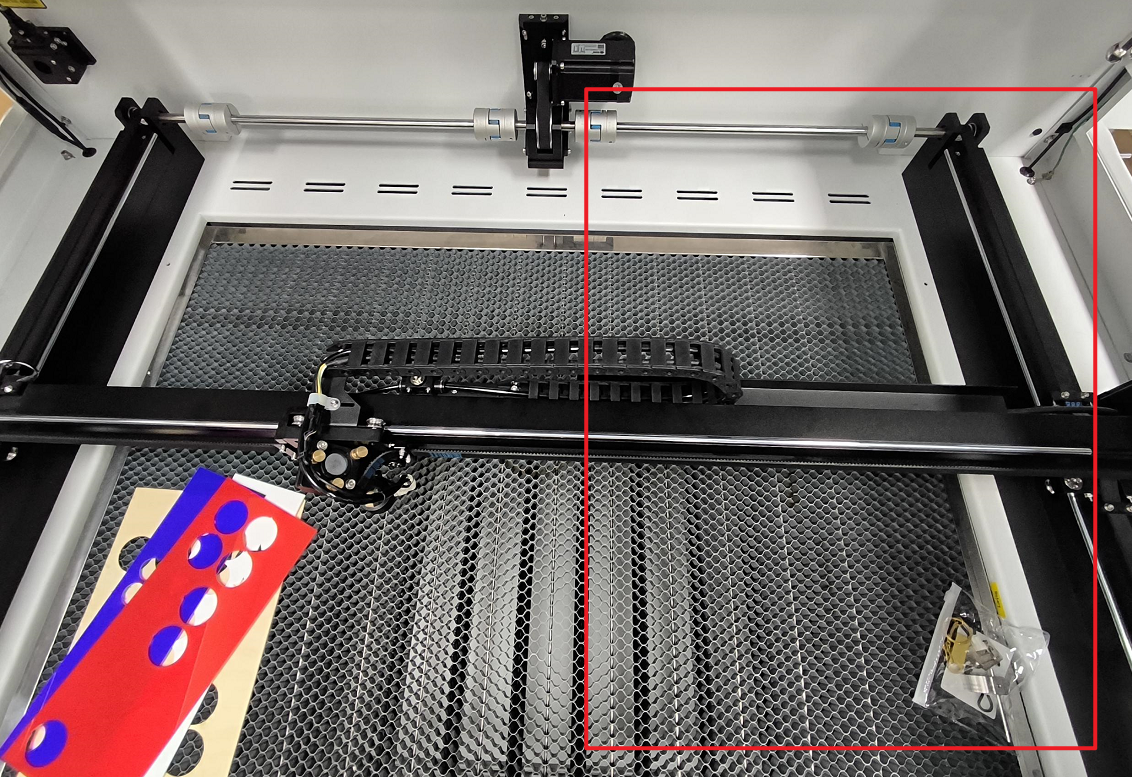
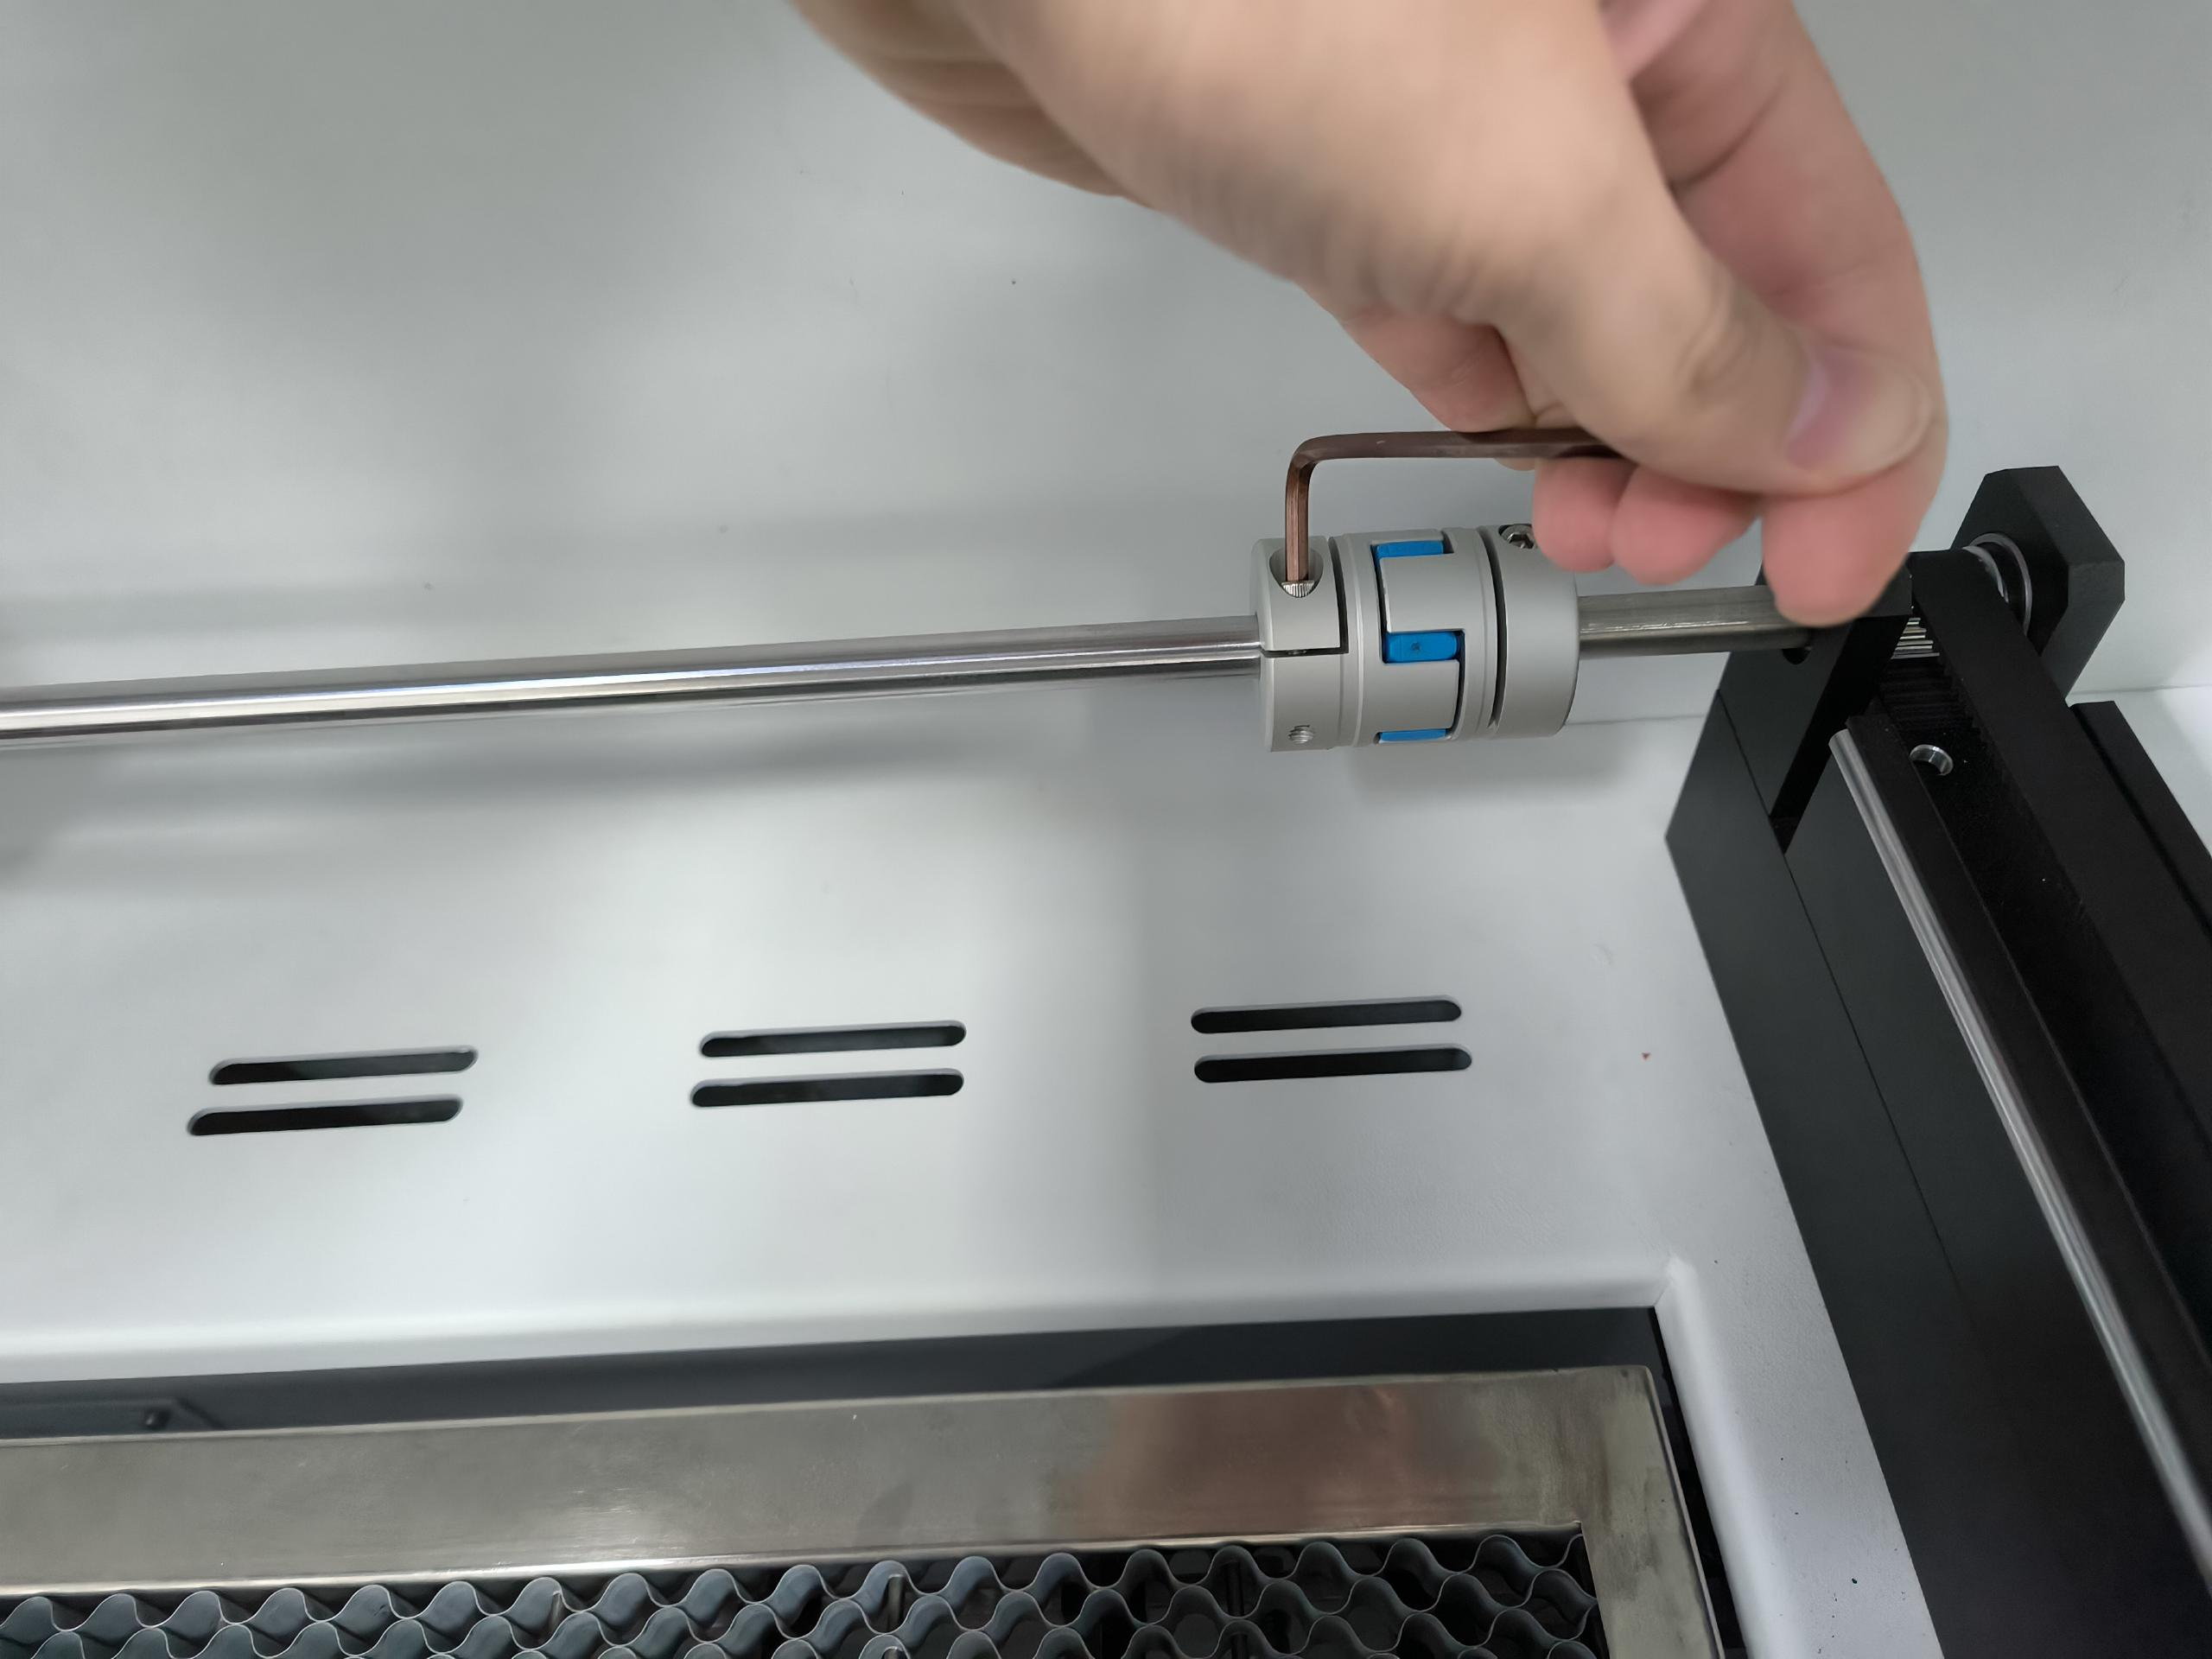
- Unlock this side of the coupling first.
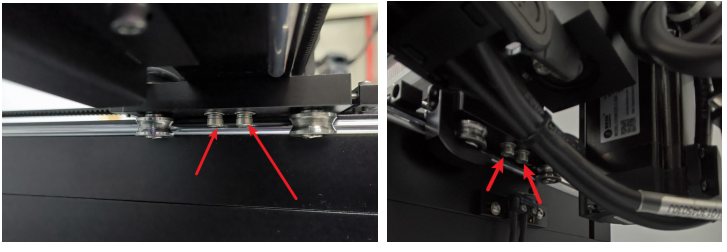
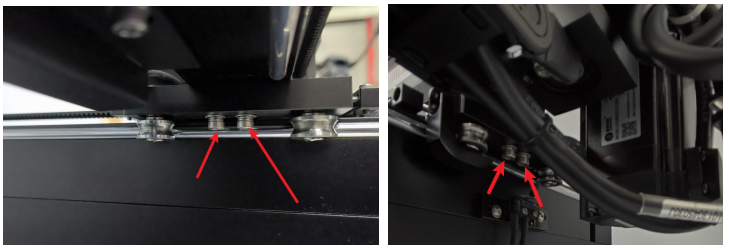
- Loosen the screws on the bottom of the y-axis slider (there are 4 of them).
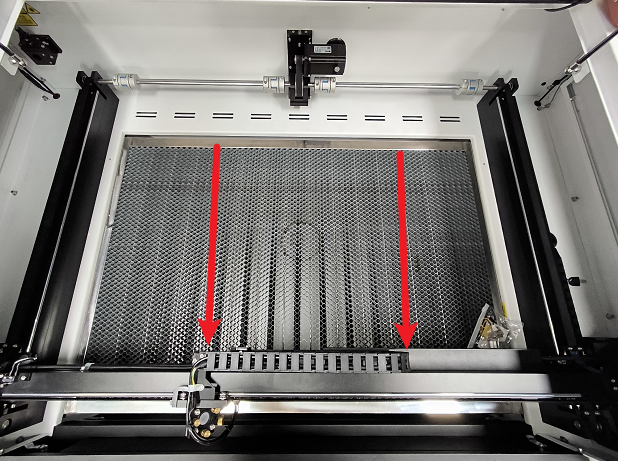
- Pull the entire X-axis to the bottom, with the bottom aligned with the tensioning seat.
- Hold the X-axis by hand and lock the coupling.
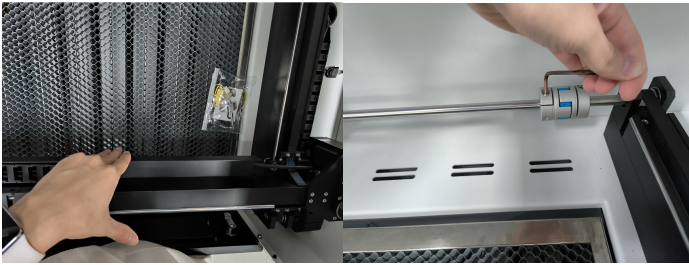
- Lock the screws on the bottom of the y-axis slider.
- Finally, push the x-axis to move and check for anomalies.
Important Reminder:
If these steps do not resolve the issue, please submit a support ticket on ZOHO: https://zohodesk.1laser.com/portal/en/newticket. A technician will then be able to conduct a more in-depth diagnosis and resolve your problem.