¶ Laser Maintenance Guide & Checklist
This Laser Maintenance Guide provides a complete checklist for cleaning and servicing your laser machine. It covers optical maintenance, hardware care, external device maintenance, and a recommended maintenance plan to ensure stable performance, longer component lifespan, and consistent engraving and cutting quality.
¶ Optical Maintenance
¶ Tools Required
Lens cleaner, Cotton swabs (Q-tip), Hex key
If the provided cleaning solution runs out, use absolute ethanol to clean the lens. Do not use isopropyl alcohol, as it may damage the lens coating.
If cotton swabs are unavailable, use a soft, lint-free cloth or high-quality cotton swabs.

¶ Mirror 1 Cleaning
Step 1: Power off the machine.
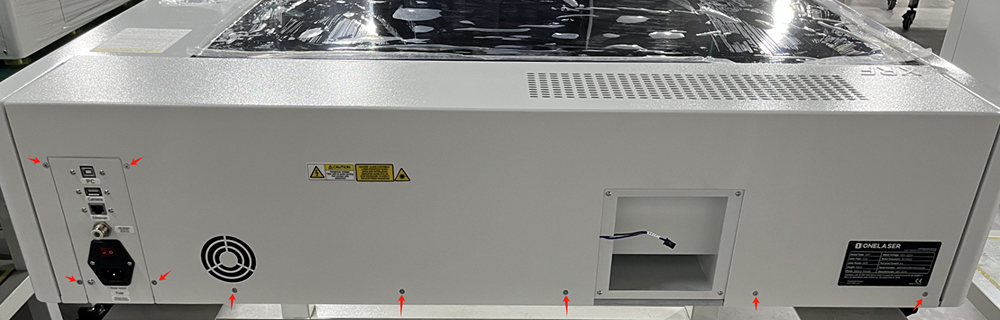
Step 2: Unscrew the rear cover screws and remove the rear case cover.
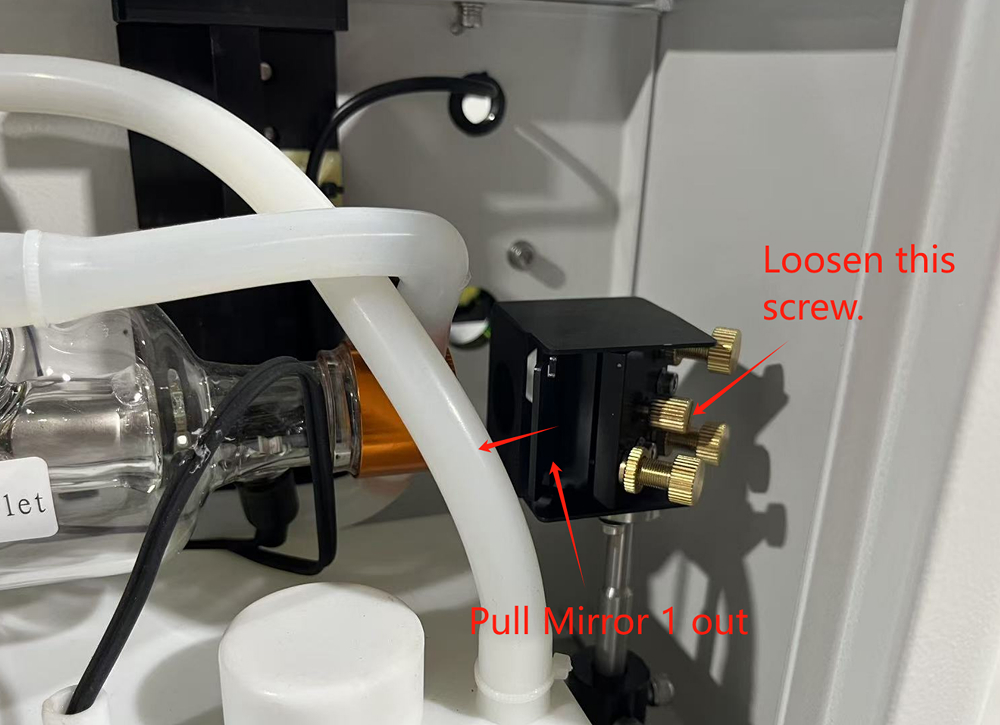
Step 3: Loosen the screws securing the reflector and remove Mirror 1.
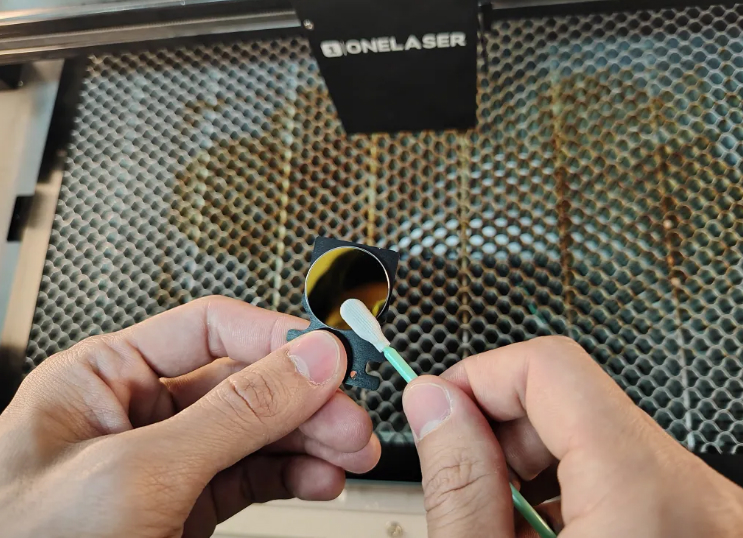
Step 4: Use a cotton swab soaked with optics cleaning fluid to clean the surface.
Step 5: Use a clean, dry cotton swab to remove any remaining moisture or residue.
¶ Beam Combiner Cleaning
Step 1: Use a cotton swab soaked with optics cleaning fluid.
Step 2: Wipe gently and finish with a clean, dry swab to remove water spots.
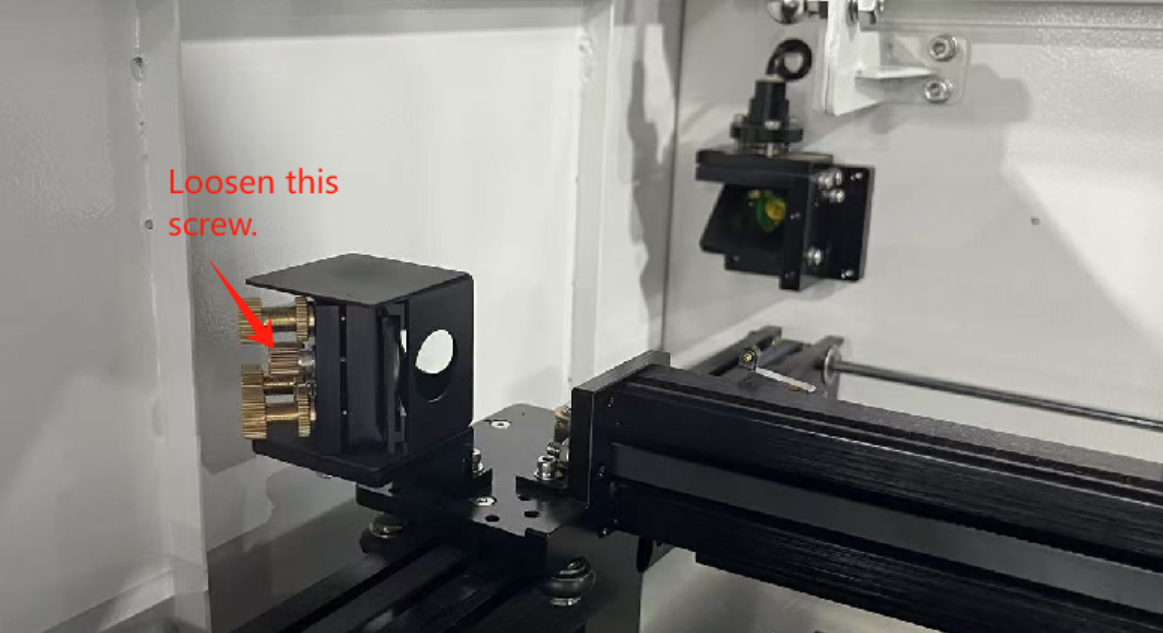
¶ Mirror 2 Cleaning
Step 1: Loosen the screws securing the reflector and remove Mirror 2.
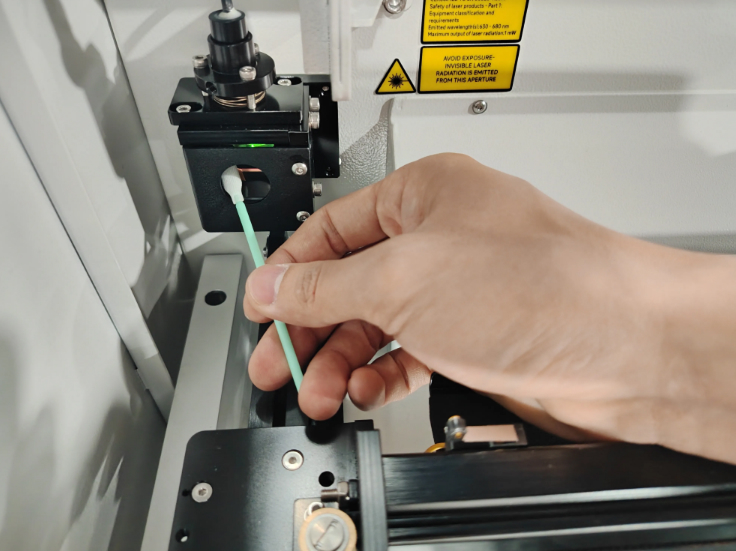
Step 2: Clean with a cotton swab soaked in optics cleaning fluid.
Step 3: Wipe dry with a clean cotton swab.
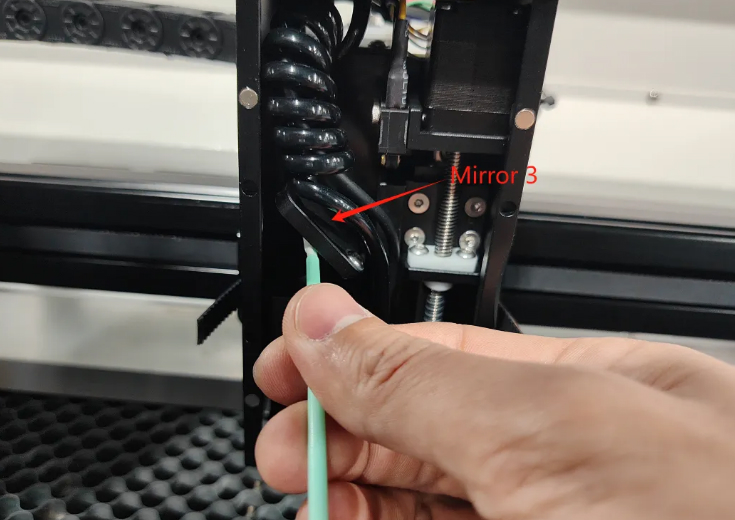
¶ Mirror 3 Cleaning
Step 1: Remove the front cover of the laser head.
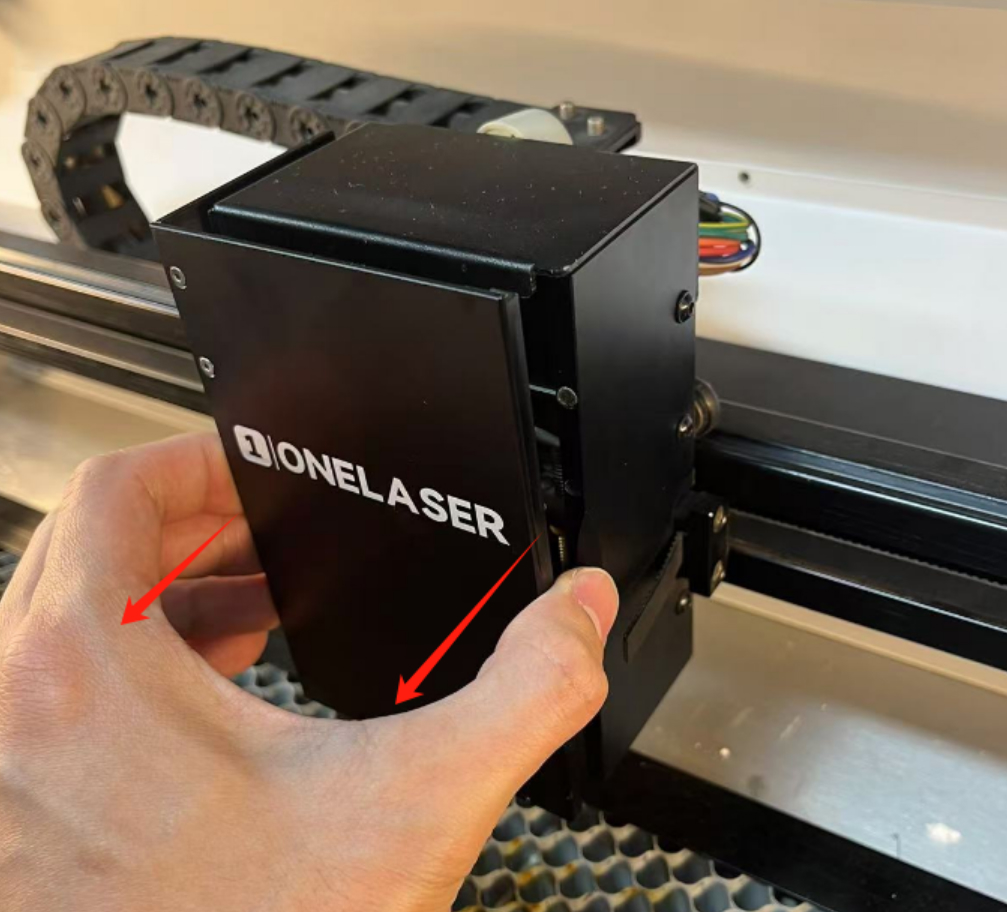
Step 2: Clean the mirror with a cotton swab soaked in optics cleaning fluid.
Step 3: Use a dry swab to remove any remaining moisture.
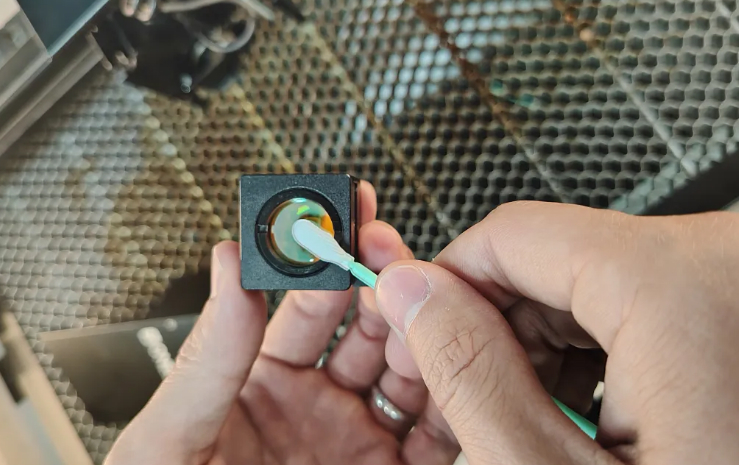
¶ Focusing Lens Cleaning
Step 1: Remove the focusing lens mount.
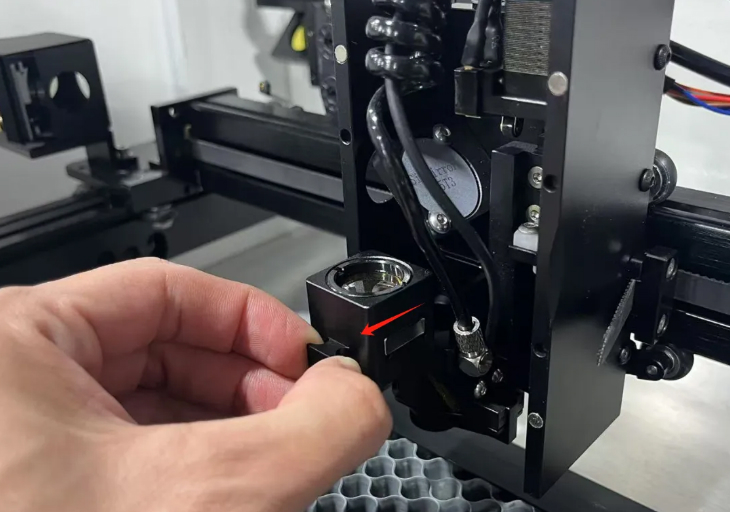
Step 2: Clean the lens with a cotton swab soaked in optics cleaning fluid.
Step 3: Dry gently with a clean cotton swab.
¶ Hardware Maintenance
¶ Tools Required
- Lubricating oil
- Air blow gun (self-provided)
- Soft brushes (self-provided)
- Rags (self-provided)
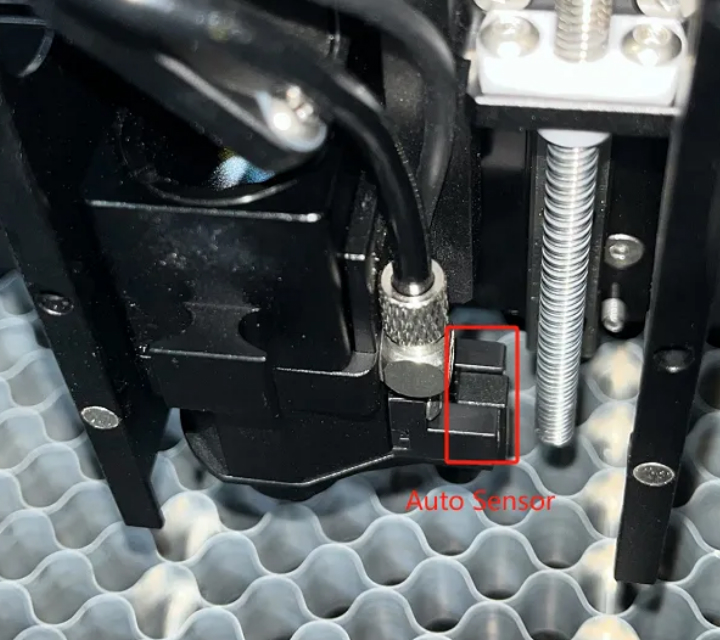
¶ Auto Sensor
Step 1: Blow away large dust particles using an air blow gun.
Step 2: Use a dry cloth to remove remaining dirt from the sensor.
¶ Rails, Belts, Gears, Rollers
Step 1: Blow away large dust particles with an air blow gun.
Step 2: Wipe rails and belts with a dry cloth.
Step 3: Use an alcohol-dampened cloth to finish cleaning.
Step 4: Clean gears and rollers with a dry cloth, then wipe with an alcohol-dampened cloth.
¶ Screw Rods
Step 1: Wipe the screw rod with a dry cloth to remove dirt.
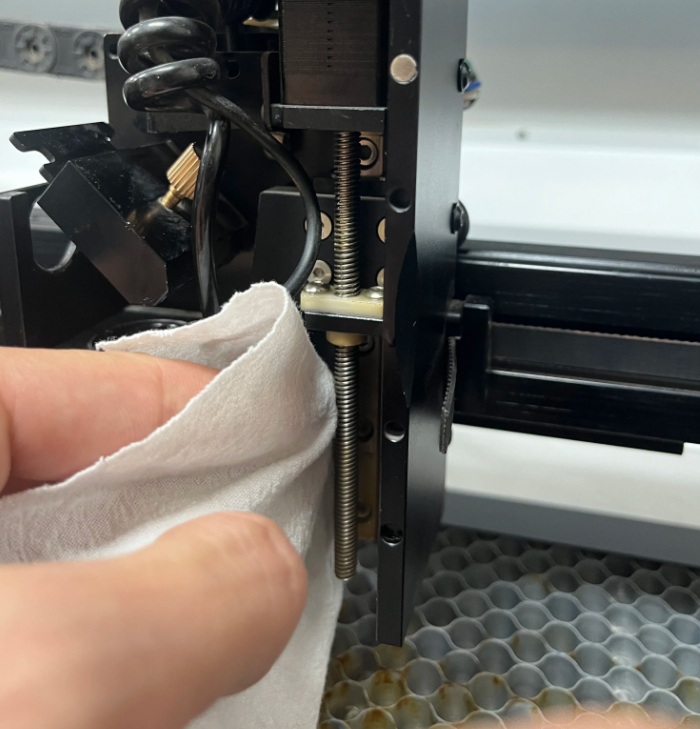
Step 2: Apply a small amount of lubricant to the top of the screw rod.
Raise and lower the laser head to distribute lubricant evenly.
Do not use excessive lubricant, as this can attract dust and dirt.

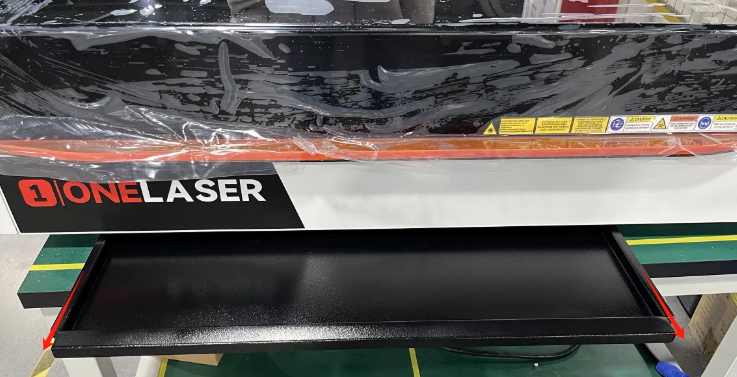
¶ Scrap Drawer
Remove the waste drawer and empty its contents regularly to prevent debris buildup.
¶ Cooling Fan
Step 1: Blow away large dust particles from the fan using an air blow gun.
Step 2: Use a dry cloth to clean dust residue from the fan blades.

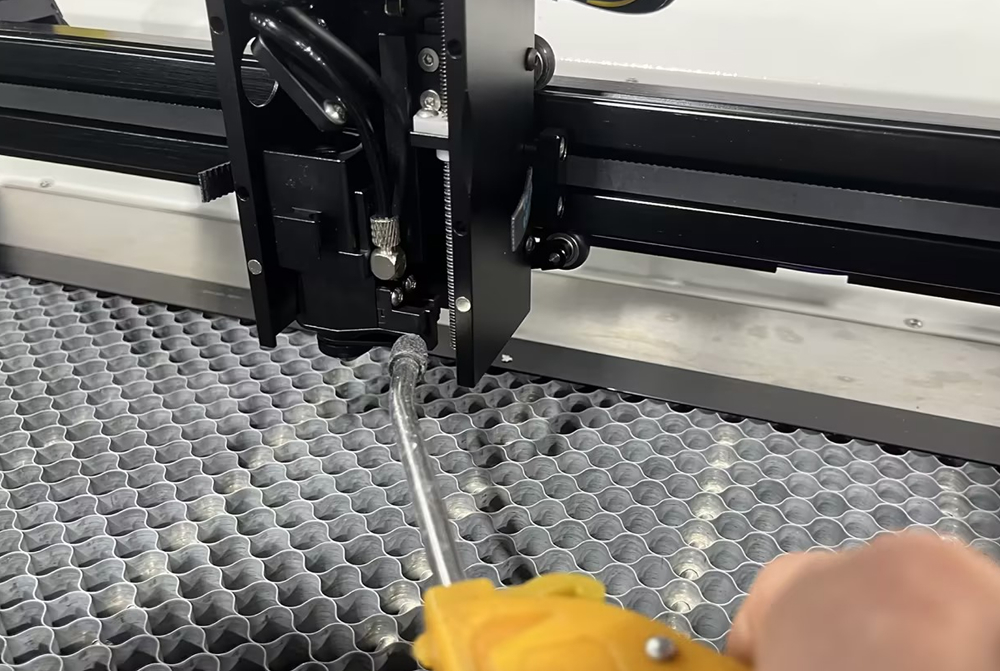
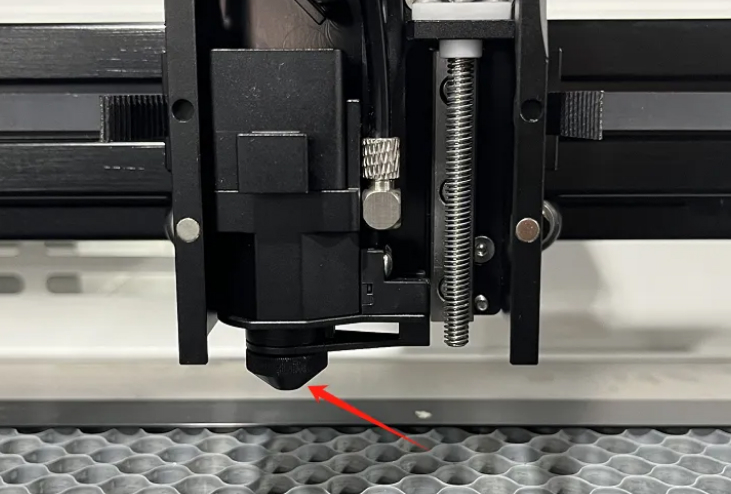
¶ Laser Head Blow-Off Nozzle
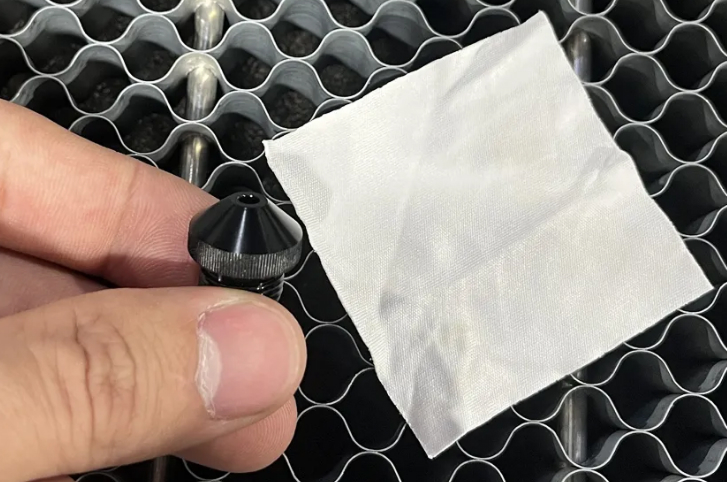
Step 1: Turn the blow-off nozzle counterclockwise to remove it.
Step 2: Clean with a cloth soaked in cleaning solution.
¶ External Device Maintenance
¶ Tools Required
Air blow gun, Water pump
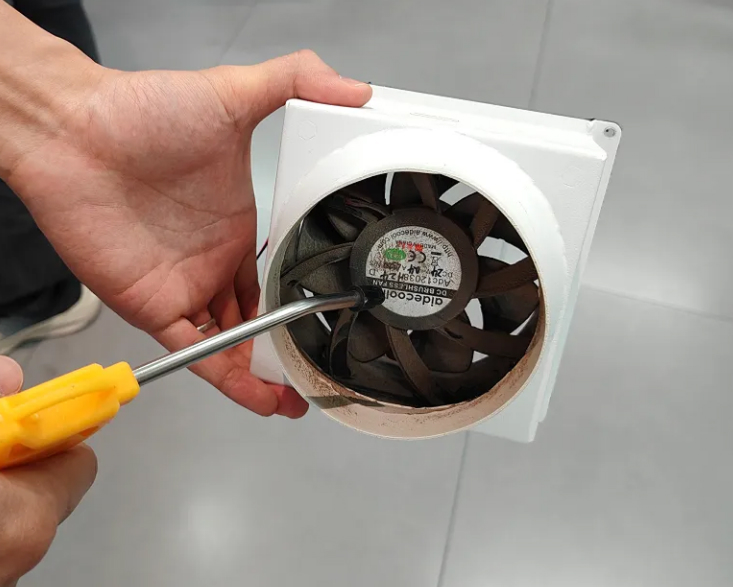
¶ Exhaust Fan
Step 1: Remove the screws securing the exhaust fan.
Disconnect the power supply to the fan.
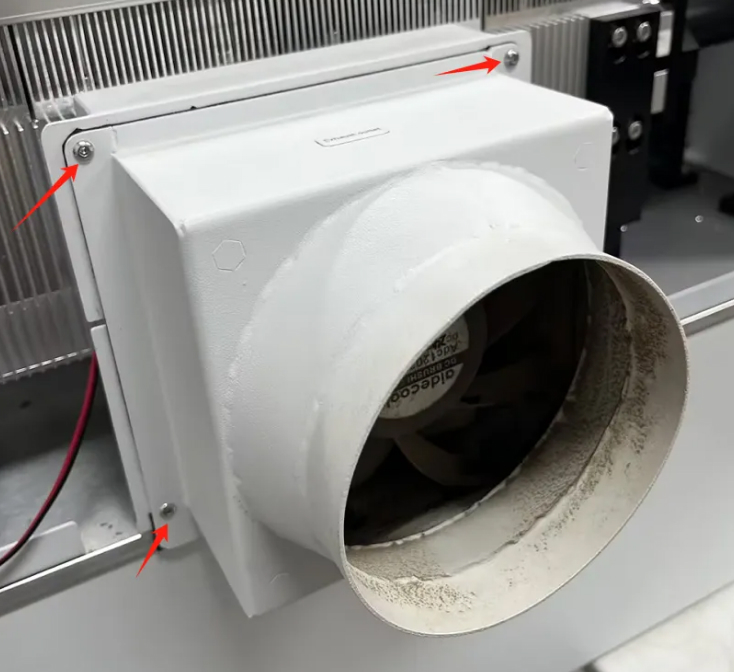
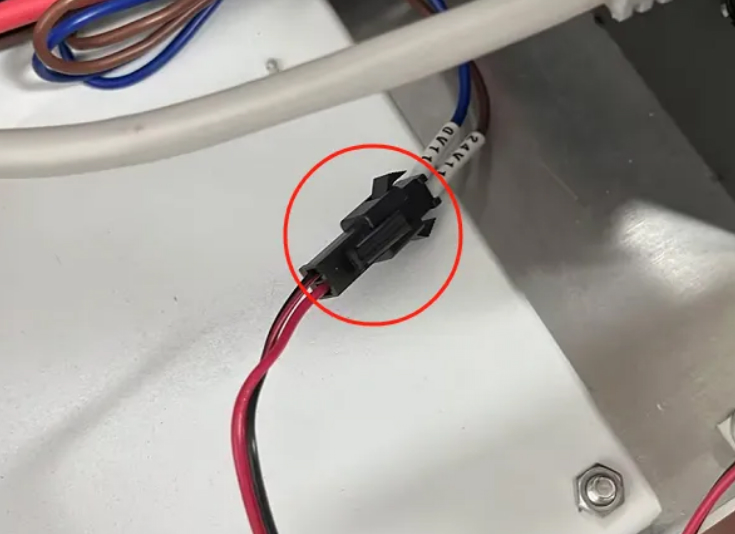
Step 2: Use an air gun to blow dust off the fan blades.
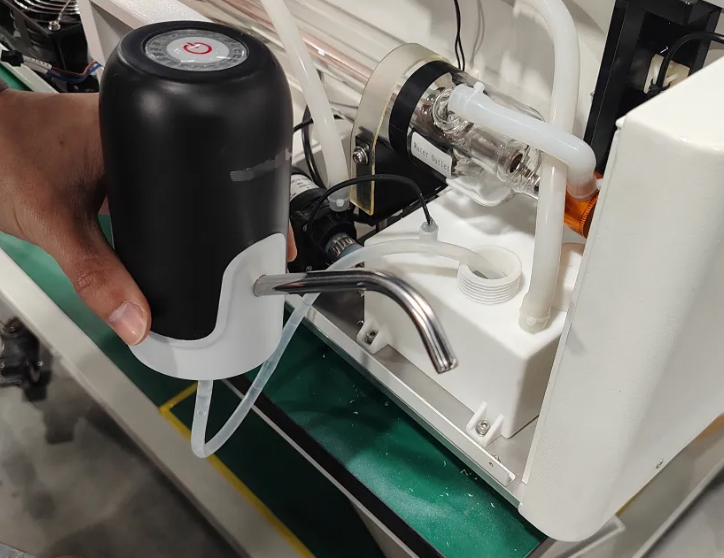
¶ Chiller (XT Model)
Step 1: Turn the water tank cap counterclockwise to open it.
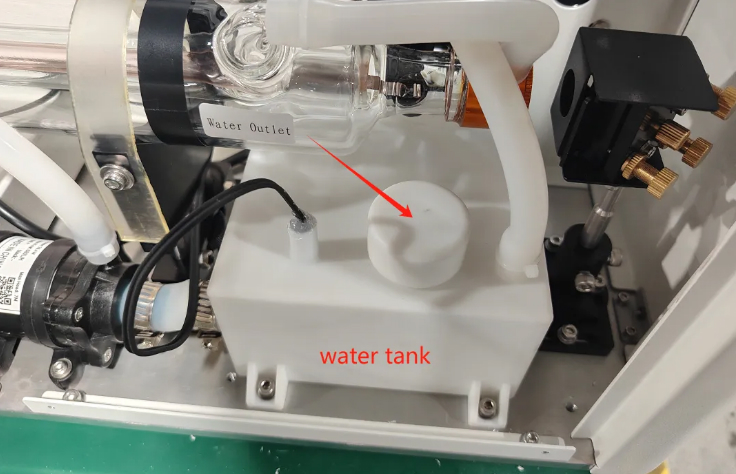
Step 2: Use a water pump to drain the water.
Step 3: Refill with distilled water.
If the room temperature is too low, add approved antifreeze.
The chiller must be filled with distilled water or pure water only.
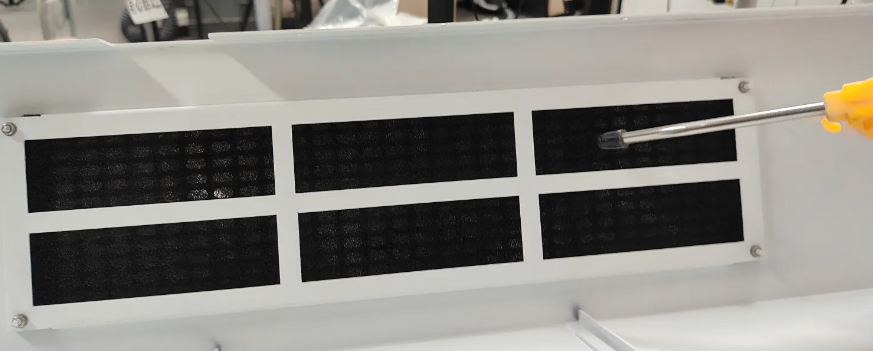
¶ Dust Filter Cotton
Use an air gun to clean the dust filter cotton located on the rear cover.
¶ Maintenance Plan
| DAILY | WEEKLY | 3 MONTHS | 6 MONTHS | 12 MONTHS |
|---|---|---|---|---|
| Lens | Mirror 2 and 3 | Mirror 1 | Belts | Overall Machine |
| Auto Sensor | Work Table | Exhaust Fan | Bearing and Rails | |
| Cooling Fan | Chiller | Interior Work Space | ||
| Beam Combiner | Vent Slots (back side of the machine) |
Please adjust the cleaning frequency according to actual usage. The recommended intervals are for reference only.
Following this structured laser maintenance schedule helps ensure consistent engraving accuracy, stable power output, reduced downtime, and extended machine lifespan.